
Sitges – class 2 Art Quilts by Numbers 3
March 21, 2012
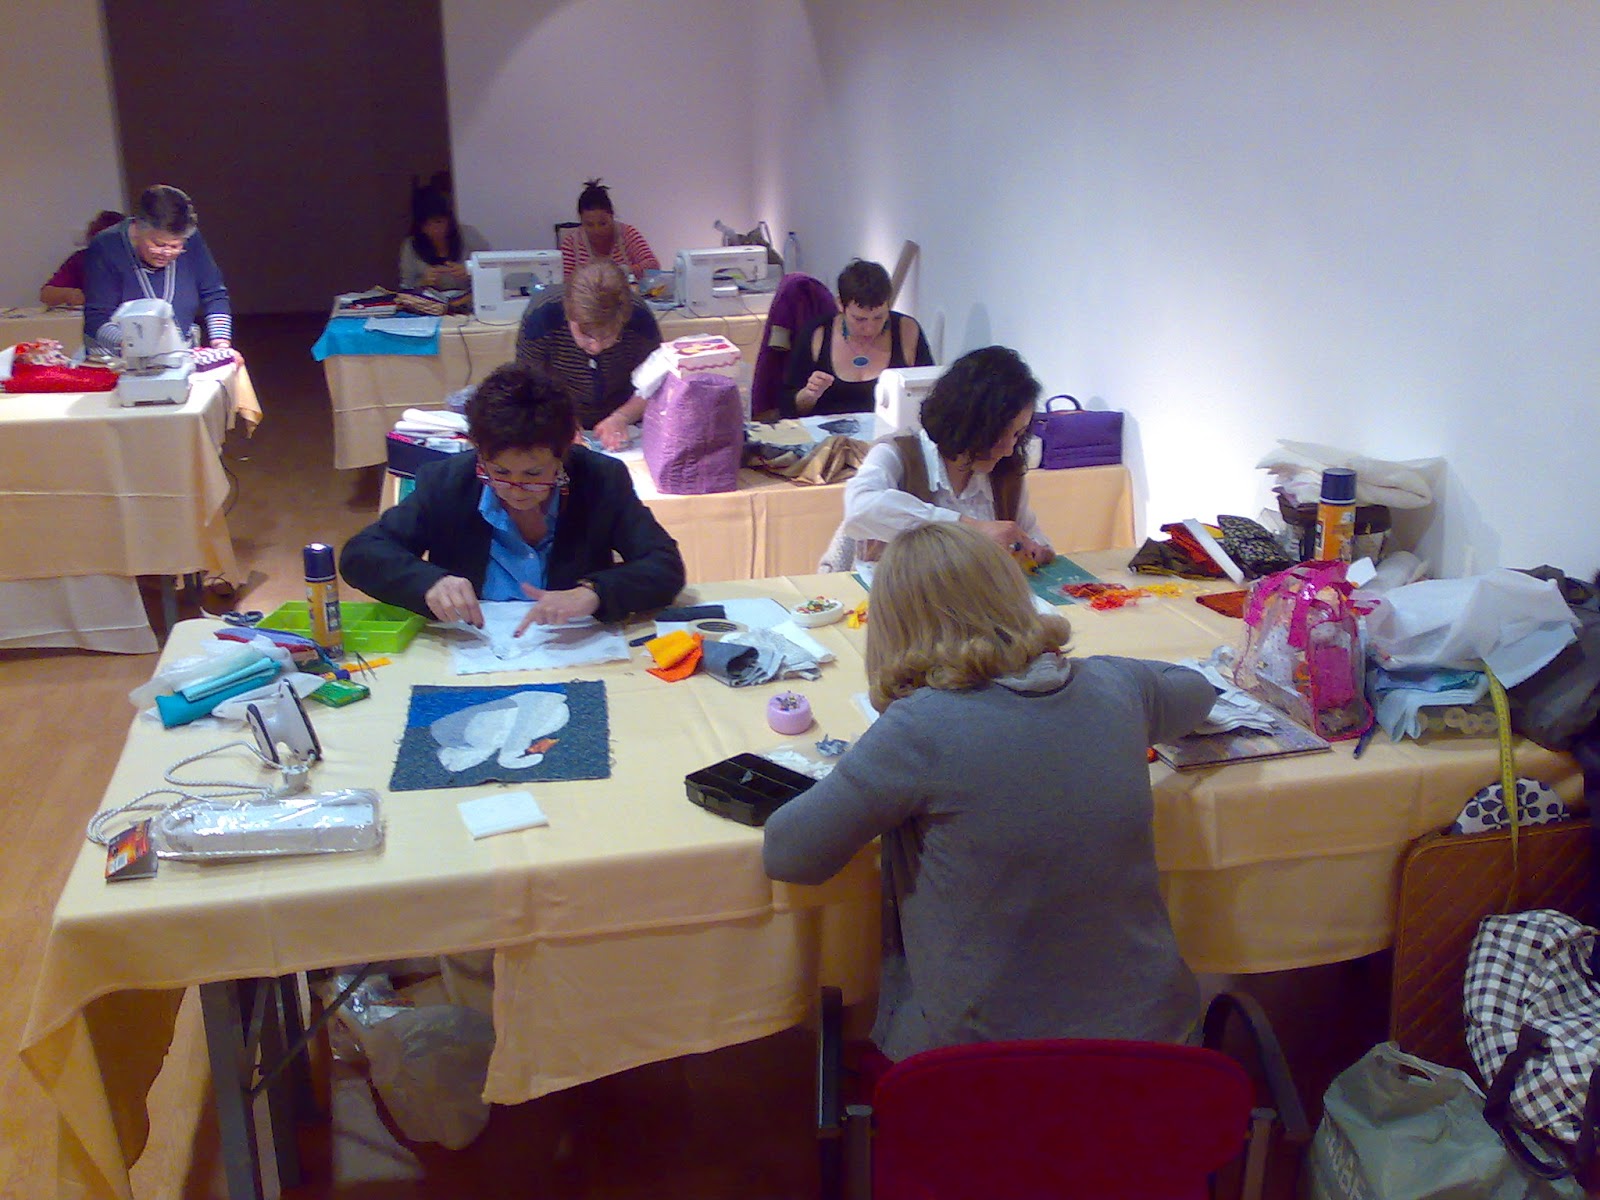
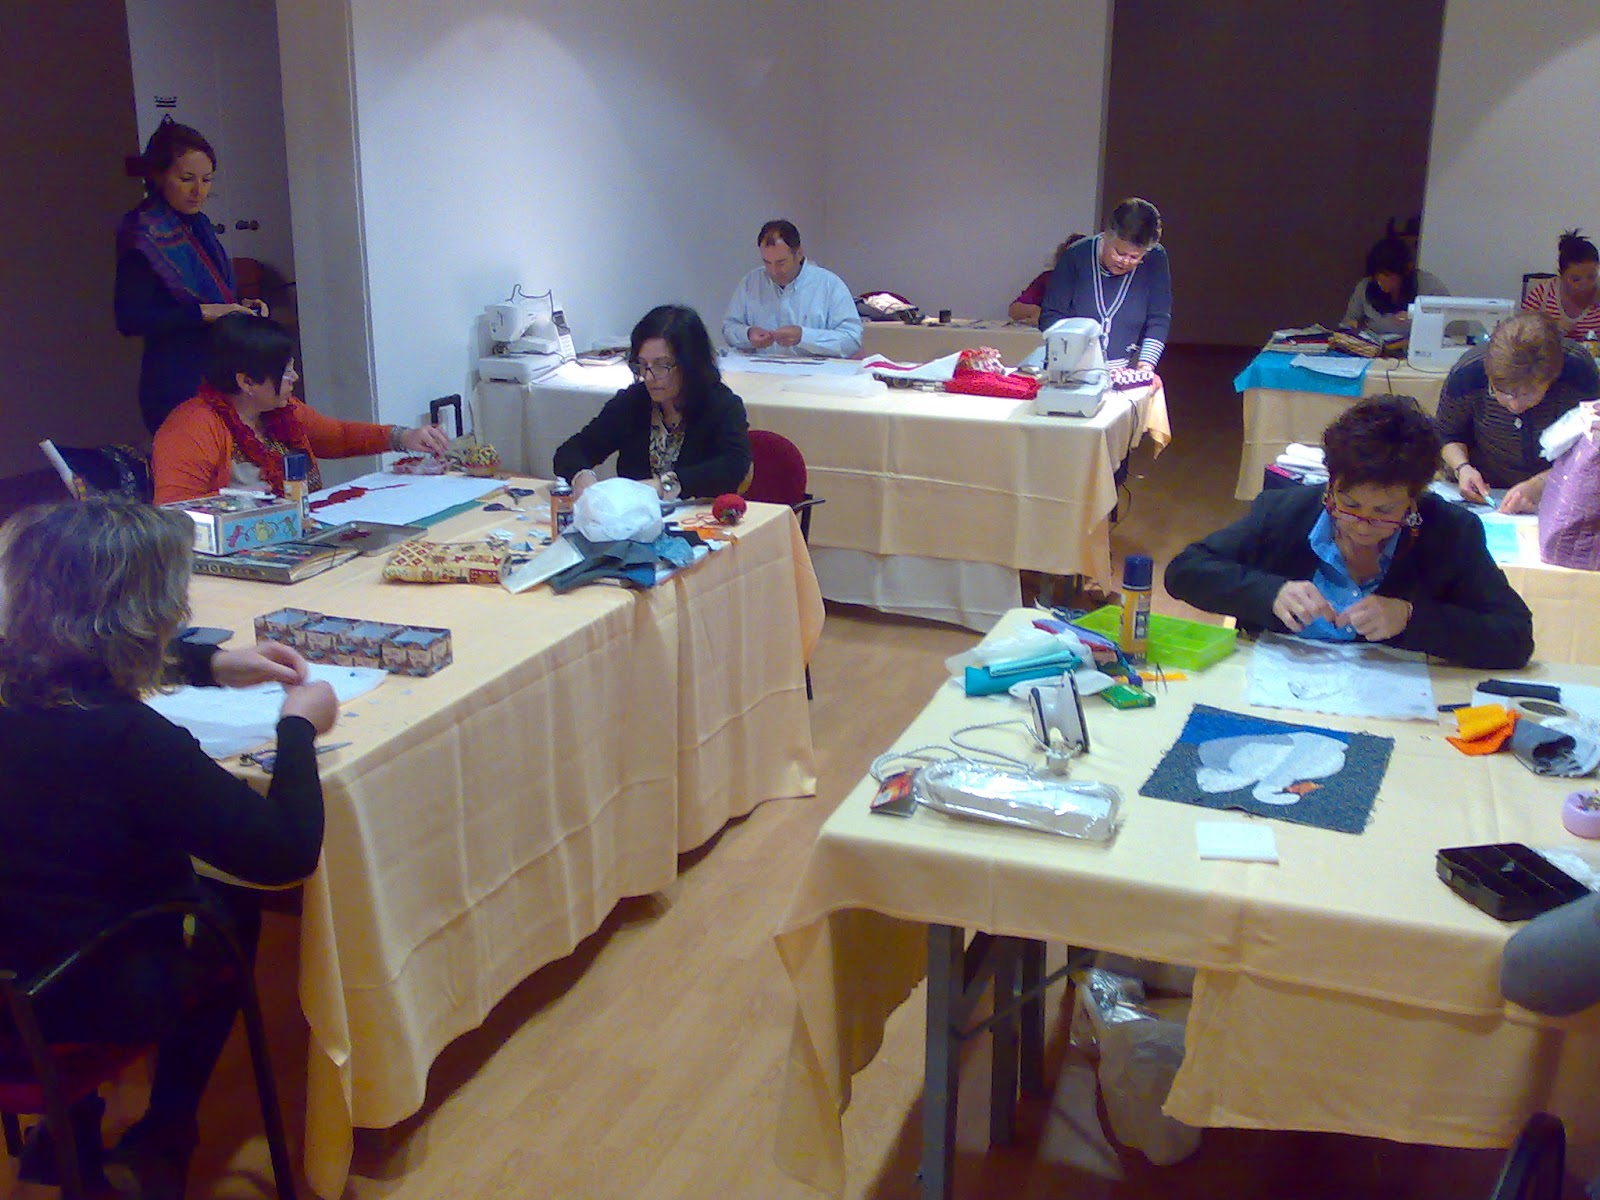
Well here is another picture heavy post. I just couldn’t decide which ones not to put up, so there are rather a lot. Besides this is the first time I have run this specific class so I need to share more to give people a better idea of the class right? In the past this class has always been as an extended Art Quilts by Numbers 1 course where I had multiple days to cover the options I use in my art quilts.
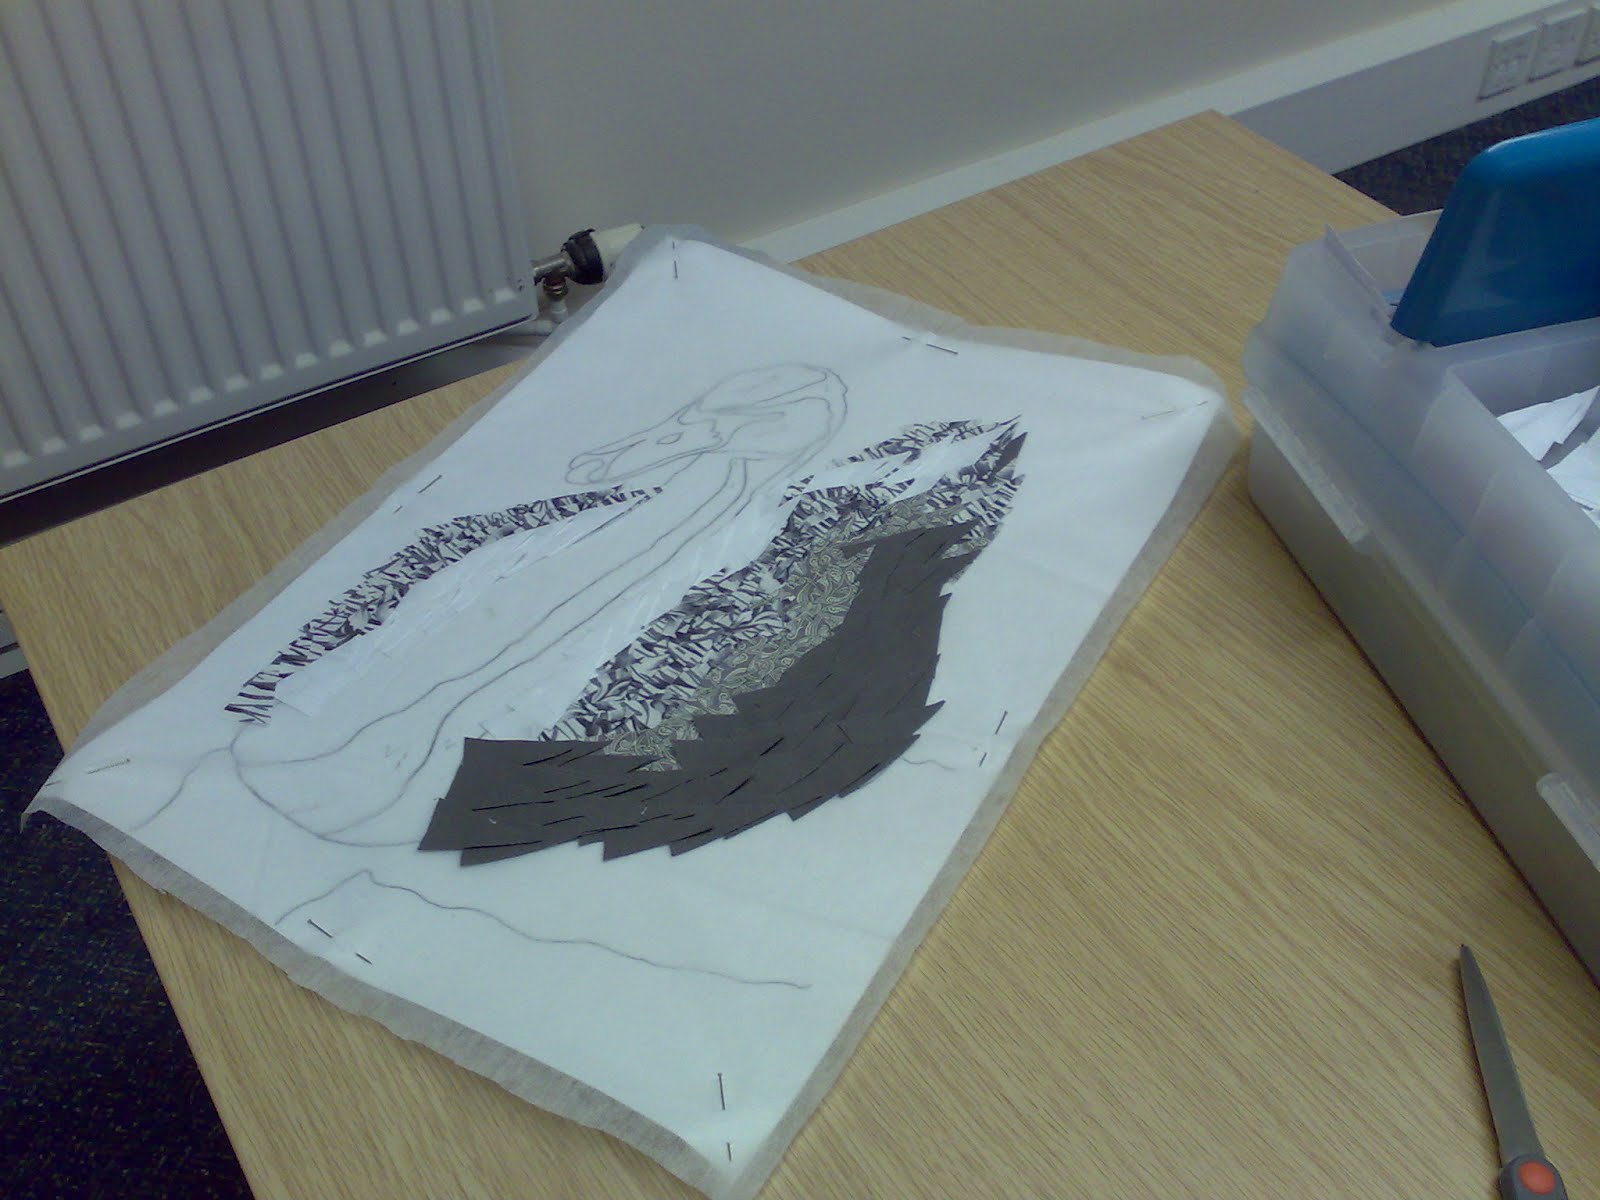
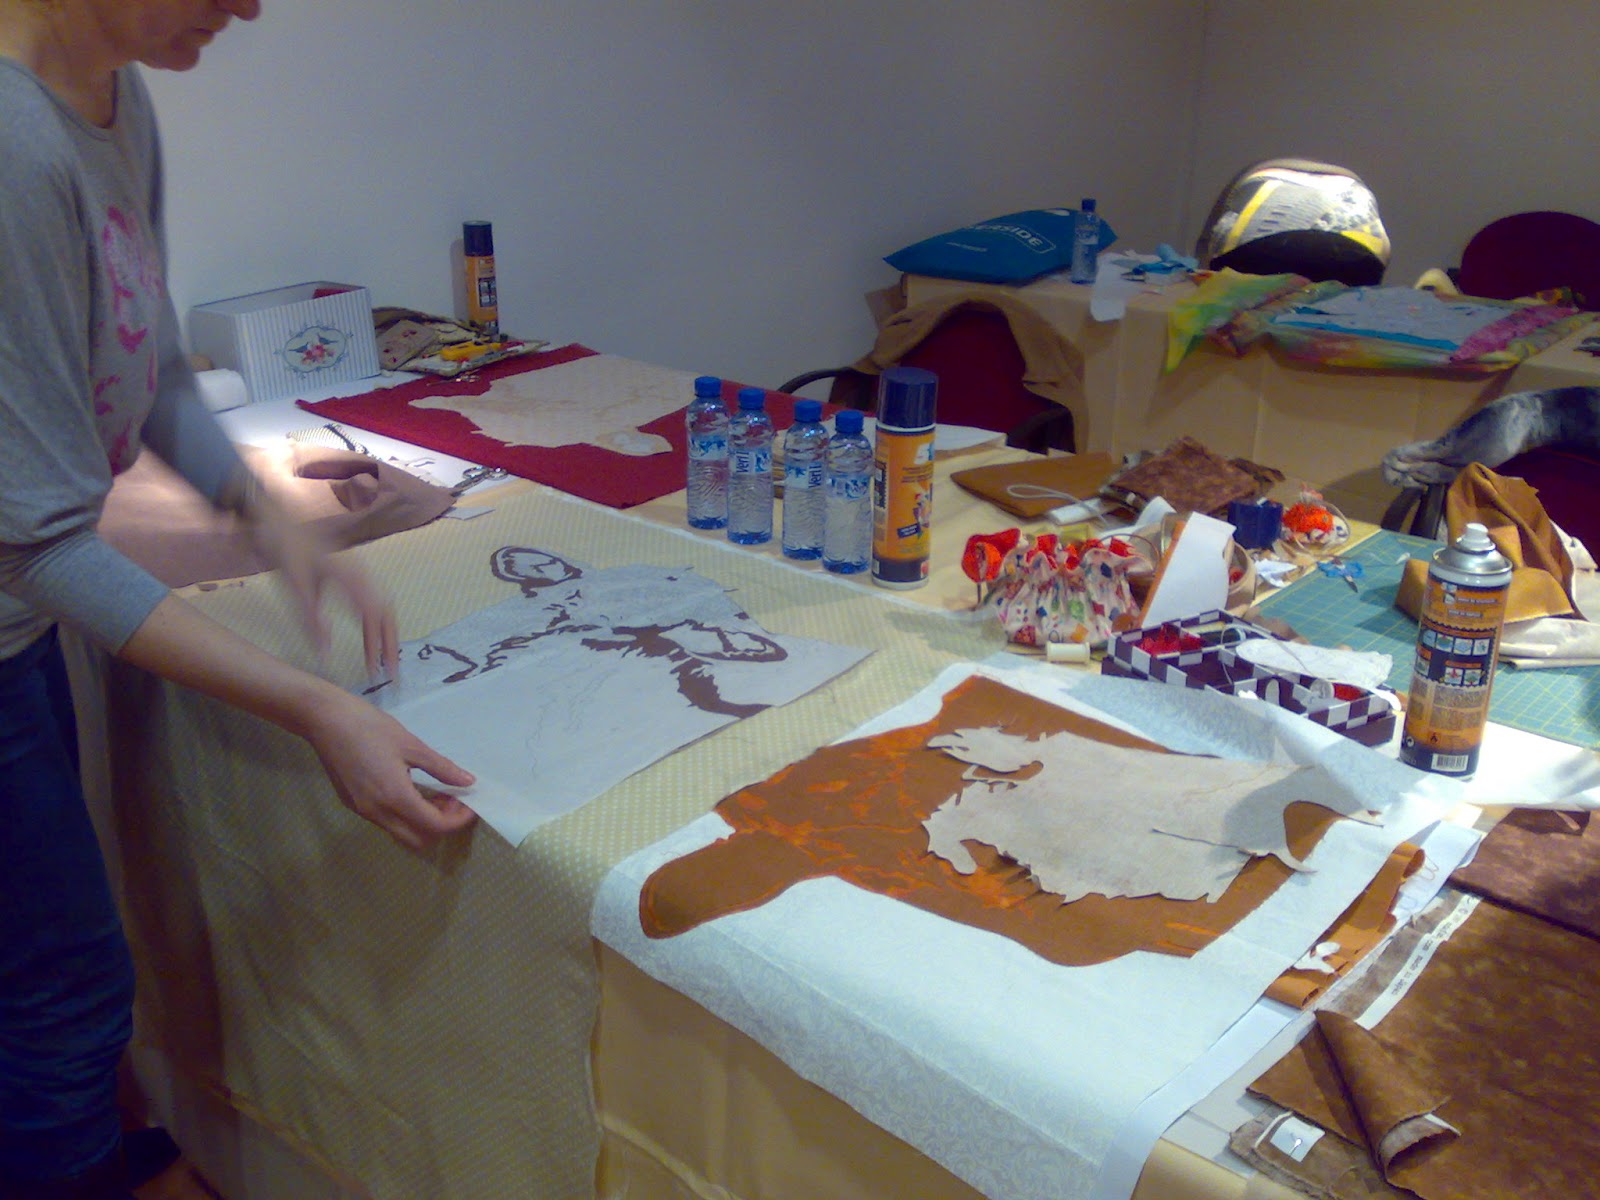 As you can probably see this class specialised in making cows. This is a more fiddly class than the other art quilts classes, partly because the cutting is more intricate and partly because it needs more shades of fabric.
It was interesting in my first class that the students struggled more with identifying different values than I would have expected. Especially as I had a lot of very talented quilters in the class. I was concerned that this would be an even bigger problem on the second day. Fortunately that wasn’t the case. There were still a few glitches but on the whole people did well with the values of their fabrics.

The hard part was actually getting the concept of the technique across to them, I suppose that’s a good thing given that is what they had paid for. I did learn that the Spanish need the why of a technique before the how. In the UK I generally find people learn better by doing and then understanding the why. I guess there is some cultural difference, unless I just got a very unusual bunch of students ![]() I did get a fantastic class, several of my students had picked up awards in the competition, in fact some are scary good. People I don’t want to come up against in competition!
I did get a fantastic class, several of my students had picked up awards in the competition, in fact some are scary good. People I don’t want to come up against in competition!
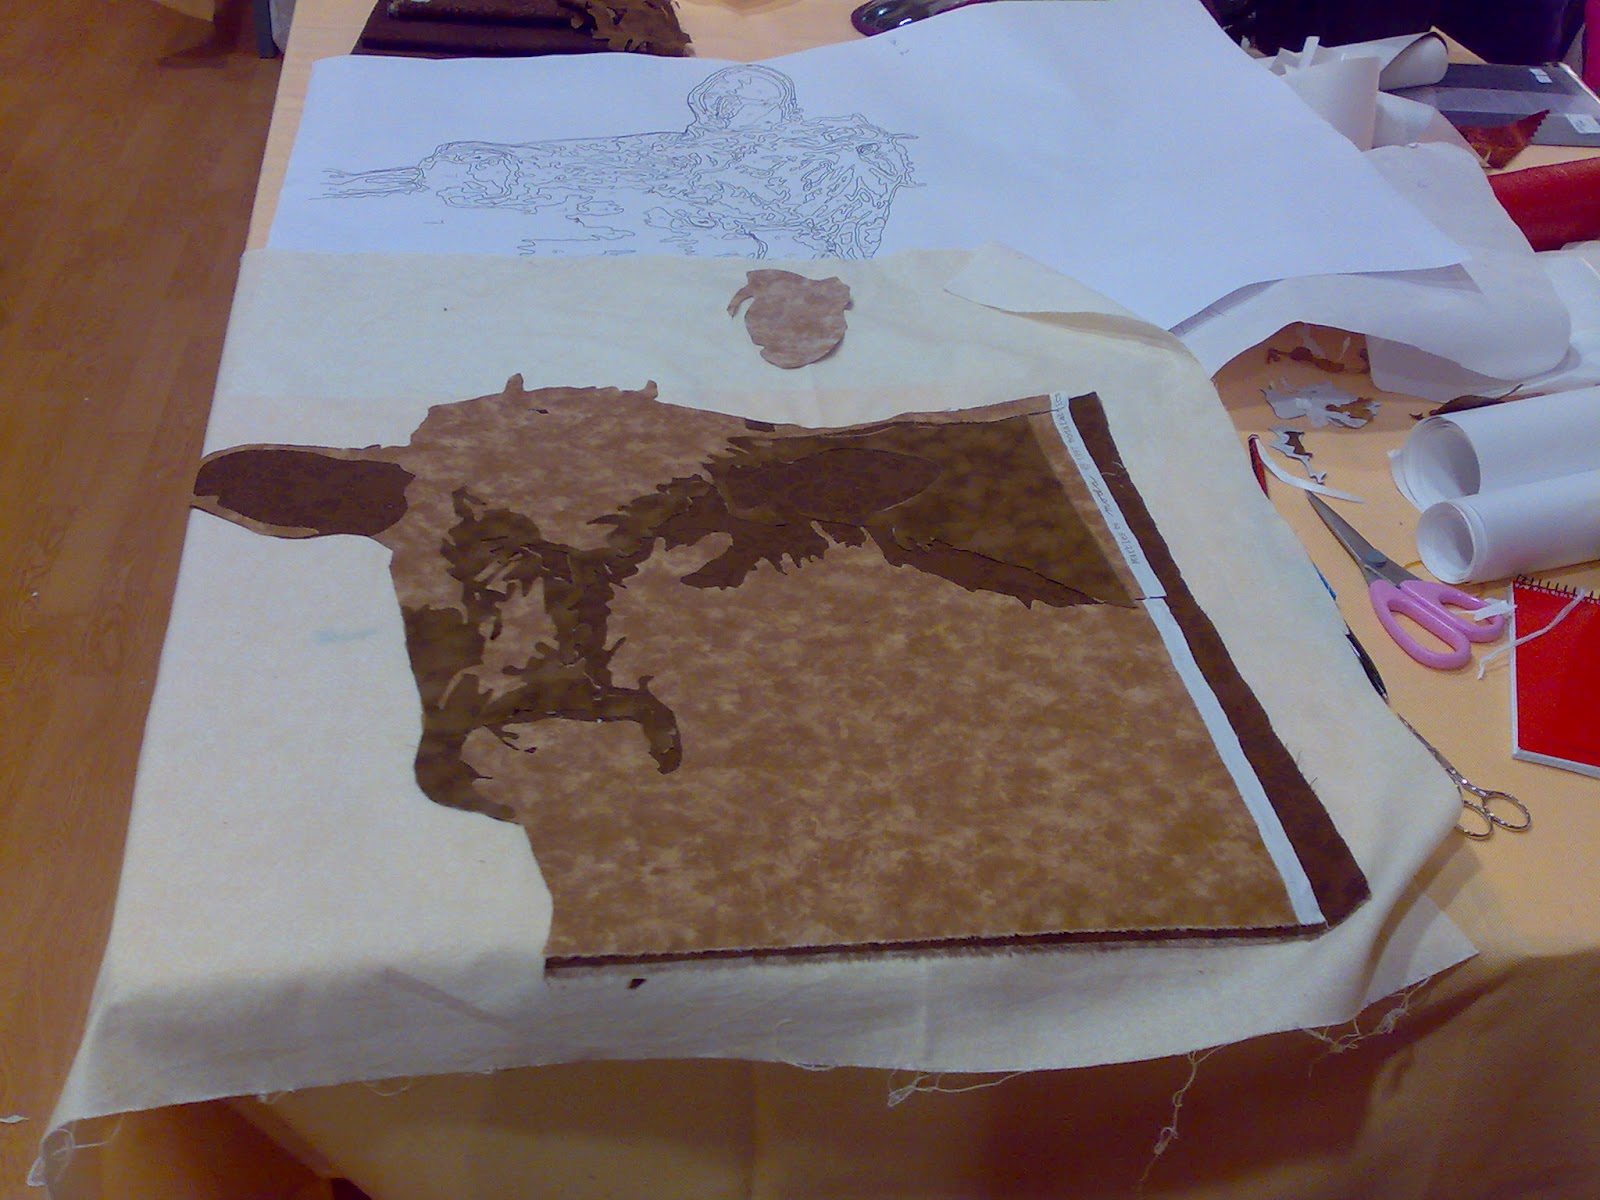
 After we went through the technical side of preparing the patterns and how that then translates in to the quilt I think most of the students were pretty happy with what they were trying to achieve. Most still had moments when the very soft rules of the process caused them trouble. On the other hand running into the exceptions and tricks means you get a lot more information out of the class.
 I also realised how far I aim to take my students in this one day class. It covers most of what I learned over several years and 7-8 quilts. Like most of my classes you get worked hard, but you will learn a lot.
 Having had a day of practice, France, my long suffering translator and I managed to start communication some of my humour. That may not sound like a big deal, but I think it’s quite important. Firstly I want my students relaxed. There isn’t much in quilting you will do better tense. I can’t actually think of anything right now. If you are laughing or giggling or even just smiling you tend to be more relaxed, then you do better work, which makes you happier. However, translating humour is really hard, especially with a tutor who uses a lot of colloquialisms and somewhat archaic language. It’s also hard to know how the students are responding. I think by the afternoon of the second day we were doing pretty well at it. Now I’ve started learning these skills I can’t wait to put them to the test again. I would love to get another chance to teach in Spain, ideally with some of these students.
 I’d also love to see if these skill transfer to other countries. I was quite nervous teaching with a translator, but it’s good. It is very different but not in a bad way, and maybe it makes both sides concentrate more on the little things. I will also be interested to see if different countries want/need different ways of presenting data.
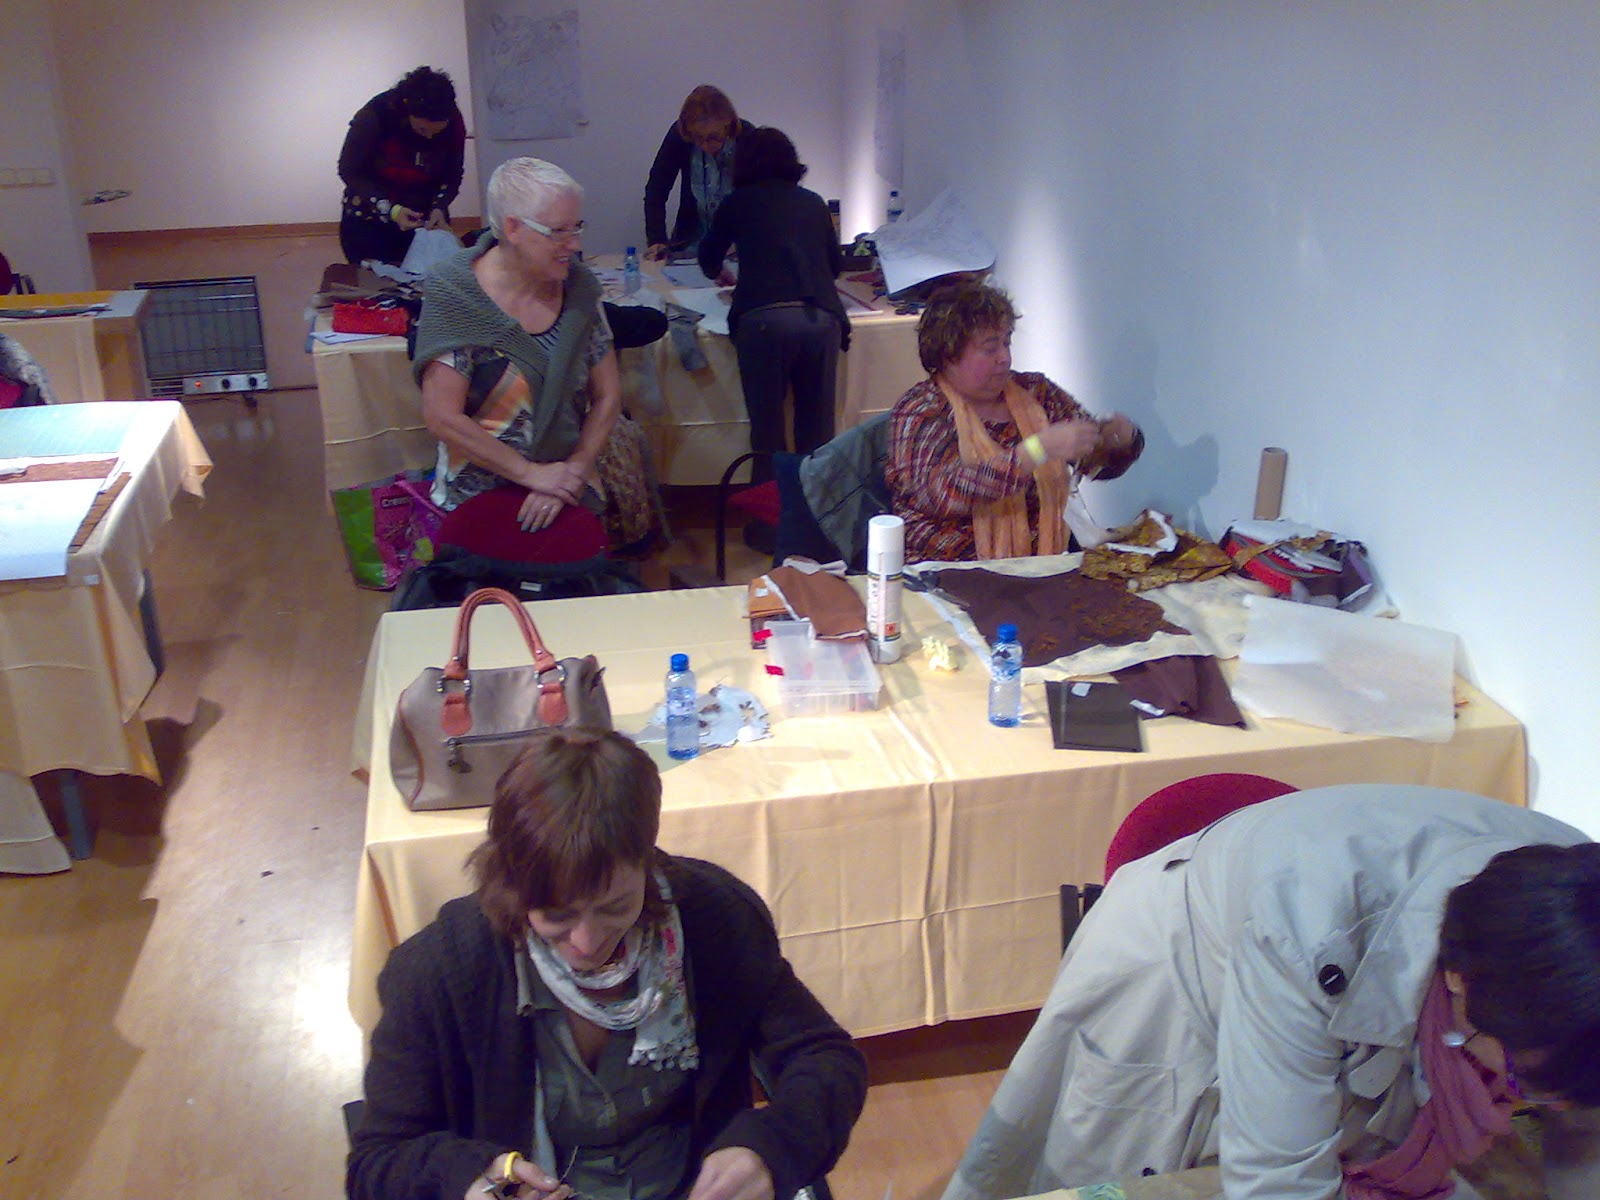
Something that did surprise me was how different the working pattern was. The Spanish students were slower to start than UK students, but boy once they get going! They settle in a work hard, fast and well. They are also still going strong at the end of the day. I’d love to get this lot on a residential course, we could move mountains
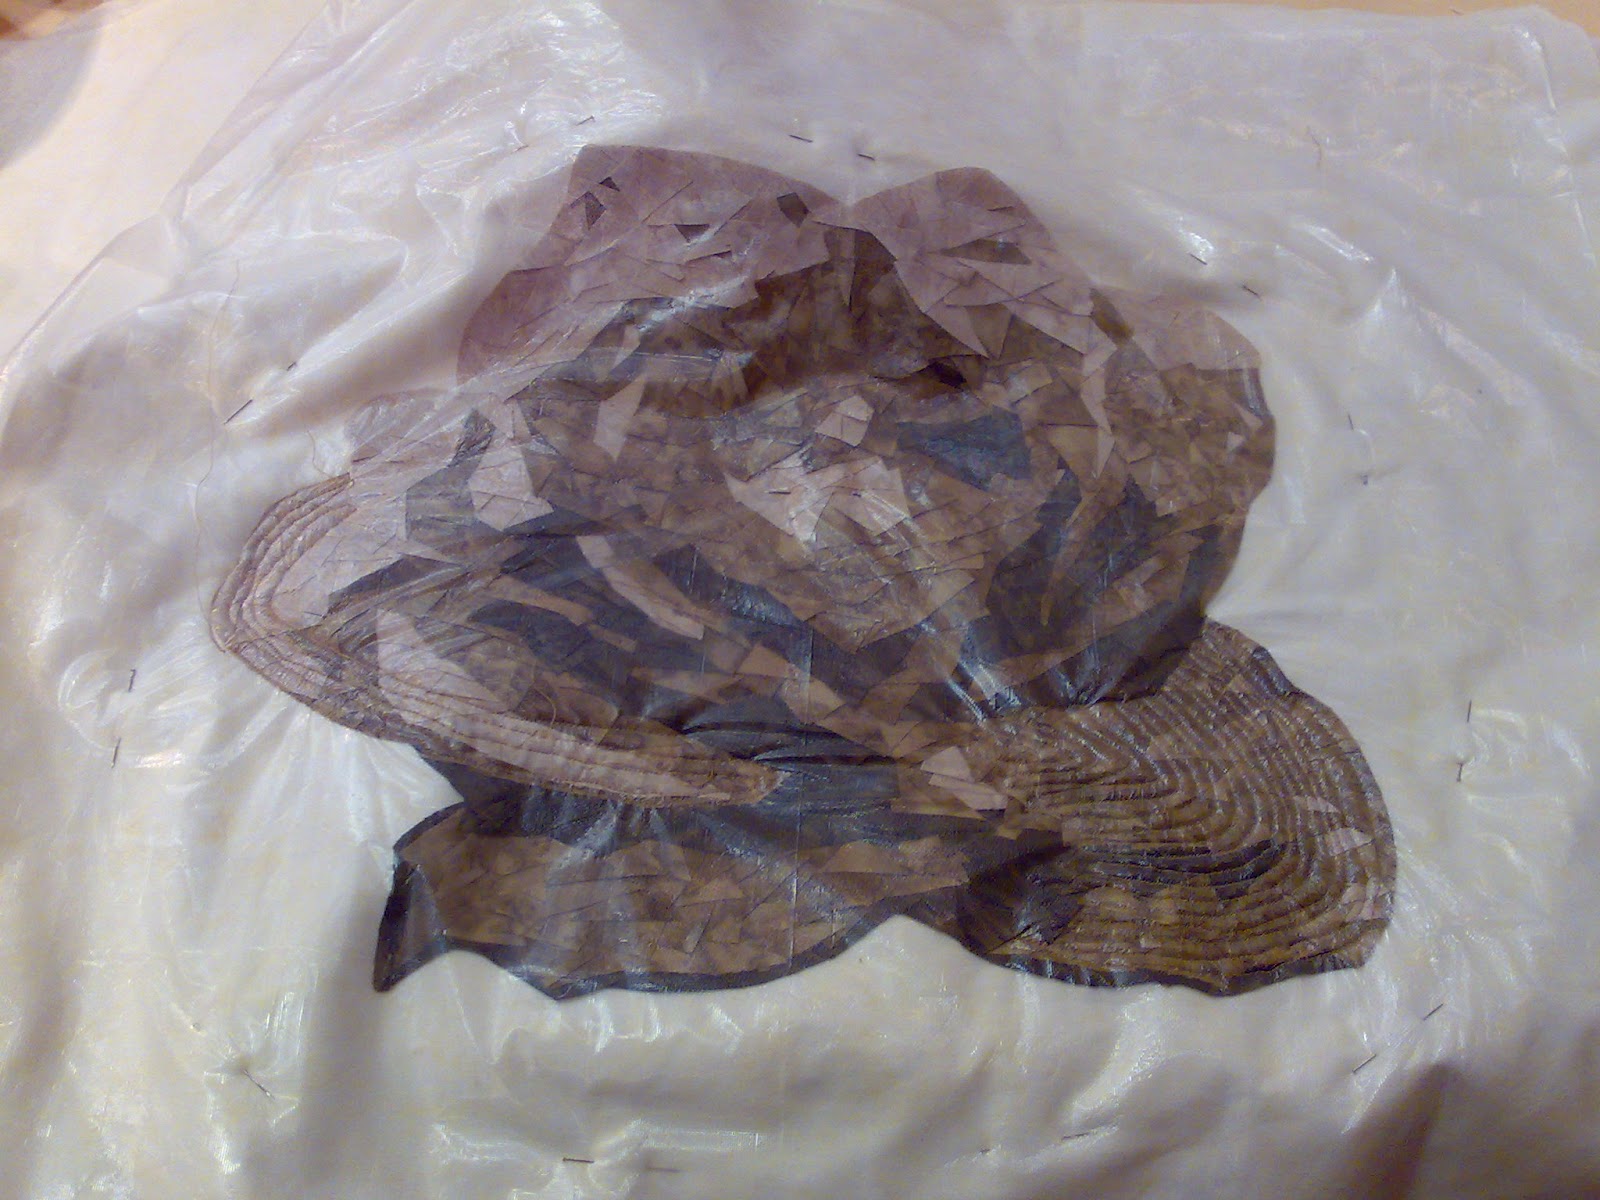
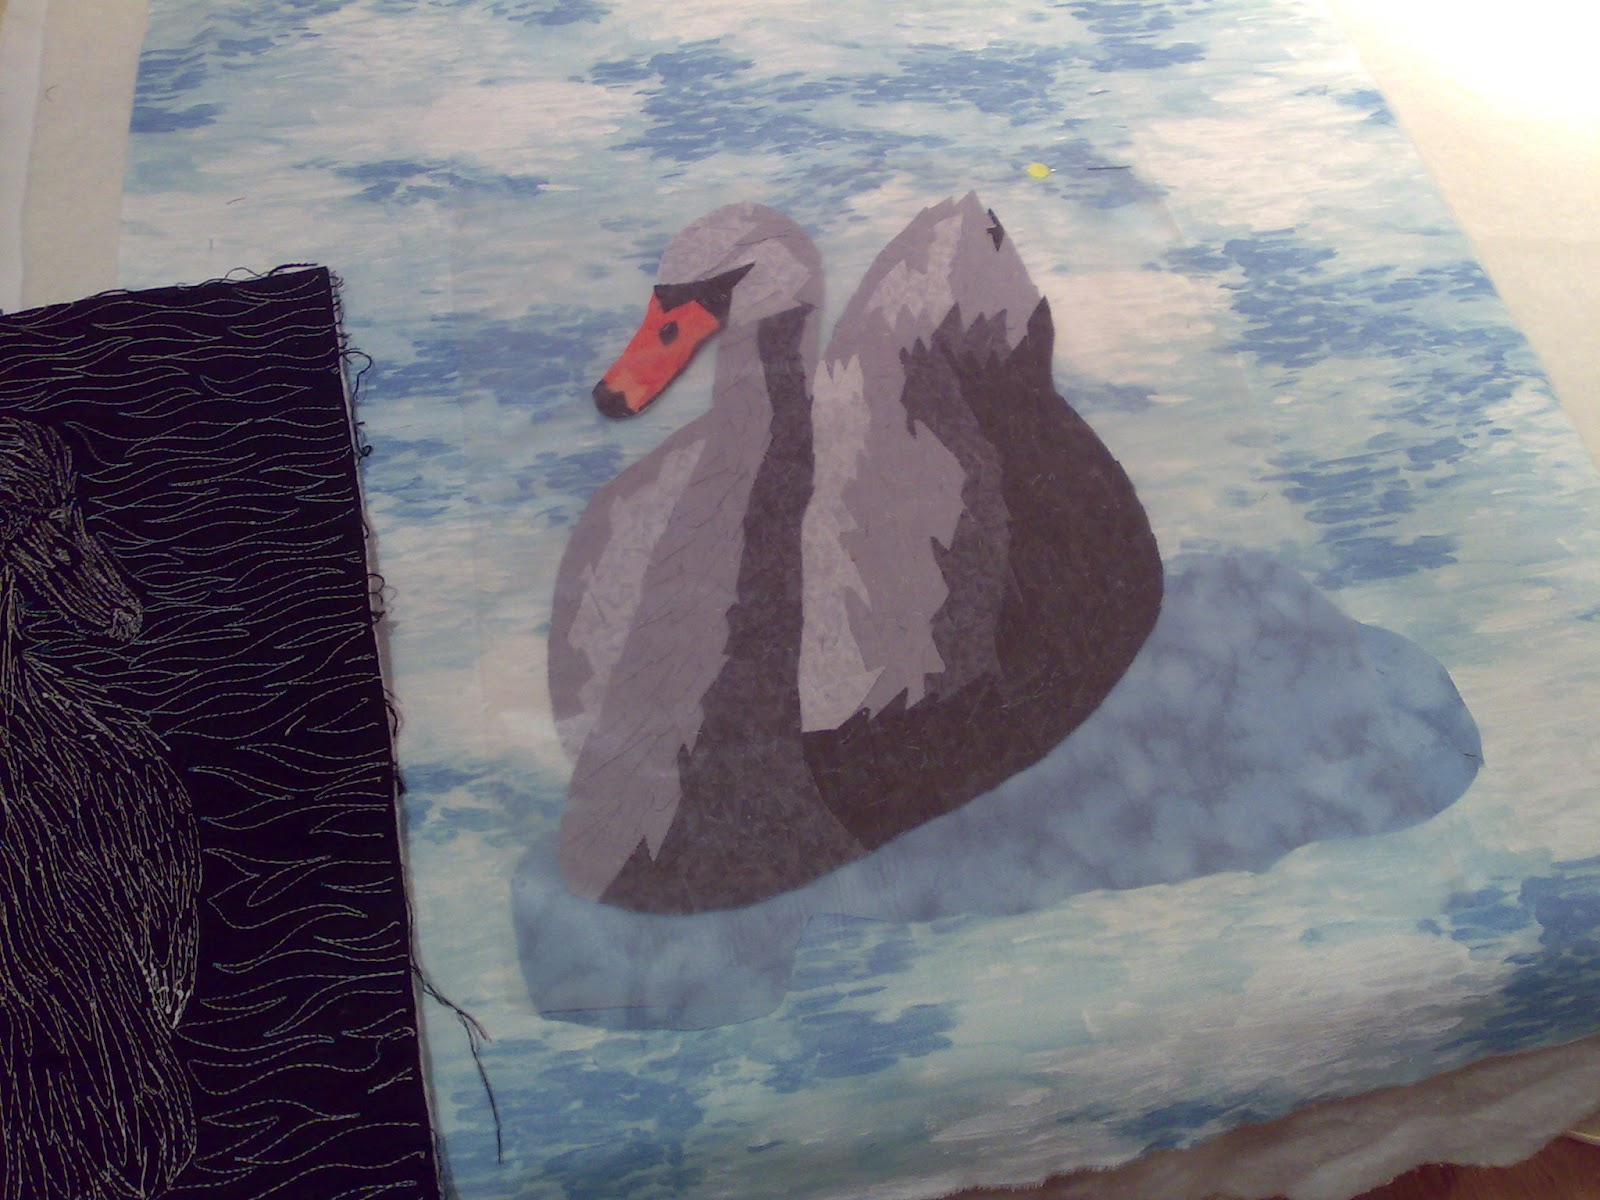
 Looking over these pictures I am still thrilled with their cows. I can’t wait to see the finished quilts. Bear in mind you are only seeing two patterns here. All the students had one of them and have then used their own fabric choices. I was surprised that only two went for non cow colours. For me it was hard to work in brown, these cows clearly want to be mad punk cows,, so yes my dear difficult student, your fabrics were kinda cool as well as hard to sort
 ![]() Maybe I will have to make a few of these beasts. I would quite like to try out the different quilting options on them too, but it will have to wait until I have some spare time and who knows when that will be.
Maybe I will have to make a few of these beasts. I would quite like to try out the different quilting options on them too, but it will have to wait until I have some spare time and who knows when that will be.
Now I am back home for a while I will be working very hard on catching up with my longarming orders. I am very lucky to have a lot of understanding customers, but even so I would really like to get on top of things again as soon as possible. I would also like to make a new quilt or two for the Sandown Quilt show this year. They have a charity category that I have been encouraging people to enter and I want to have a go as well. There is also a challenge category that looks fun, but that will only happen if I really get a wiggle on.
 I hope you’ve enjoyed seeing what my students got up to. I hope they had as much fun as I did. It really was a great experience. France (translator) was amazing, without her I really couldn’t have done it. Not only did she translate but she also worked as a classroom helper which made my life a lot easier.
To any of my students who are reading, please please share your finished cows with us, and do feel free to comment. Google translate isn’t perfect but it works well enough.
Sitges – class 1 Art Quilts by Numbers 1
March 20, 2012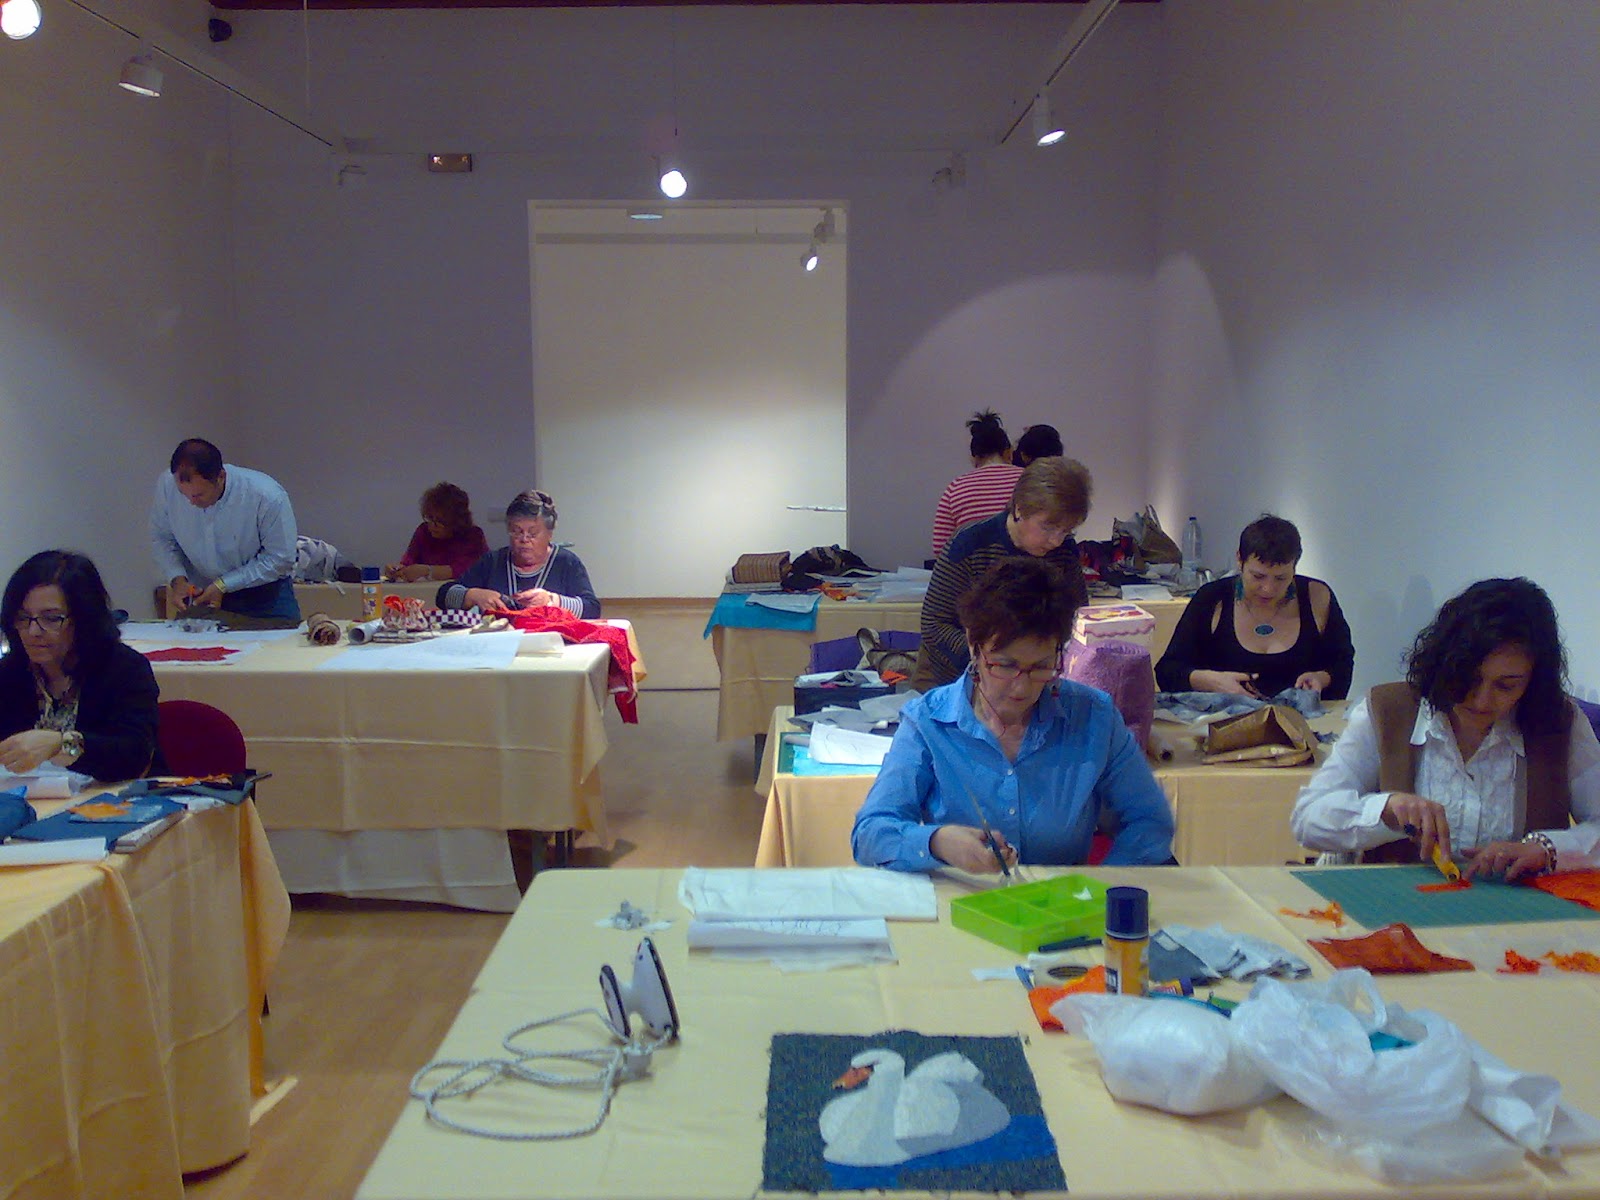
Now I have mostly recovered from my trip to Spain it must be time to start posting some pictures.
This is the first of the two workshops I taught, art quilts by numbers. This is one of my longest running classes and still one of the most popular. However teaching in Spain meant working with a translator, which I have never done before. So this was just like being a new tutor again and this time I couldn’t hear when my students were having a problem.
 I was also worried has my translator was going to cope with repeating everything many times which I do a lot in my classes. I did some planning before I went but I still wasn’t sure how this was going to work.
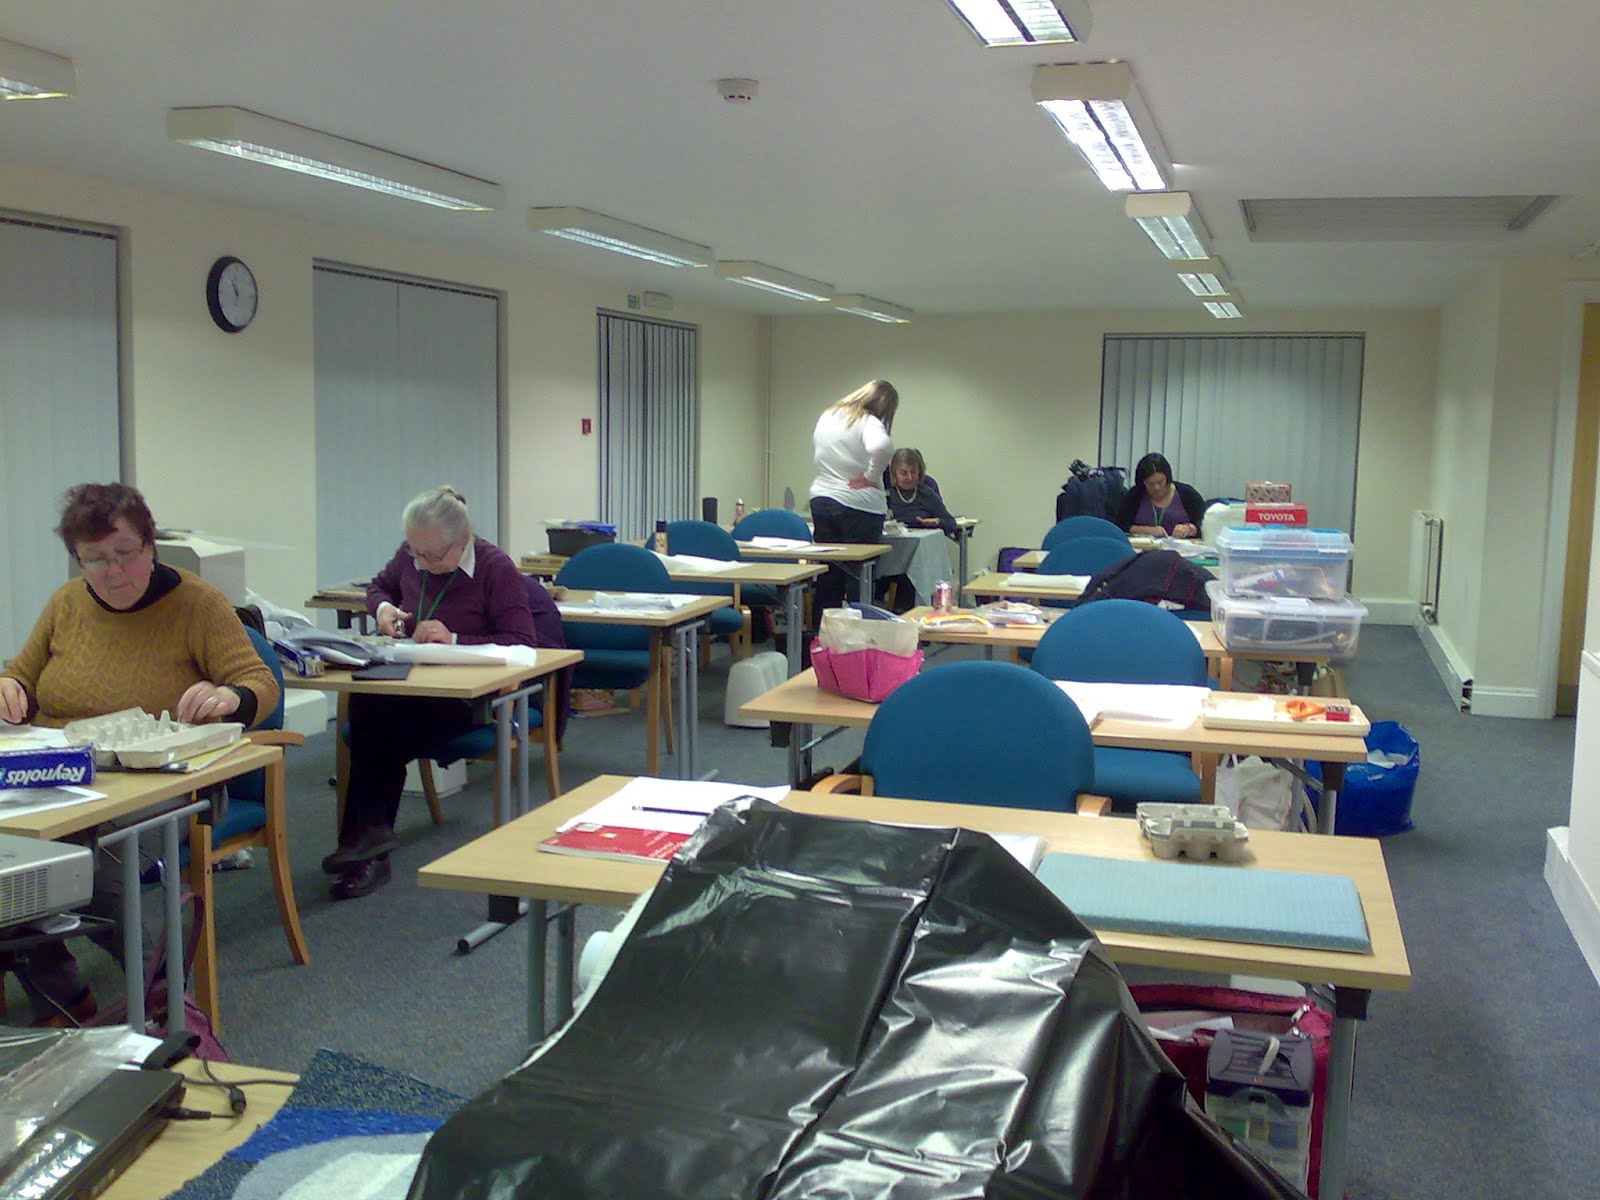
 The organizers found me a projector so I could teach the computer section of the class to everyone at once and it went well. France, my translator was fantastic. It was tricky keeping an eye on the class, but my students were very good about asking for help and so understanding when I clearly didn’t have a clue what their problem was. Poor France did indeed have to repeat herself a lot. I think she could teach the class just as well as me now.
 I usually try and stay in my classroom over lunch if the students want to keep working. One did so I stayed. While I am happy to give up my lunch I am not prepared to take someone else’s, so France went for lunch, I’m sure she must have really needed a break too. Of course this meant I couldn’t readily communicate with the student who stayed or those who came back early (and a lot of them did). It turns out years of running out of words was perfect training for teaching in another language. I often find near the end of a class so I have got quite good at signalling what I want people to do. Equally the Spanish students picked up my signals really well.
As you can see the students did really well and produced some great work. Most students were very close to completing their projects by the end of the day, although they were also very tired.


Travel
March 13, 2012I'm sitting at the airport heading for Spain. I was hoping to have time to catch up on my blogging but I will be bording any second. So sorry folks but you will have to wait another week for the updates on my recent exploits. Sitges here I come
Tweedale Quilter
March 7, 2012

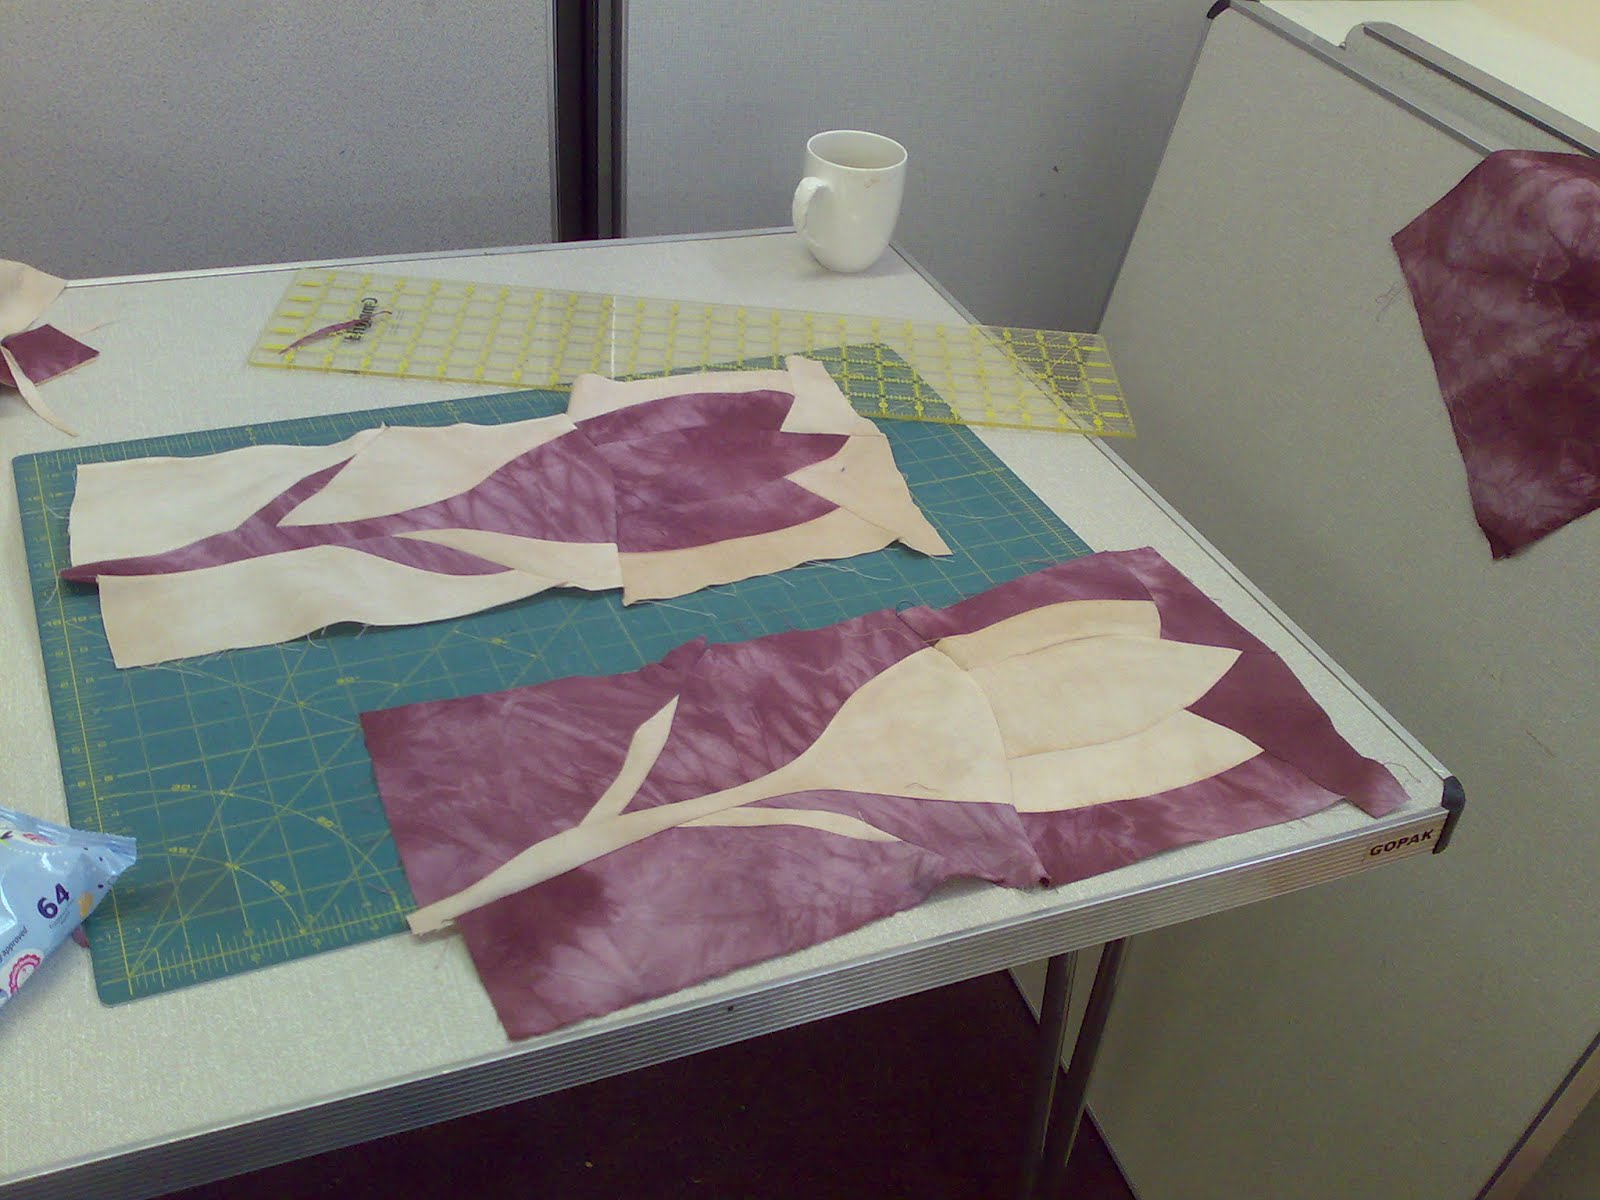
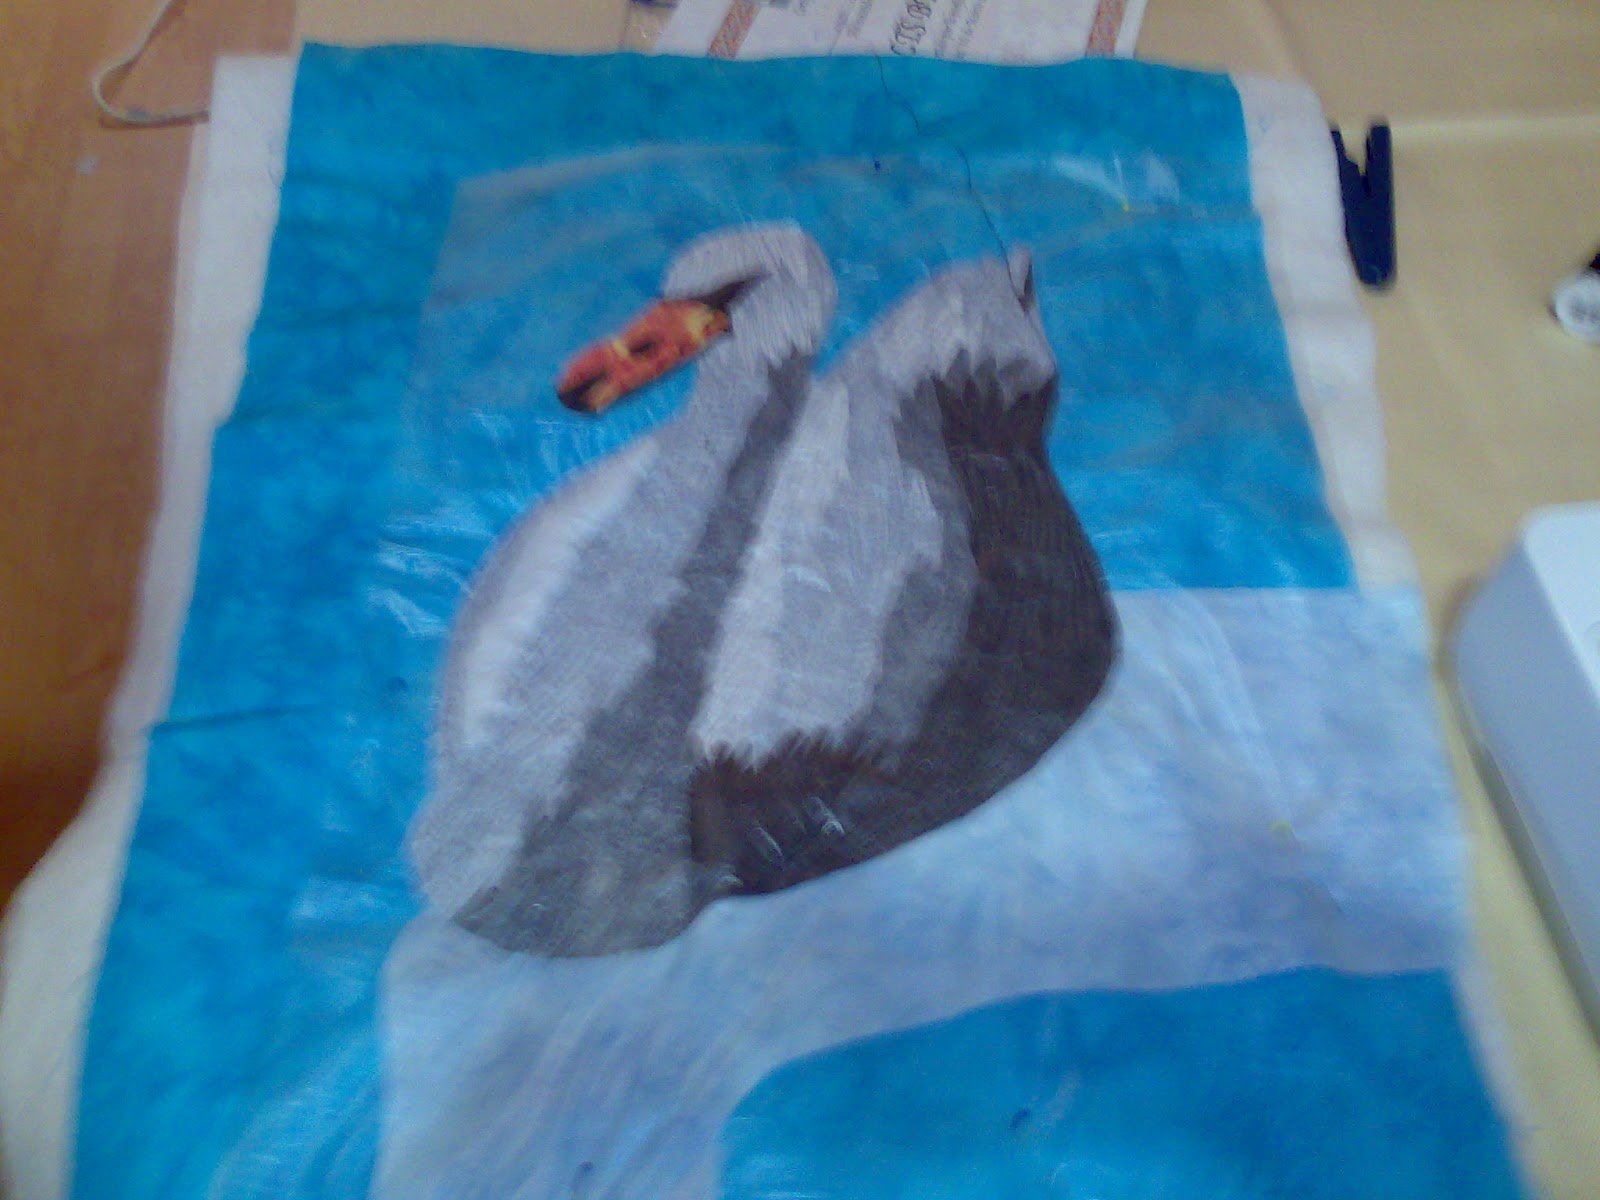
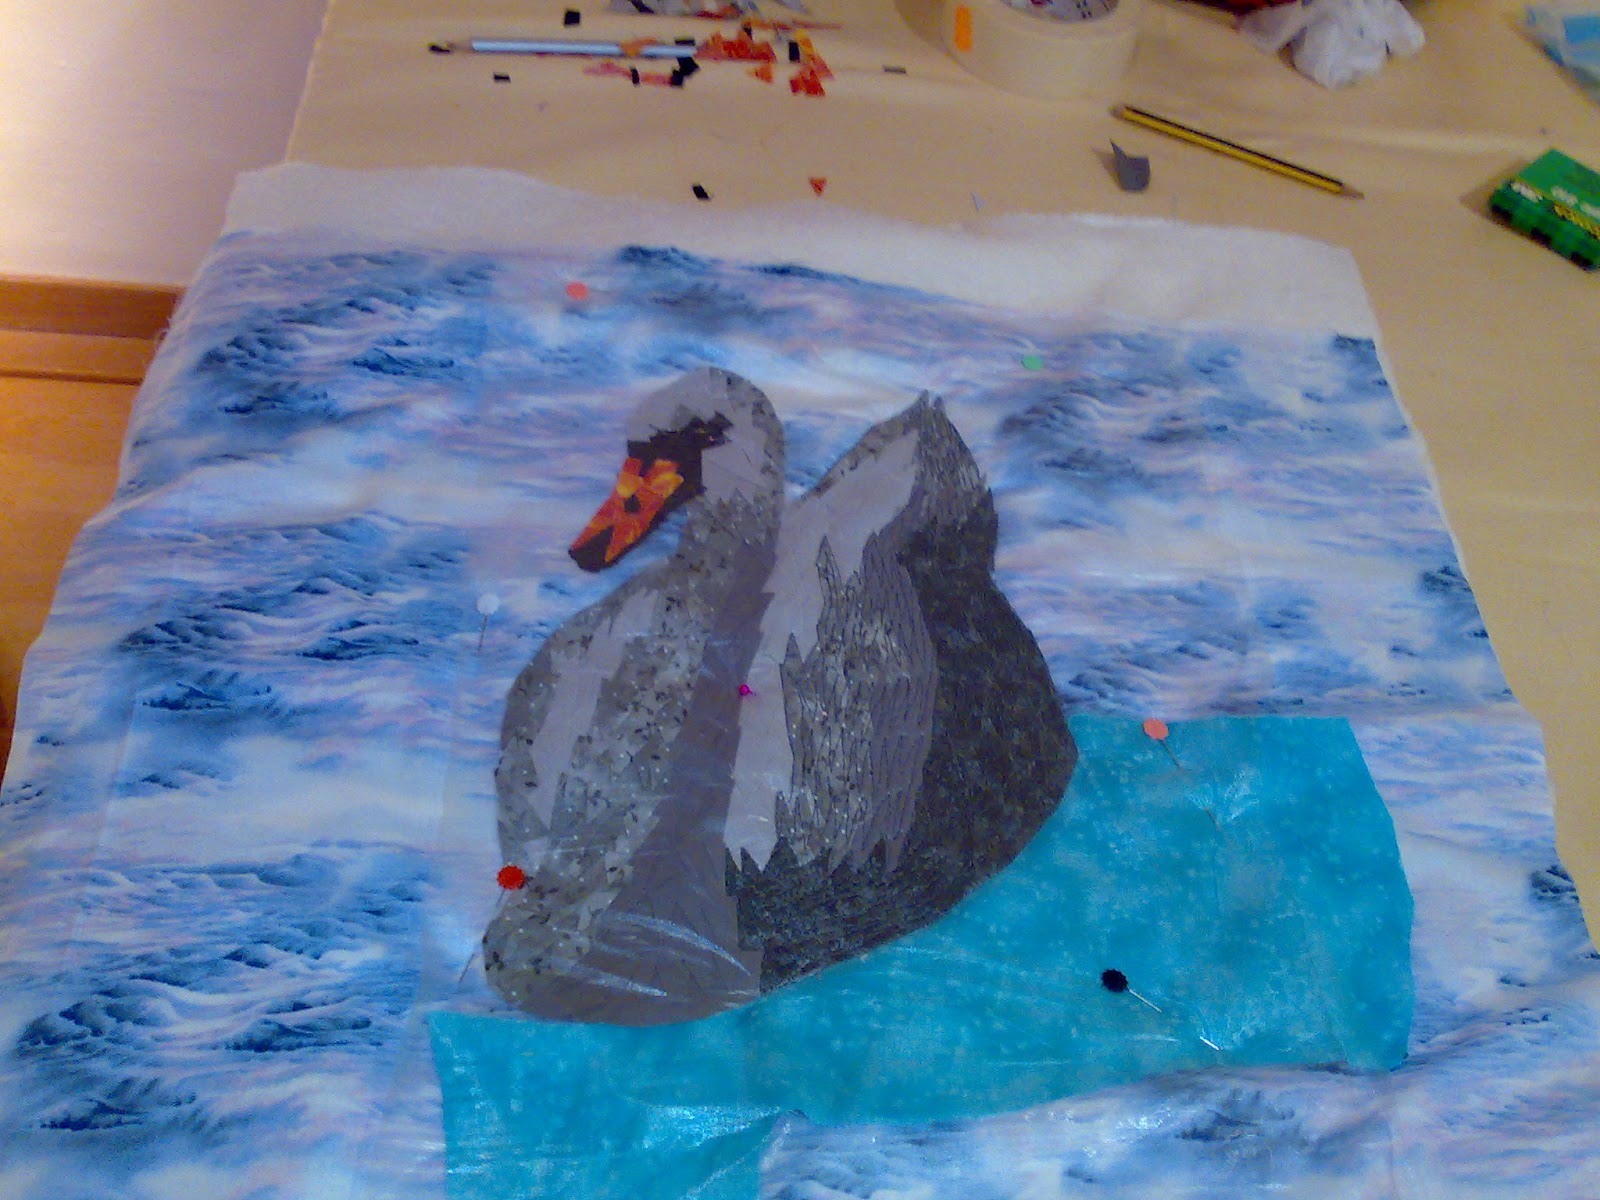
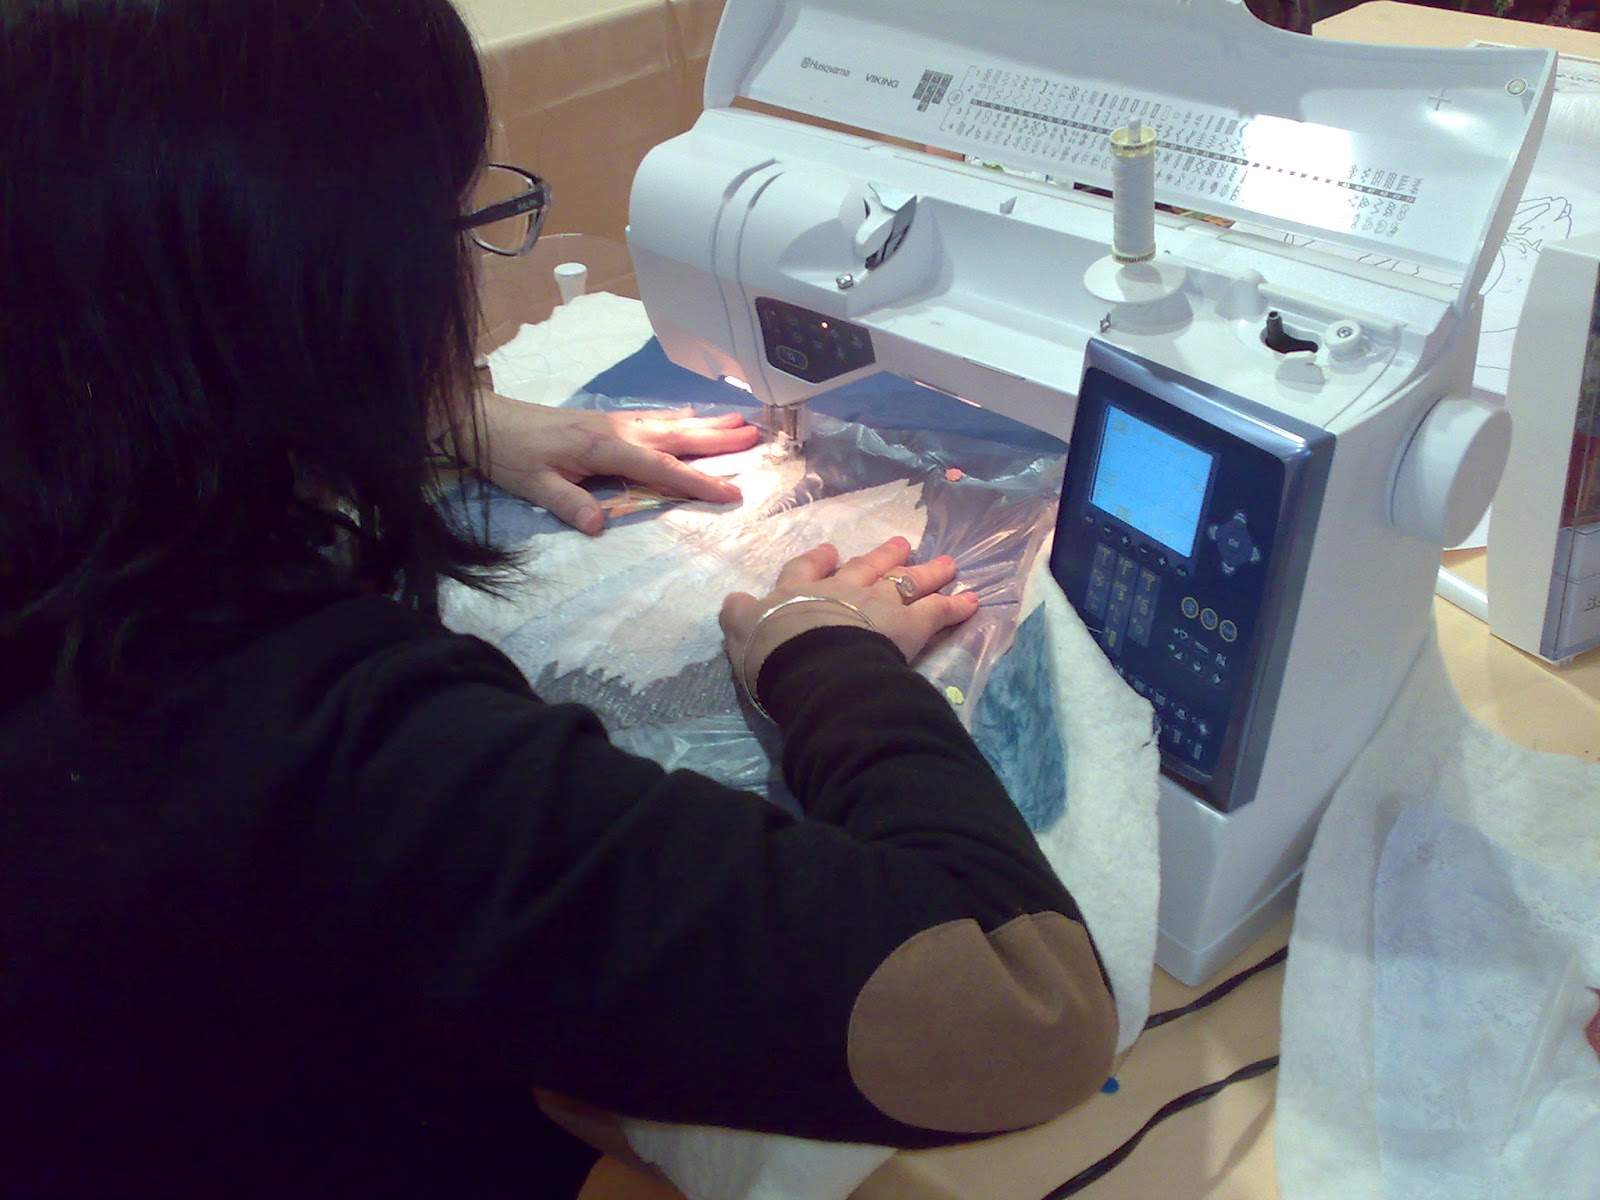
 Given I am sat on a train with very little to do I thought I might as well update my blog. I've got a few things I will need to post from home but I can share some pictures from todays workshop. Today we were working on caveman tulips, Ricky Tims style. I think a lot of the group were a long way out of their comfort zones but as you can see they got over it and produced some good work. I did take a lot of pictures but as they are being uploaded from my phone I thought I would try to be moderate. I am sure there is a lot more I should say we had fun and luch was great, but I am really tired and thinking seems beyond me.
Tweed view b&b
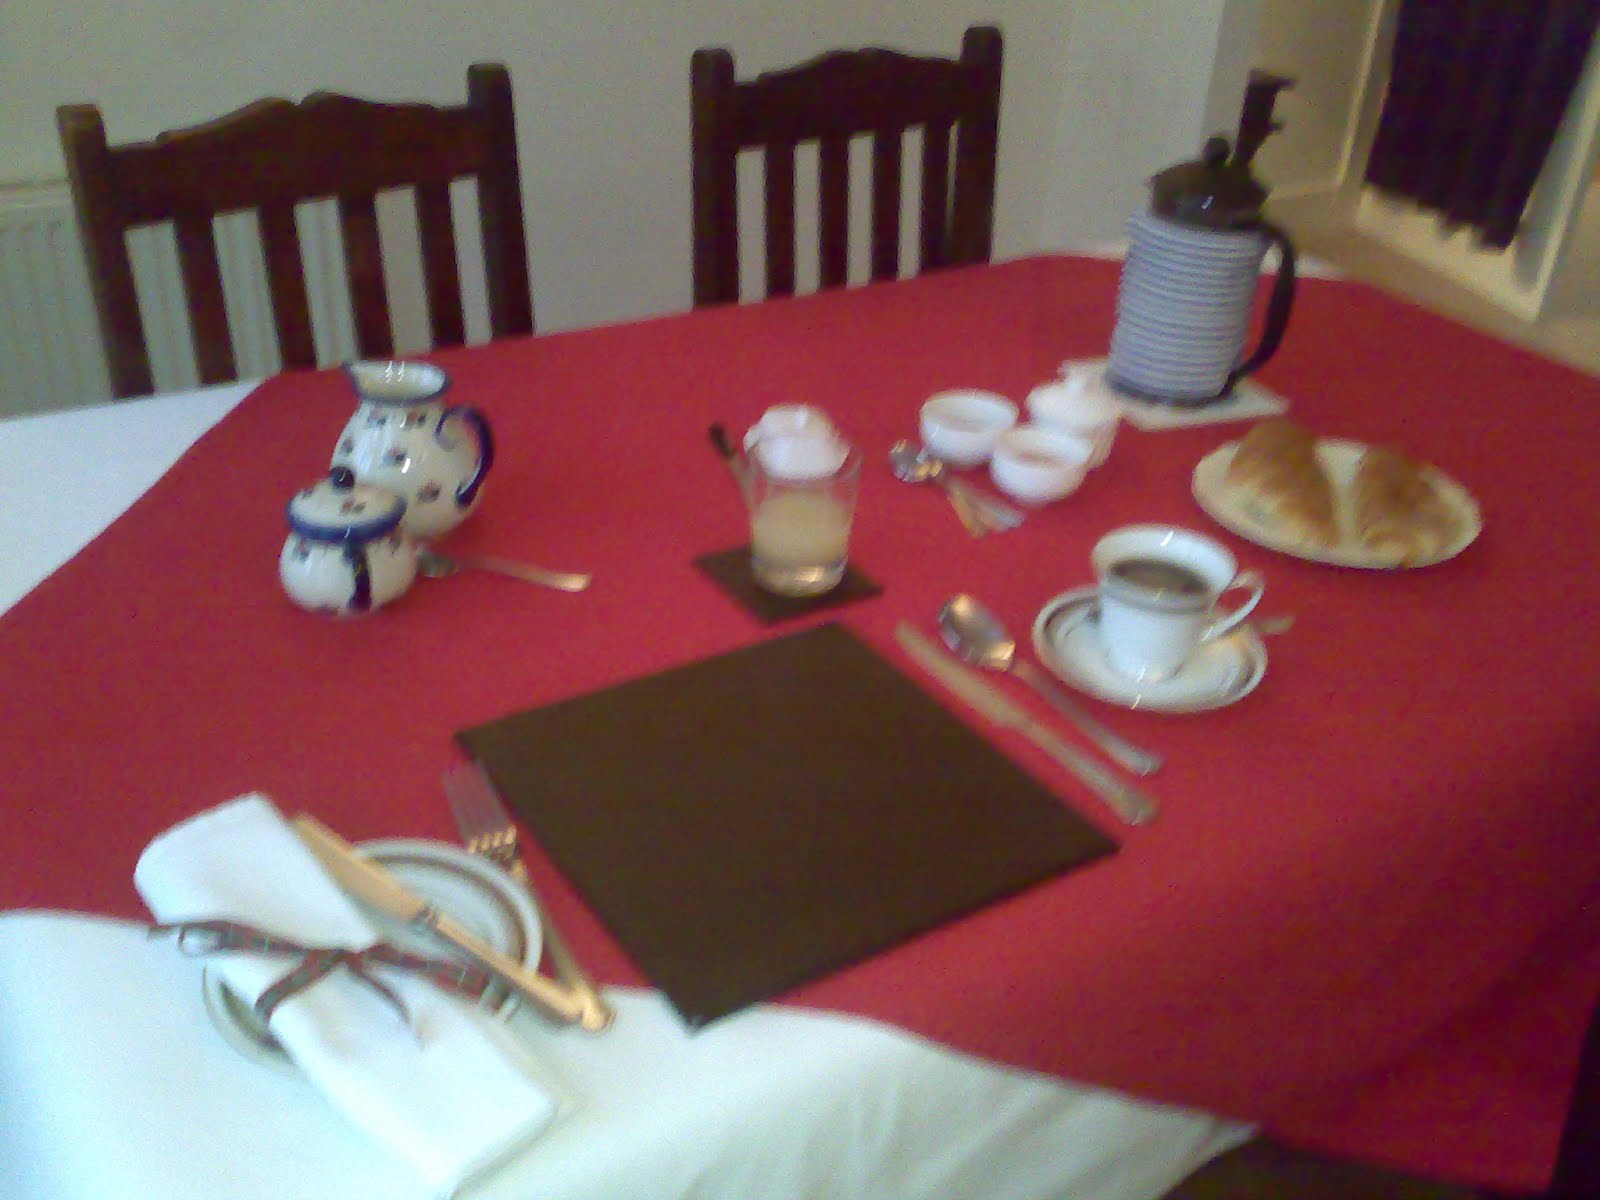

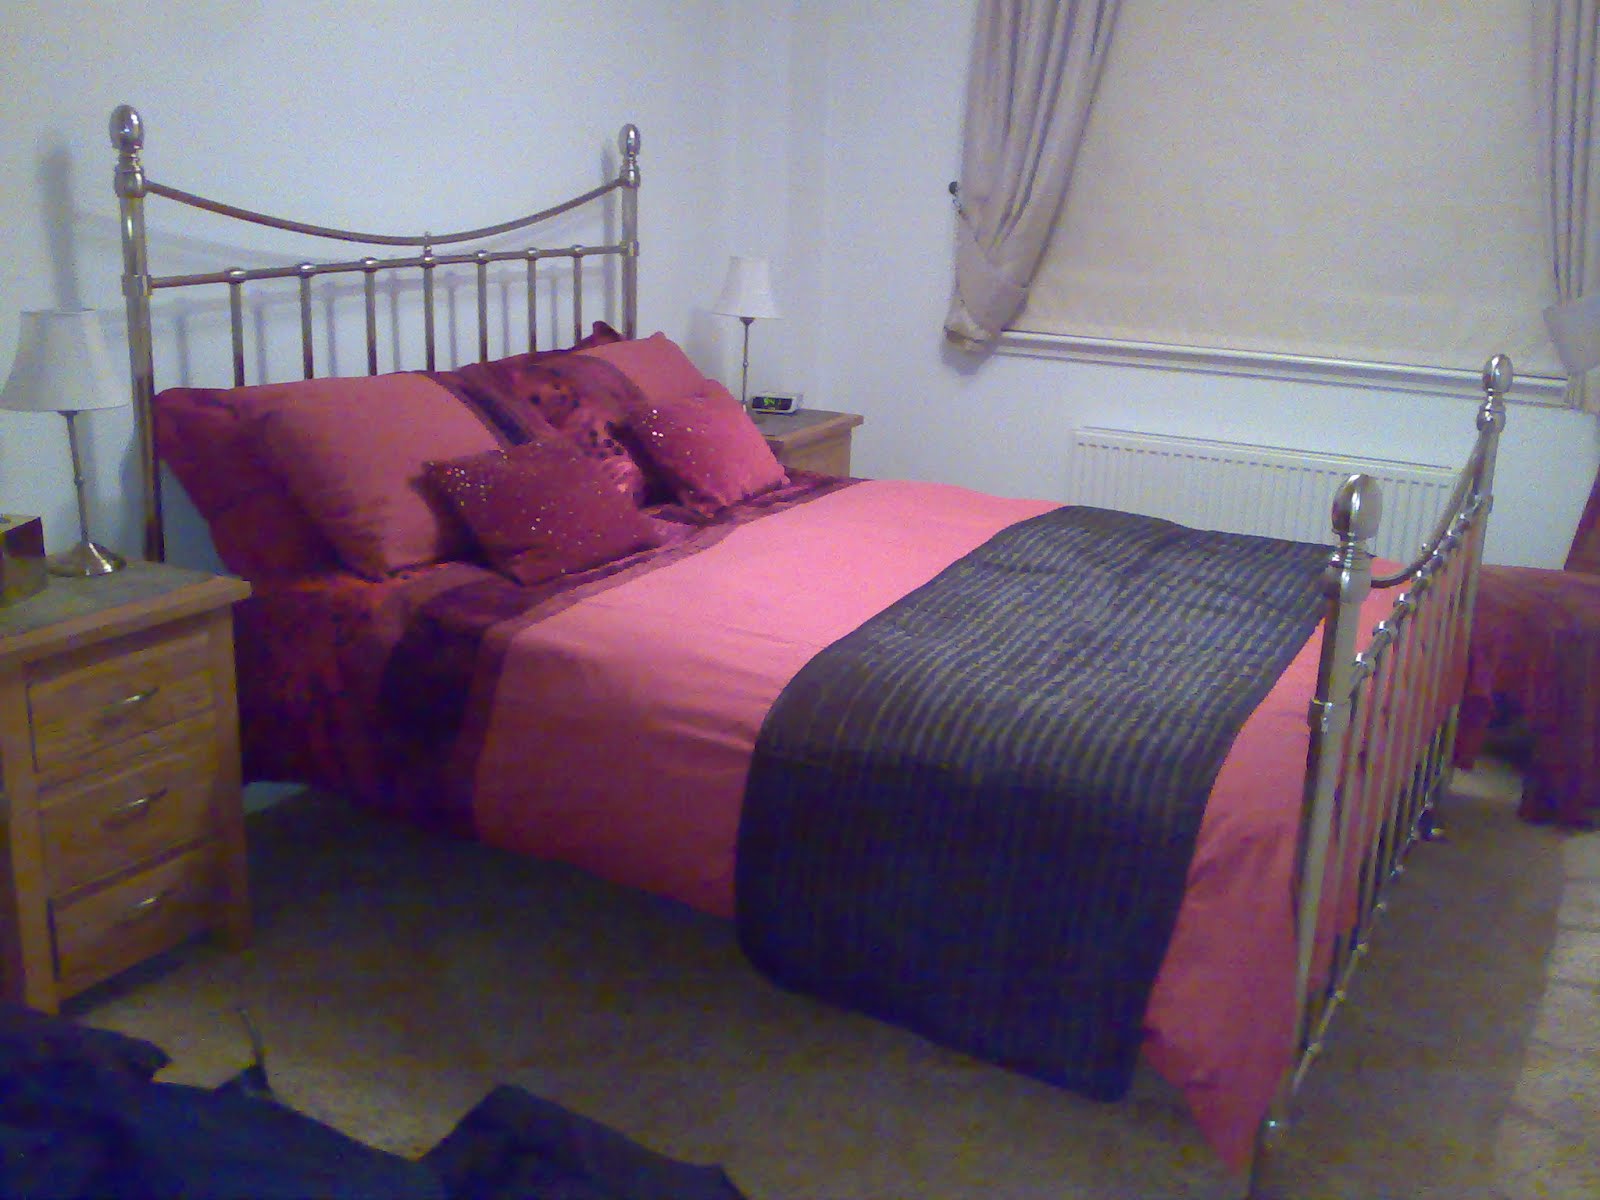 I feel guilty calling this a b&b but it's how they describe it. This is a very nice very posh place to stay and the people running it are fab. The room is lovely, I'm sure I am too scruffy for it. The breakfast menu is huge, and so far the food is really good. I have a very good pot of coffee and a bowl of porridge with whisky. I am sure you will excuse me if I get back to it.
Art quilts by numbers – Farncombe estate
March 3, 2012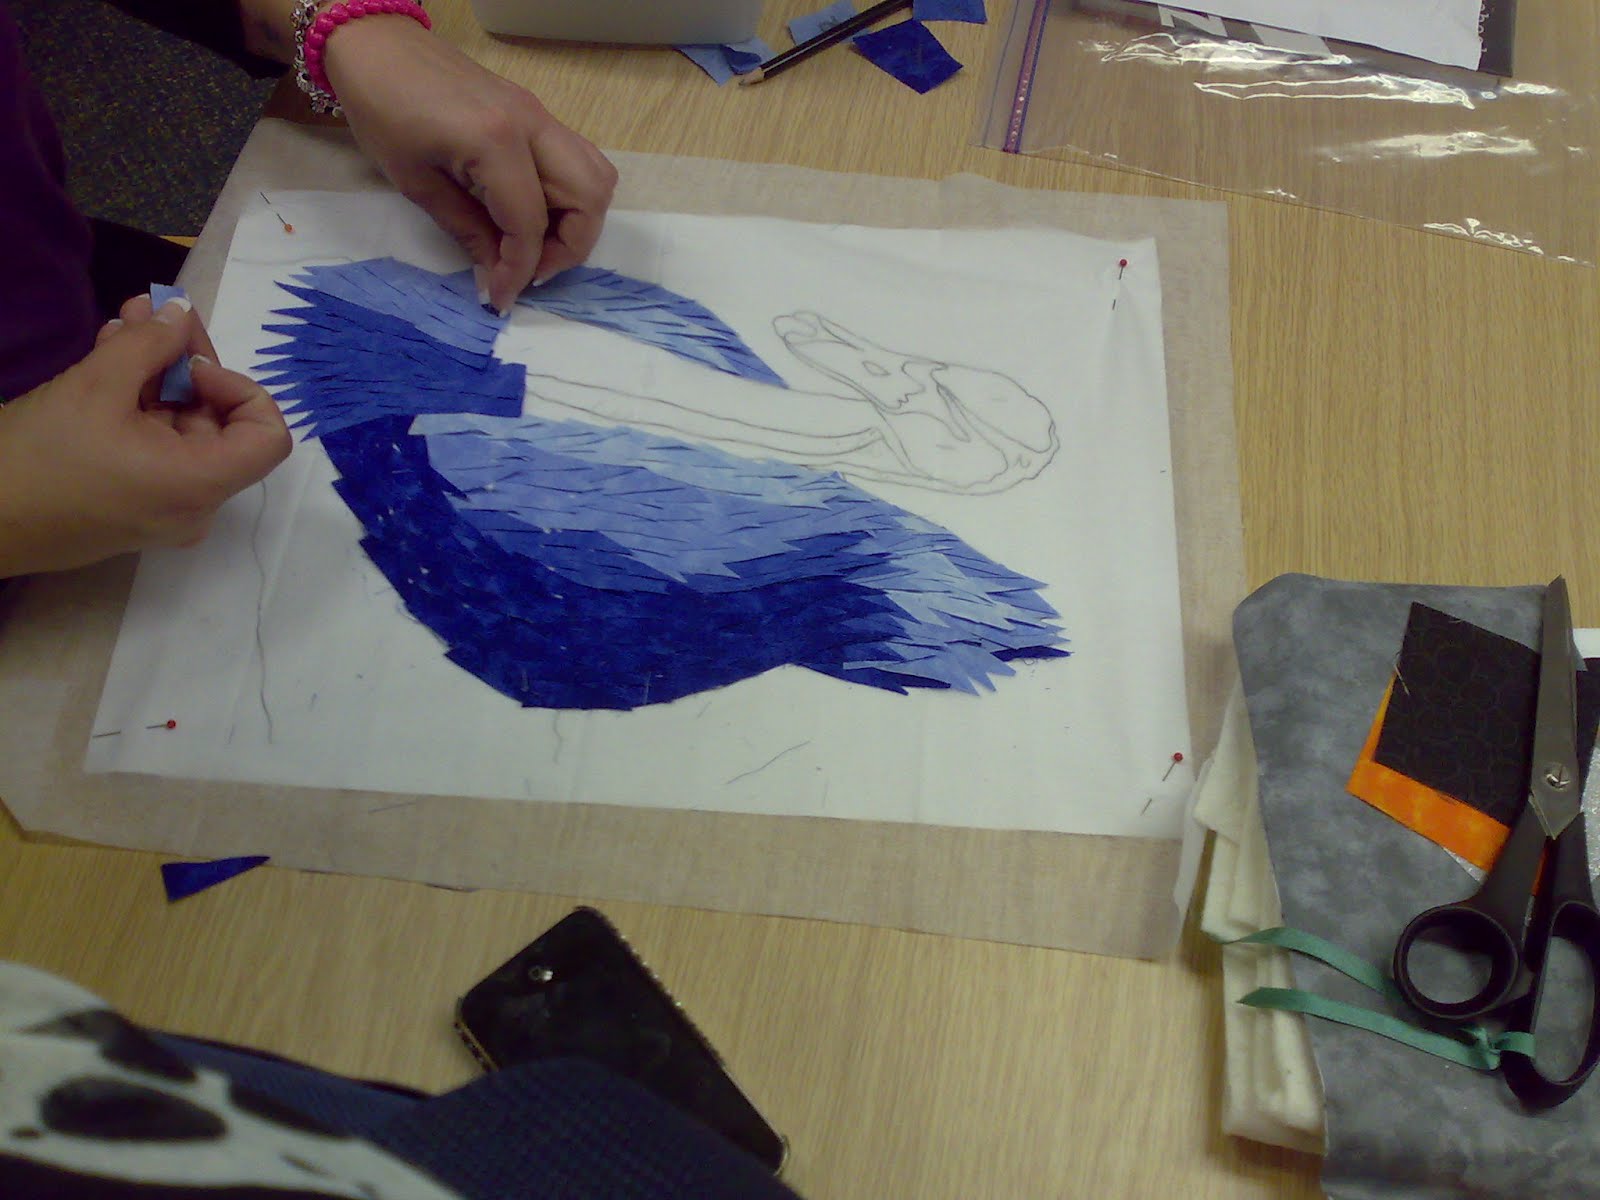

 Wow! This is an amazing venue for residential courses. It is a collection of buildings in the Cotswolds spread up a section of hill. It was foggy when I arrived but I bet the views are good. I got here shortly after lunch so I would have time to find my way around and get the room set up. As you can see it was looking good, then we started work
 ![]() The weekend starts in the bar with a free drink and a chat. Then a quick welcome from the manager. After that a three course dinner and then to work. We started with the computer side of art quilts, which is so much easier with a projector there was a risk everyone would fall asleep in a dim room after a good dinner, but actually everyone made it through that section. That took us to the end of the official day. So nearly everyone got started on their quilts. As you can see they have done pretty well. I can see this being a very productive weekend. While I am not officially teaching I am also working on a couple of small quilts of my own. Maybe I will be able to share them tomorrow.
The weekend starts in the bar with a free drink and a chat. Then a quick welcome from the manager. After that a three course dinner and then to work. We started with the computer side of art quilts, which is so much easier with a projector there was a risk everyone would fall asleep in a dim room after a good dinner, but actually everyone made it through that section. That took us to the end of the official day. So nearly everyone got started on their quilts. As you can see they have done pretty well. I can see this being a very productive weekend. While I am not officially teaching I am also working on a couple of small quilts of my own. Maybe I will be able to share them tomorrow.
Just a quicky
February 28, 2012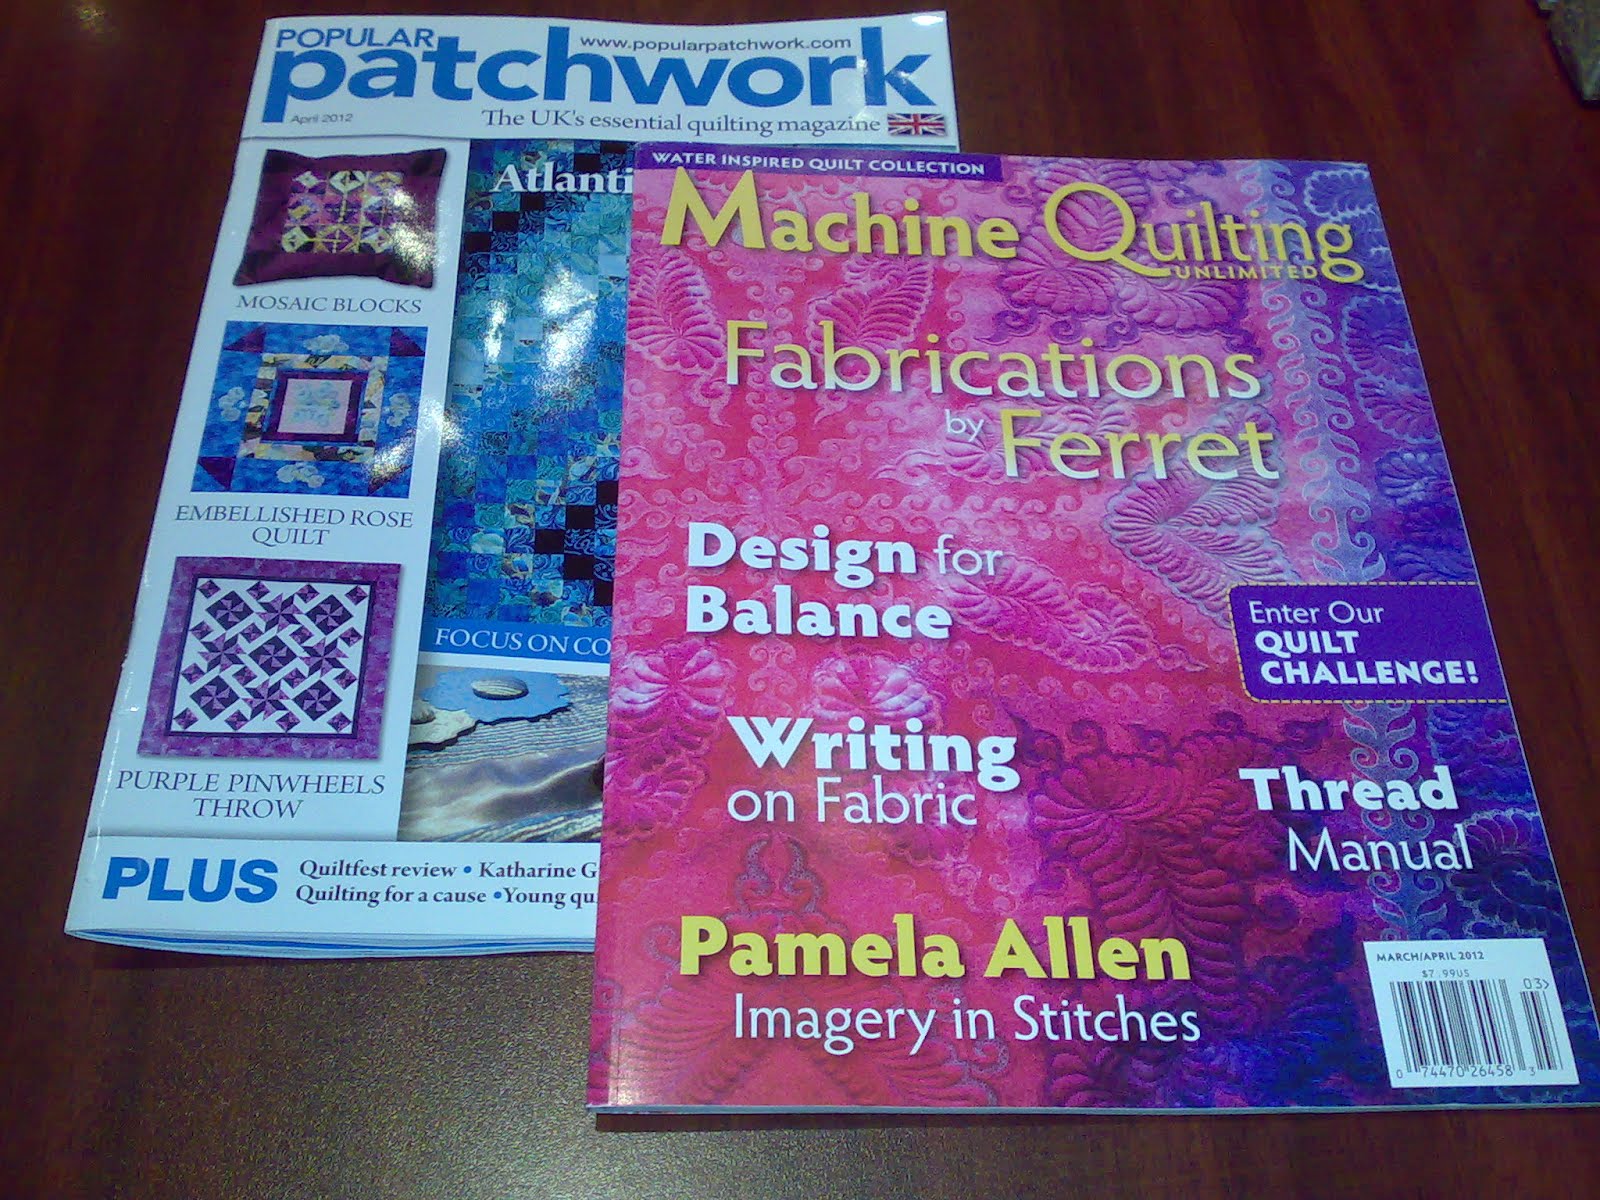 I'm still busy so here is a quick update on some of the exciting things that have been happening. One of the most exciting has been my first magazine cover. machine Quilting Unlimited has Prometheus on the cover of the latest issue, and a large article inside. It really is a huge thrill seeing your quilt on a cover.The other magazine in the picture is Popular Patchwork, which has a fantastic writeup of Quiltfest complete with lots of pictures.
Quarterjack workshop
February 27, 2012I’ve done it again. I got so engrossed in the class I forgot to take pictures, I suppose that’s a good thing as a tutor, but it’s very frustrating when I want to write a blog. This is a group I spoke to last year at their Christmas party at an amazing venue. The workshop was a bit of a shock to the system, as it involved a 6am start but it was a beautiful day and a good venue. The venue, Holt Village hall, is lovely. Very light and a good number of power points. The group also limit their numbers to 16, so everyone has lots of space to work.
The other thing that worried me was the range of students. Some were worried the class would be too hard and others that it would be too easy. I was concerned that one or other of the groups would be upset. As it turned out they were a lovely group, and at the end of the day all said they had learned something. The class was machine quilting 1, which is designed for beginners, but it seems I start from a different place to most people. I’m just very relieved that the students felt it went OK.
I haven’t forgotten I need to finish the gallery tour, I’ve just not had a chance yet. As well as the teaching I’ve had a couple of articles to prepare for magazines, and as those had deadlines I figured I would have to do them first. Hopefully I will get the gallery finished tonight or tomorrow though, then I can share some other exciting news.
Quiltfest Gallery – Part 4
February 21, 2012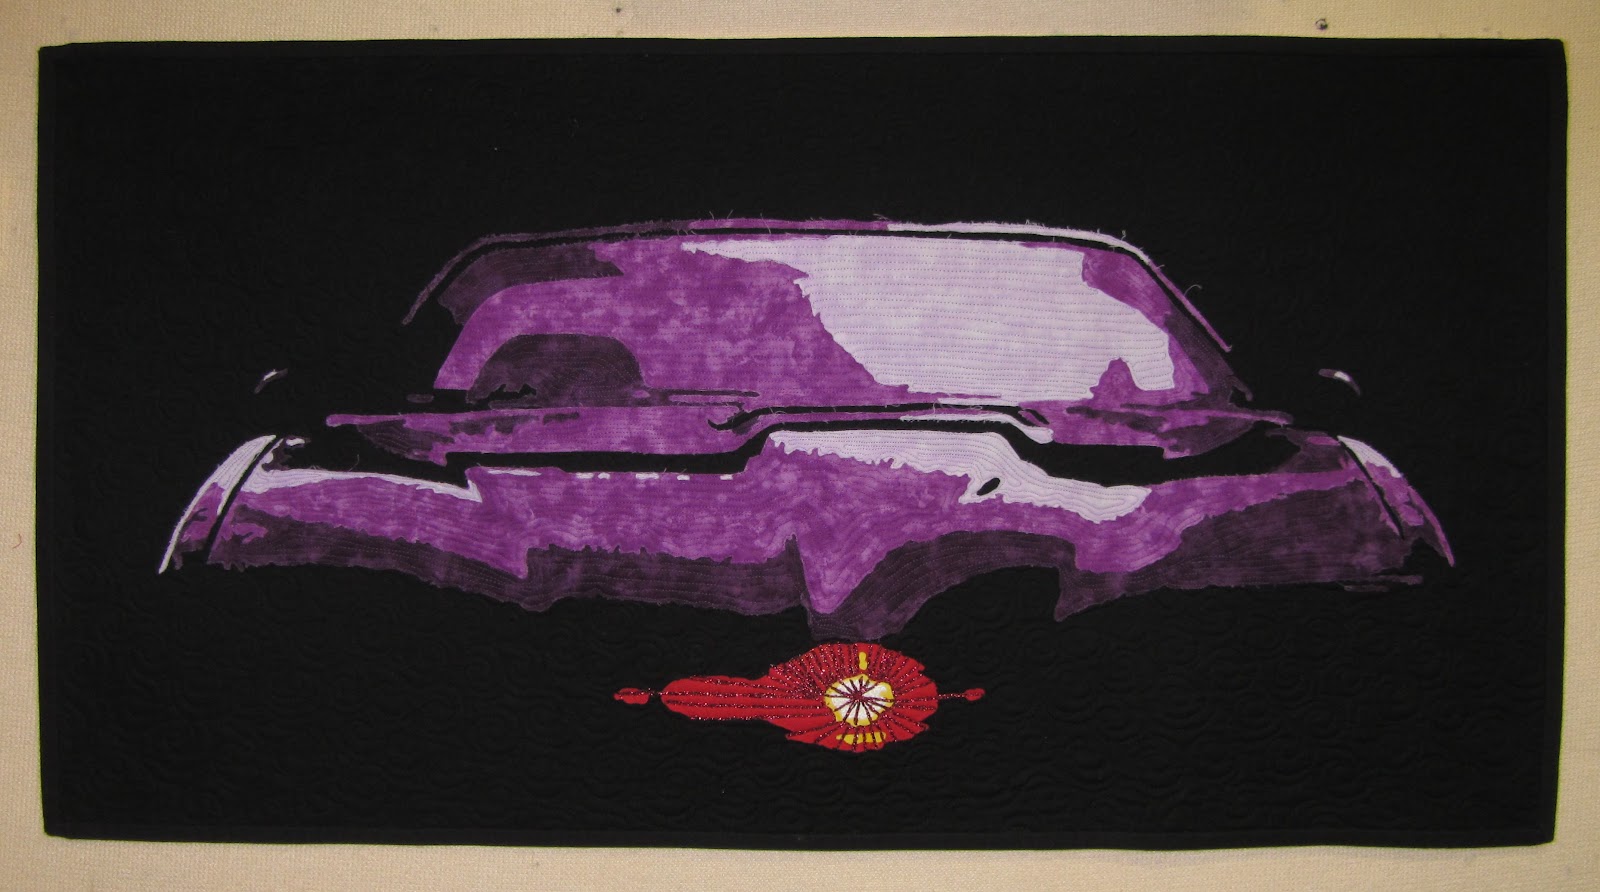
This is part 4 of the gallery tour, the other parts can be found here, one, two, three.
 OK, you’re back, lets carry on our trip around the show. Our first quilt today is another that I hadn’t intended to show, but it filled a tricky space and I like it so, here it is. I think more than anything this one shows my age, it’s K.I.T.T. from Knight Rider. I was never much bothered by the people in the series but I fell for the car in a big way. In fact the ring tone on my phone has been the theme tune from the show since it has been possible to set them. Ah if only you could fit the whole of my talk into a 1981 Transam.
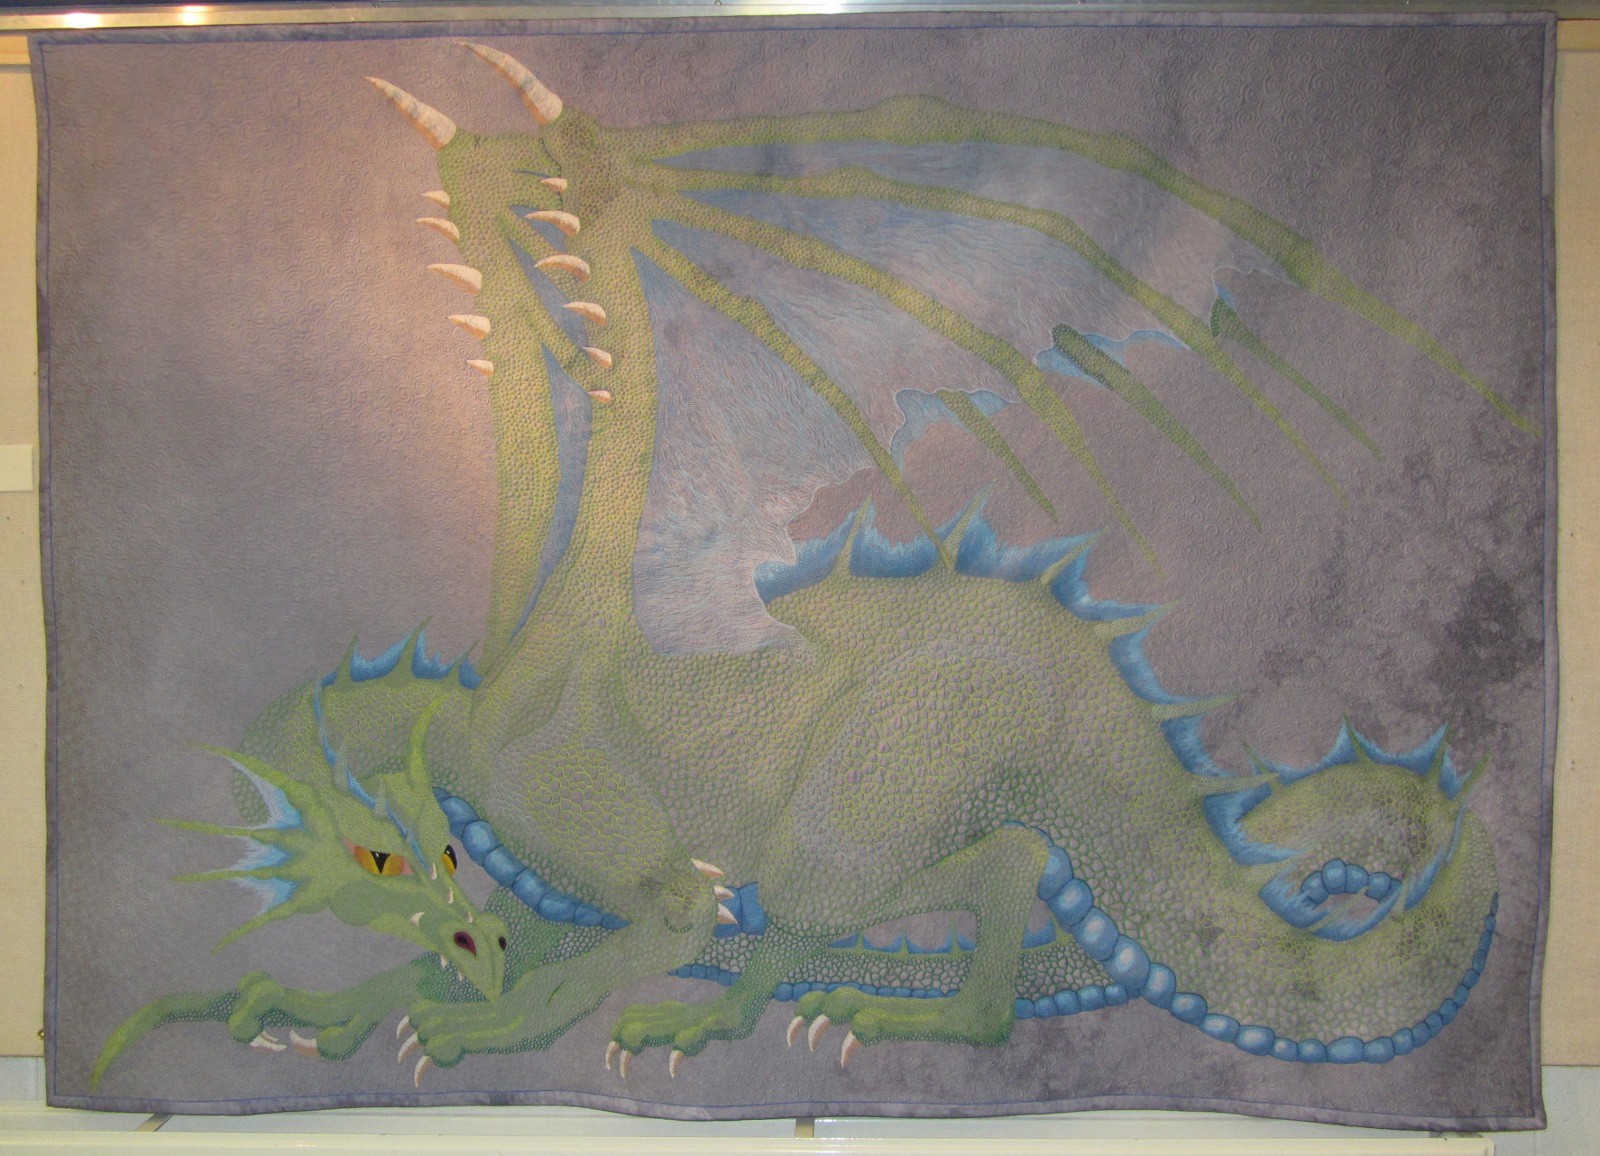
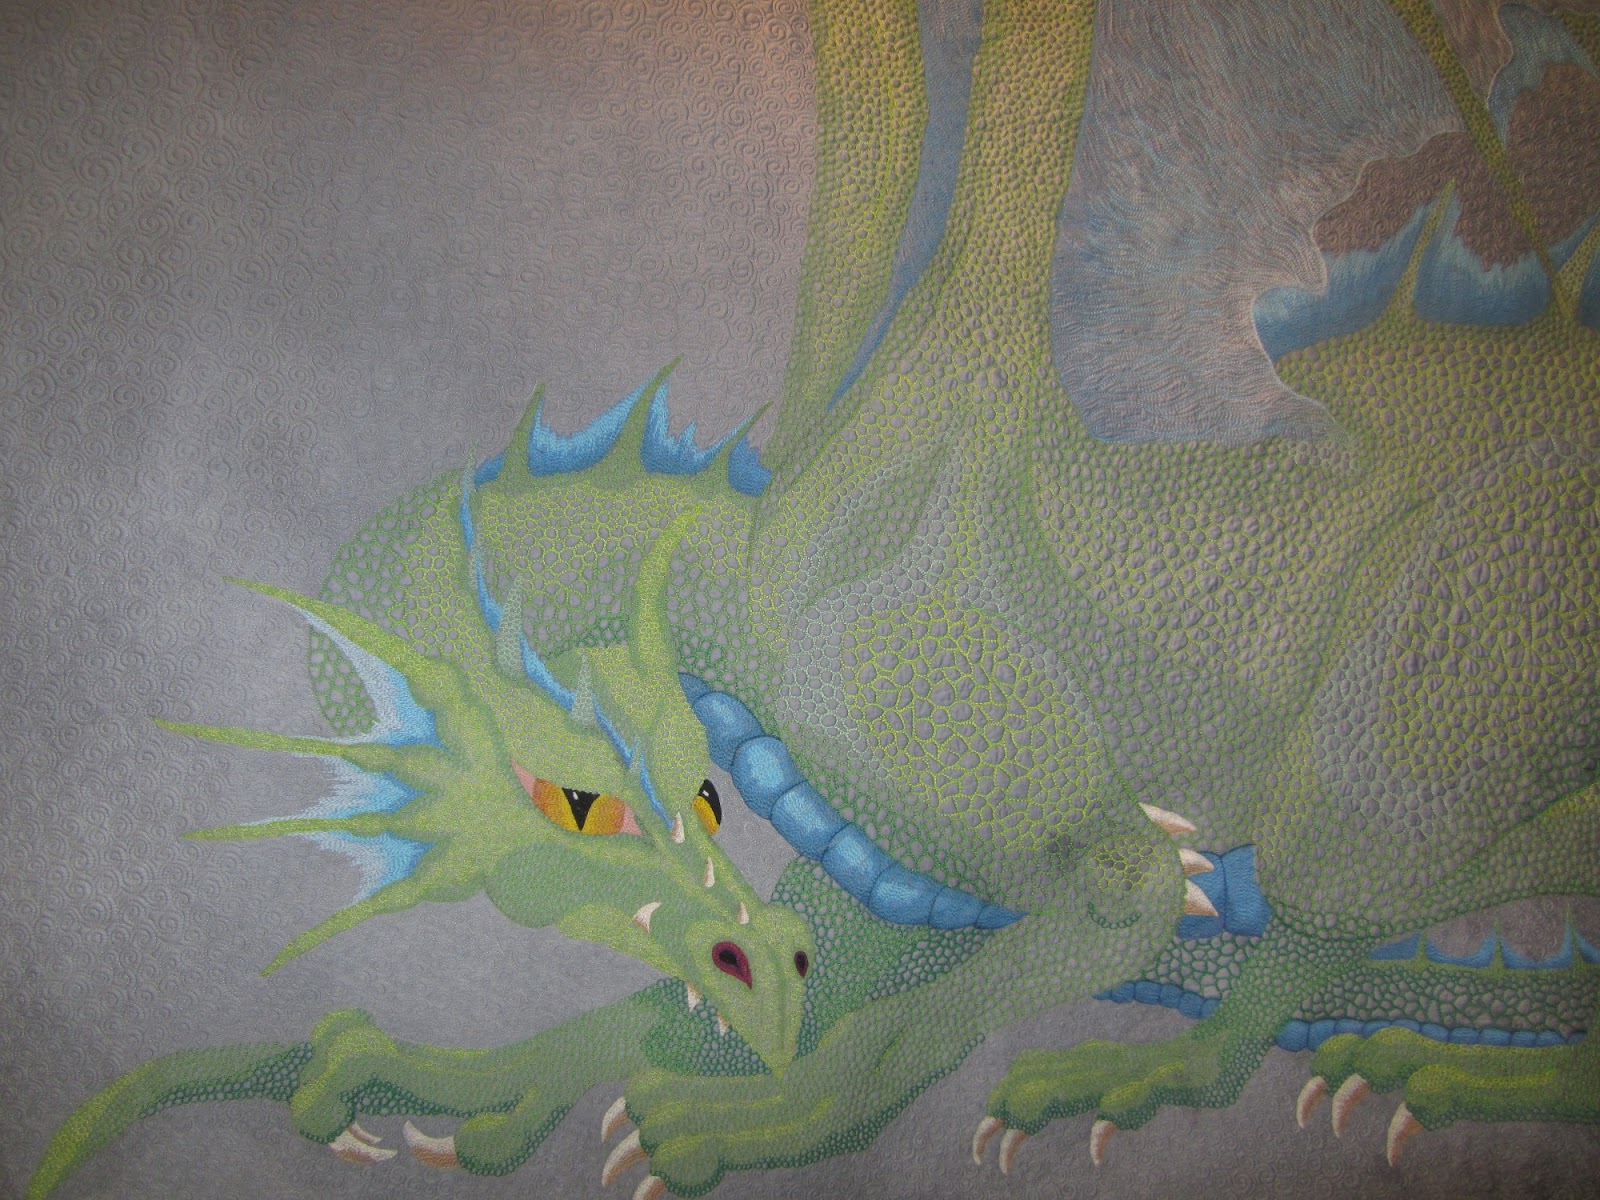
It seems this is the most eagerly expected quilt by my blog readers. Dragon 1 (yes the first dragon is technically Dragon 0). If you are a regular reader of my blog you will have seen me working on this one just before the show. I think it came off the frame 3 or 4 days before the show. If you missed those posts they start on the 8th of January, so start at the bottom of this page.
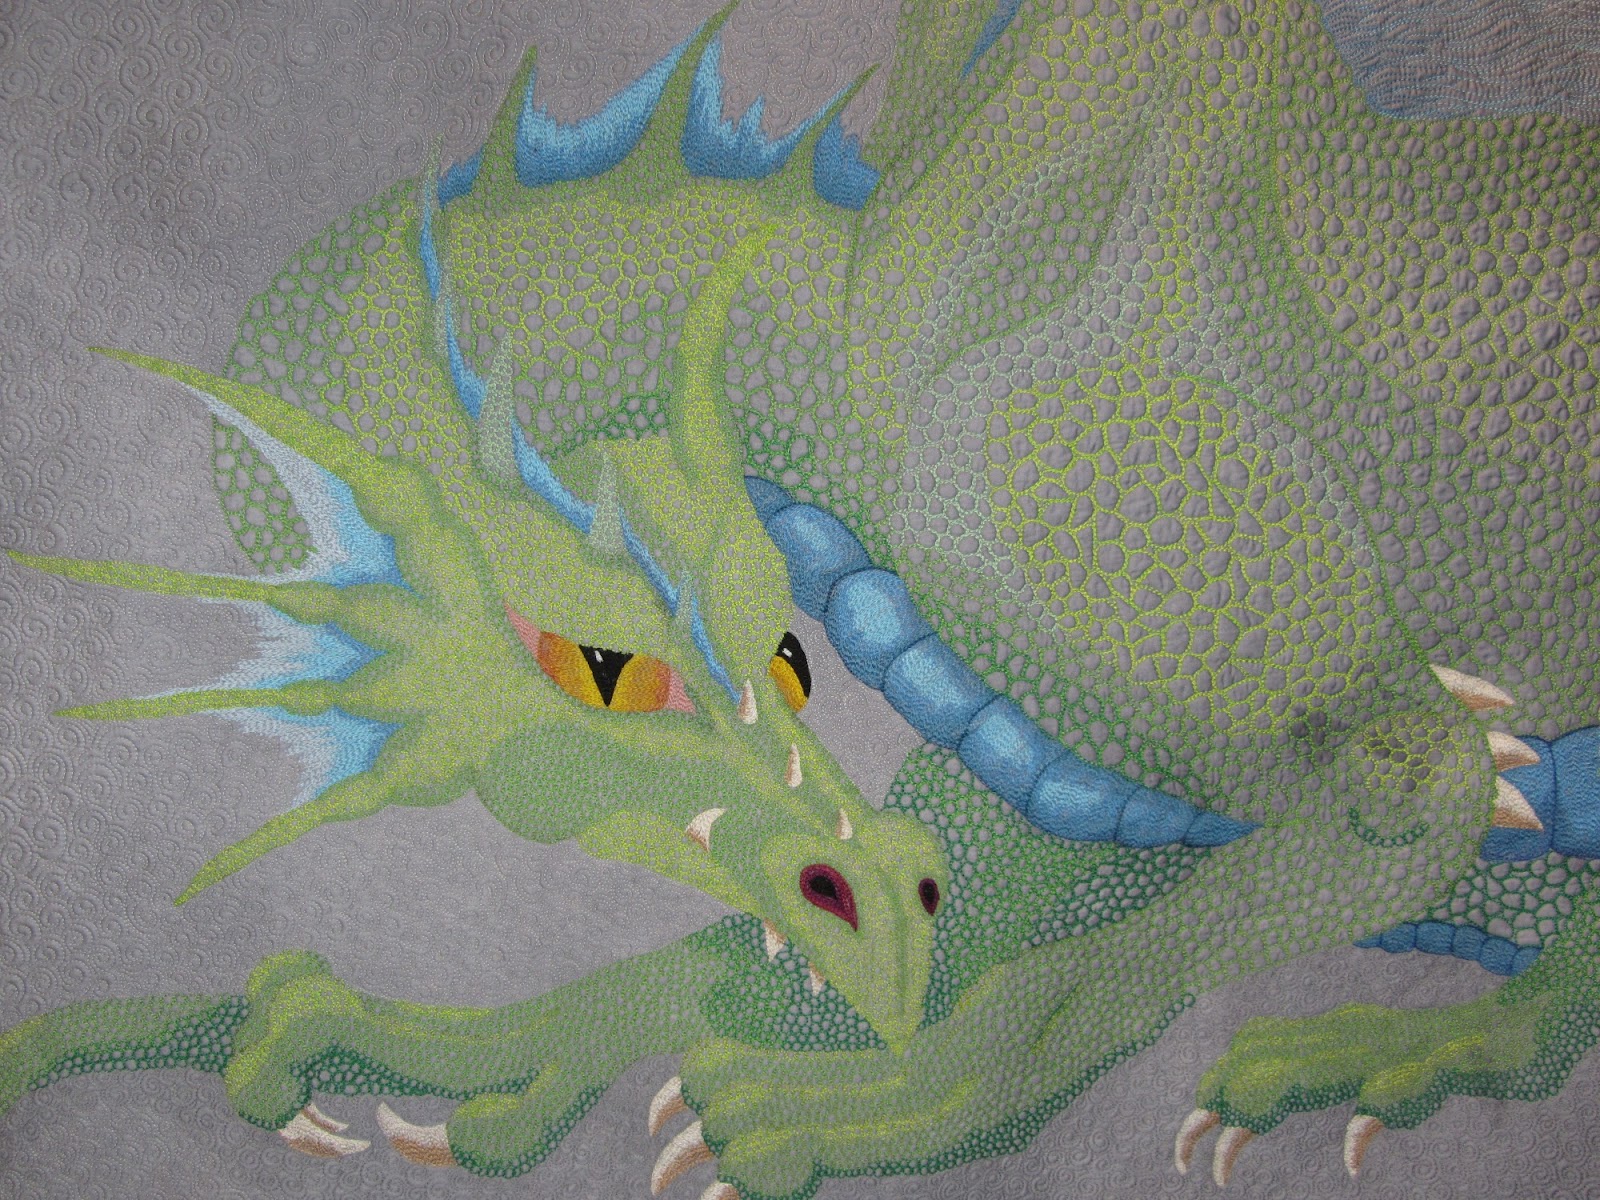
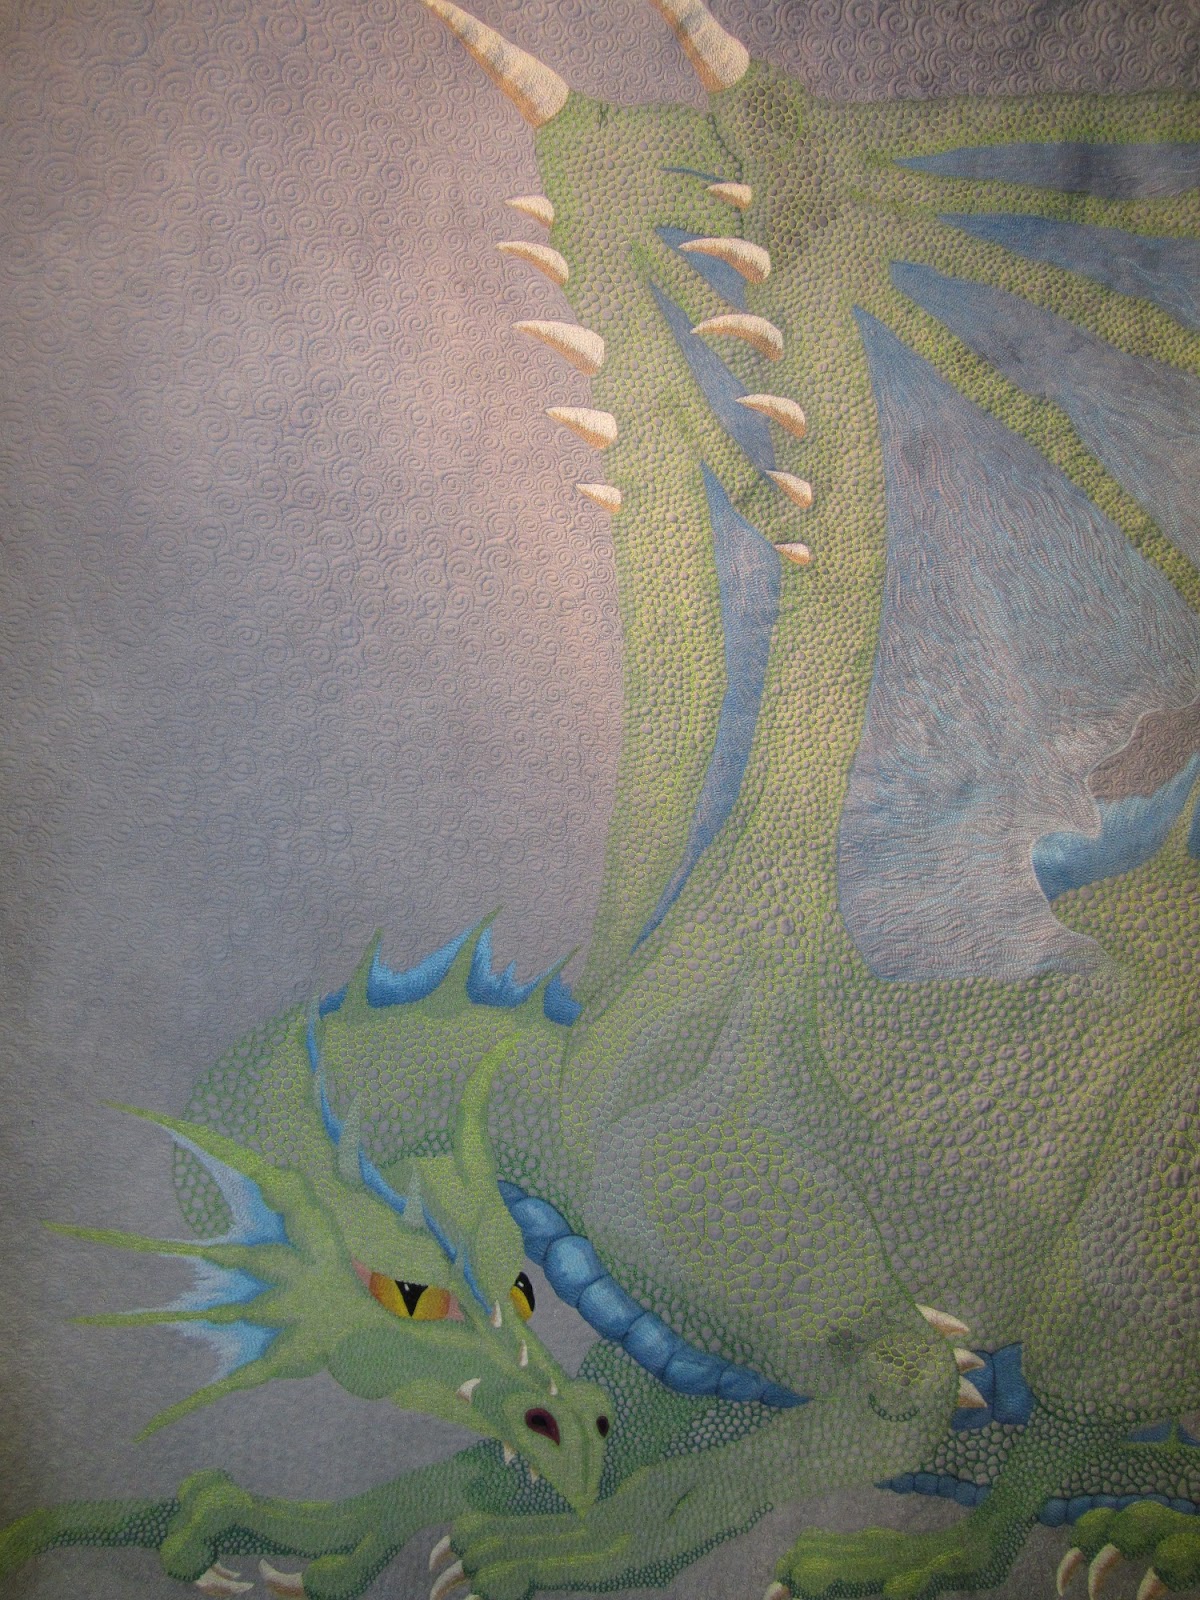 I was hoping that this quilt would look like it was drawn in water colour pencils. It is actually a wholecloth quilt with the design made entirely in thread. The starting image for this quilt was the preliminary sketch by Glenn Wallbridge, for my first dragon tattoo. Bonus points to the readers who spotted that while I was working on it. It is stitched onto another piece of cotton sateen
hand dyed by Heide Stoll-Weber. The image was scaled up to be the biggest I could fit on the cloth I had. I managed to use the whole piece with just enough to bind the quilt. I am very stingy when it comes to Heide’s fabrics. Being hand dyed it does have variations in colour, but in this case they are all shades of the same grey. All the colour on the quilt comes from the threads used.
On the top of the quilt the threads are King Tut, Signature and Aurifil, and in the bobbin I use Masterpiece. I only use cotton threads in my work. Maybe it is old fashioned and snobby, but it’s what I do and I can’t see me changing any time soon. It does somewhat limit my colour options.
Rather than mark directly onto the quilt I prefer to do my marking on wash away stabiliser. Over the time I have been quilting ever marking tool I have used has let me down at least once despite my testing them all before I use them. The stabiliser keeps the markings that little bit further from the quilt. If I can avoid marking altogether I do. In this case though I needed some help. This project was a huge challenge for me. I don’t draw and my grasp of drawing and shading techniques is very basic. I had to learn and fast.
This is also a style of quilt I had mostly written off. I always match my bobbin thread colour to my top thread colour. This means all of my art quilts have a wholecloth art quilt on the reverse. It seemed to be a poor deal to make an art quilt as a wholecloth. I’d only get one quilt for my work not two. Who doesn’t like something for free.
 I learned a lot here, and having done this quilt I will do more in a similar style. I’ve got ideas for stretching the number of colours I can get in thread, and I can see other ways of laying down thread. I want to play with stabilisers and different waddings. This quilt has Warm and Natural in it, as that was the densest wadding I had to hand. I think more solid ones would be even better. I just need the time to play now.
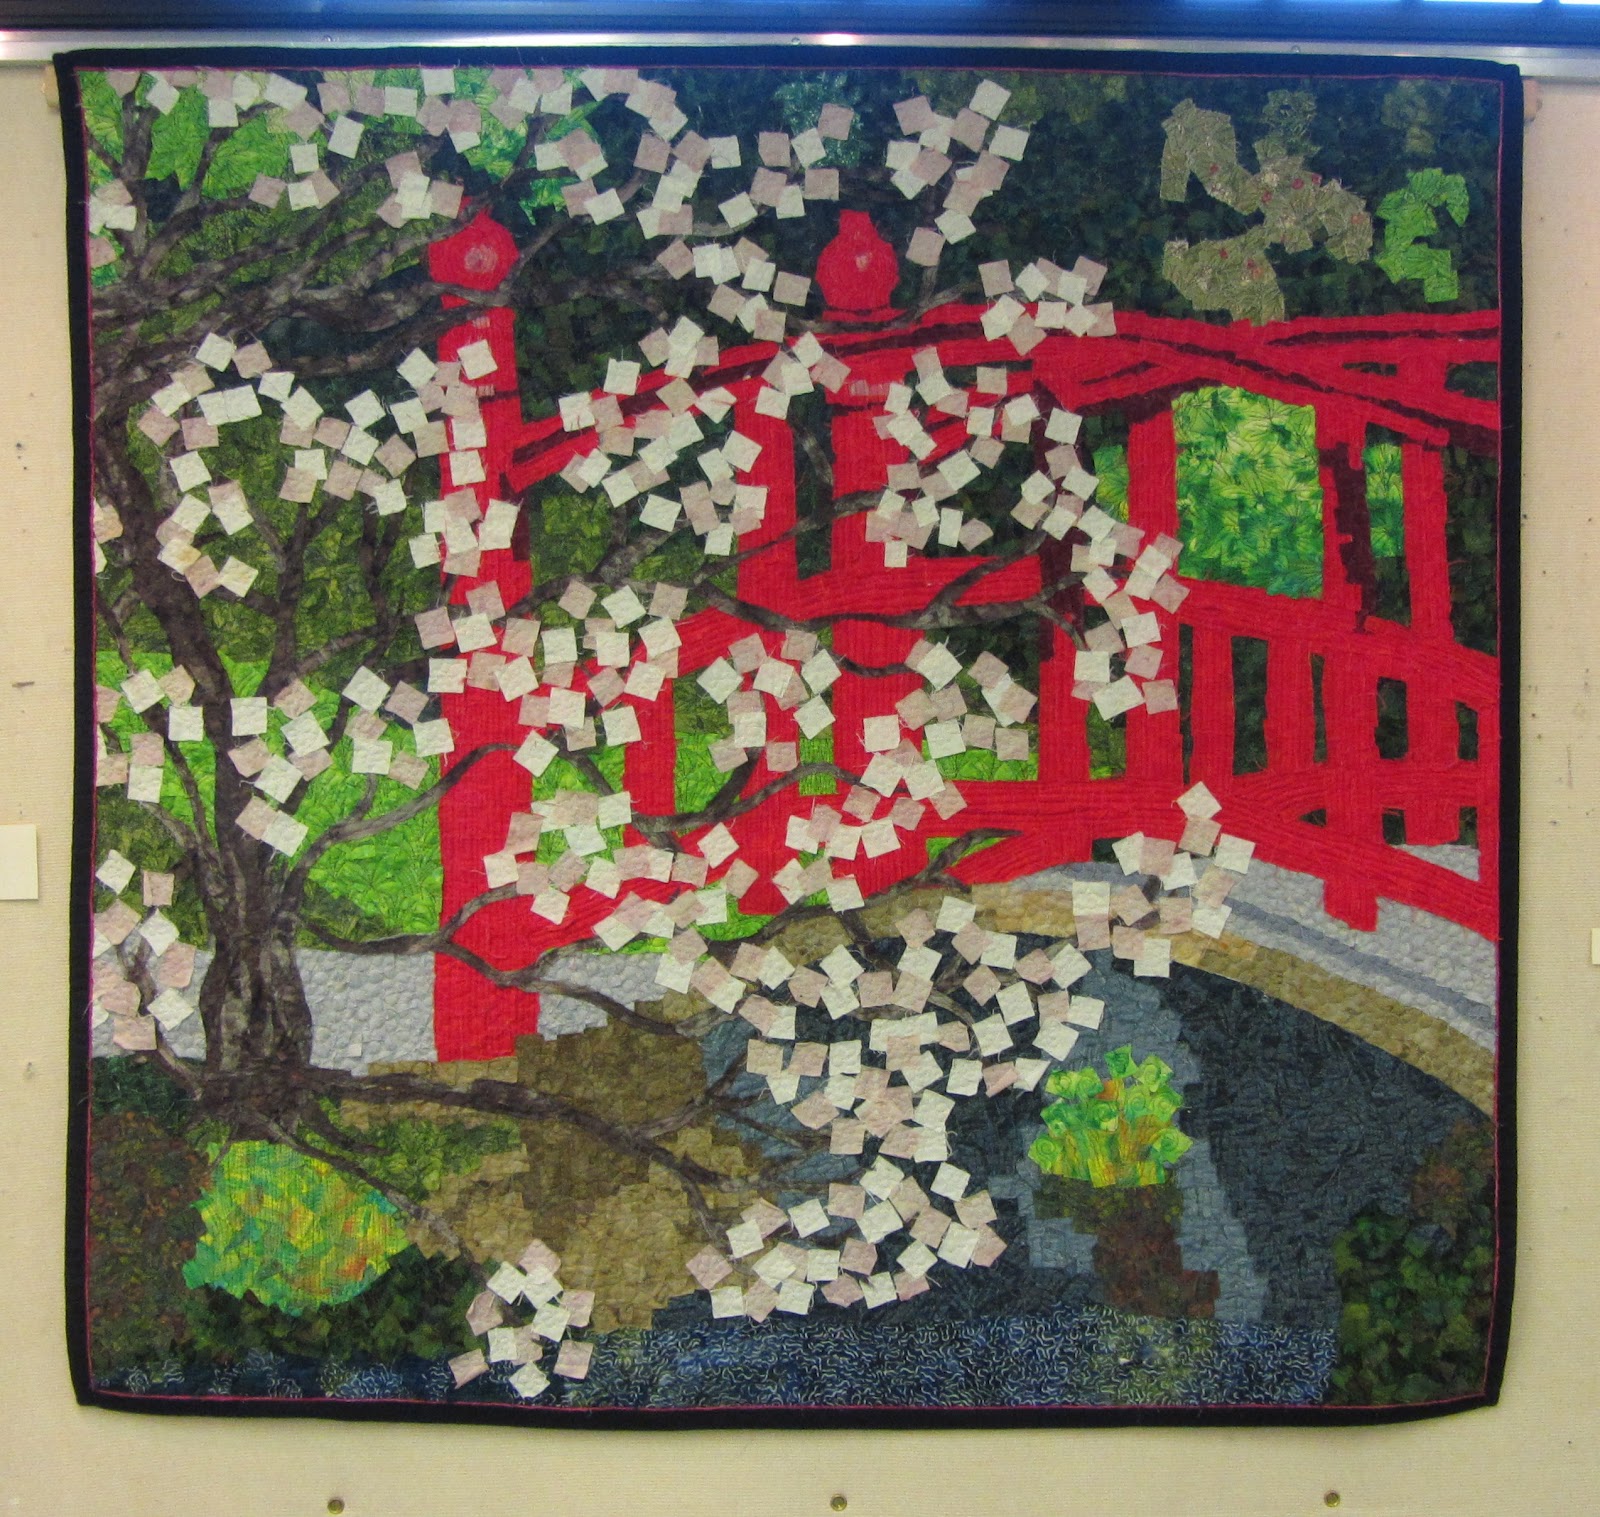
 Here is another older of my older quilts. I made it to try and get a quilt into an American show. The show had the theme ‘Celebrate Spring’, and I had been spending a lot of time at the National Gallery. Cherry blossom in an impressionist style seemed the obvious choice. This was another quilt that took me out side of my comfort zone and had me trying new things. I loaded the frame with a calico backing a layer of 80/20 wadding and another layer of calico. On the calico I marked where the bridge path and river needed to go, then I started colouring in.
All the colour comes from 1″ squares of fabric. I laid a few pieces down then stitched them into place with a pattern appropriate to what they were representing. So the bushes are quilted with leaves and the path with pebbles. The wood on the bridge has a grain to it and every blossom has a flower quilted on it. Most of the picture was made from the top down, the tree though I had to add from the bottom up. I just couldn’t get my head around working it the other way.
In Full Bloom did it’s job. It was accepted into the Celebrate Spring show and was the first quilt I exhibited in the USA.
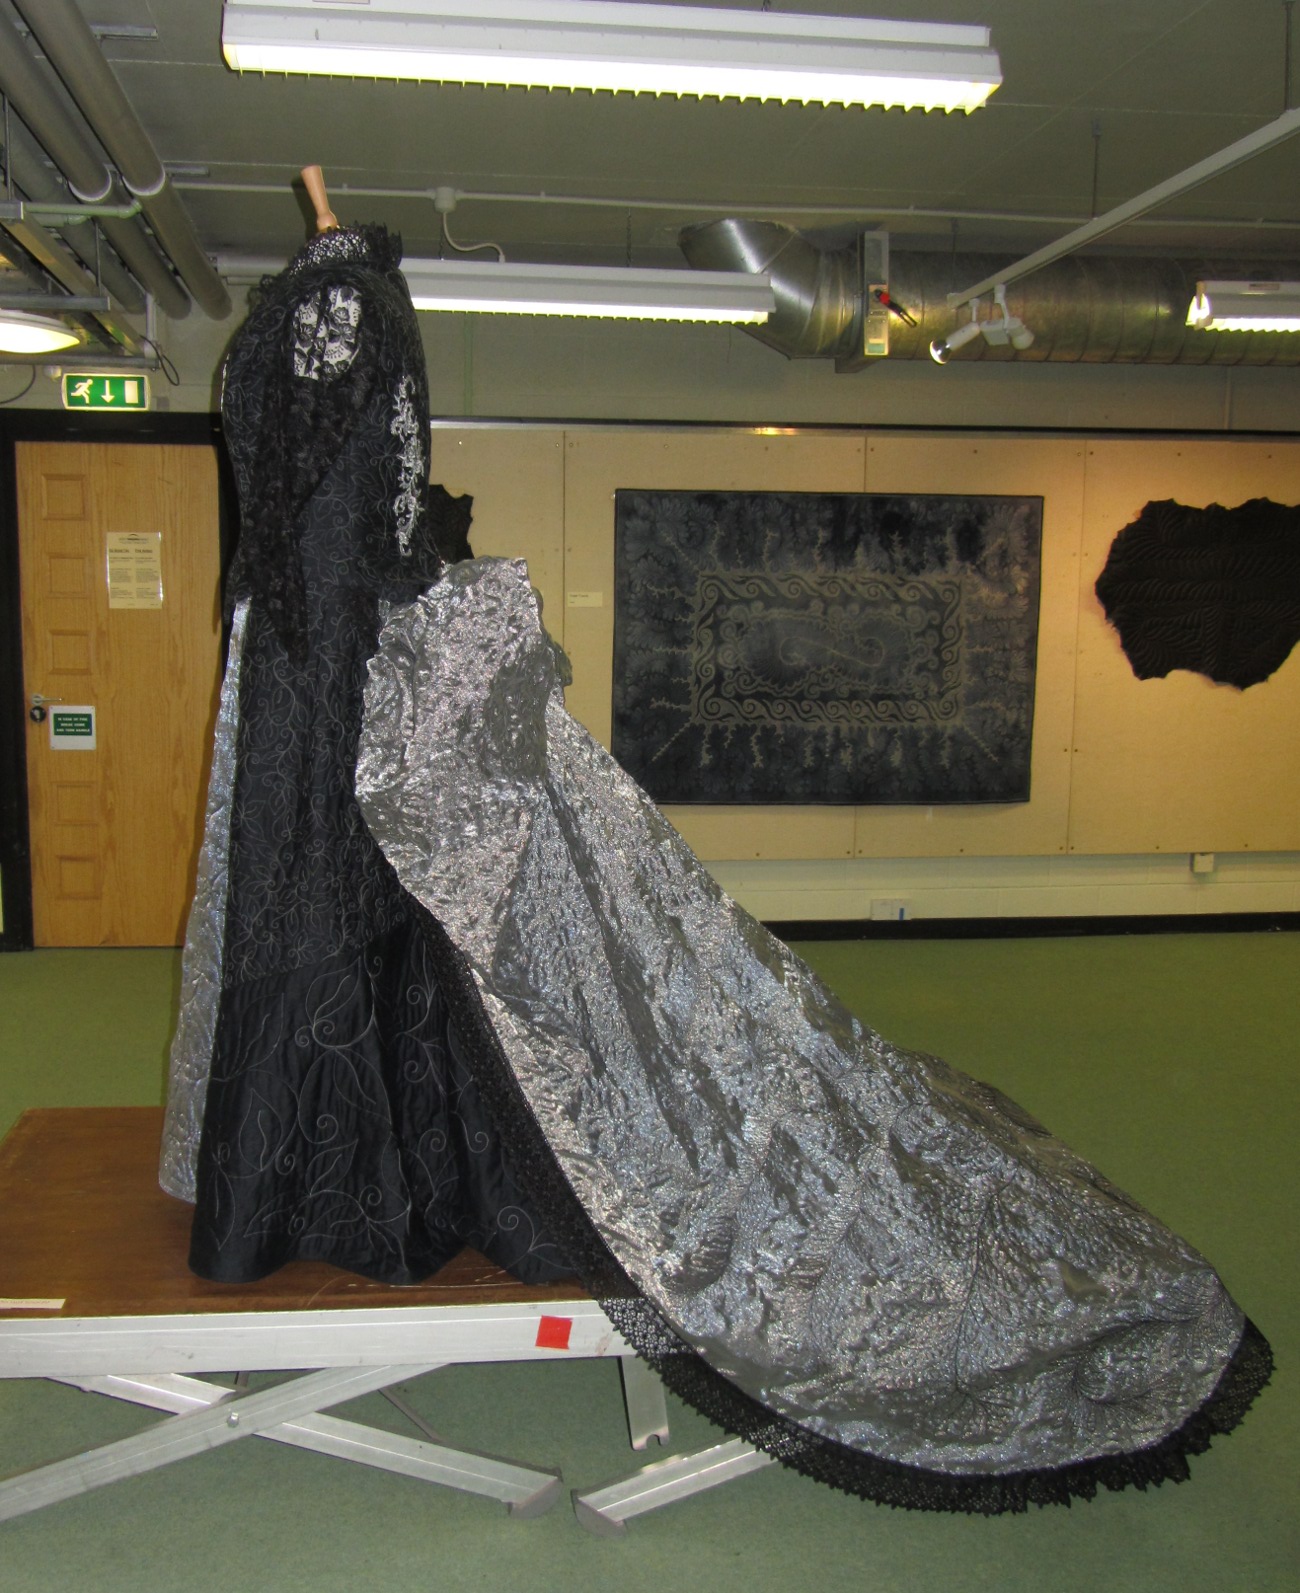
That’s the end of the wall. Let take a look at the items hung elsewhere in the gallery. We’ve walked around a large plinth in the middle of the room, holding a dress on a display form.

In 2009 I was asked to take part in a new feature at the Festival of Quilts, a fashion show. There were teams from the UK and Russia and each member of each team was to make four items. Day wear, evening wear, accessory and fantasy. I wasn’t that interested until I heard that last one. I’d been thinking for a while about making a suit of armour and this seemed like the perfect excuse. Unfortunately, because it is quite fragile and it was too bulky to store when we had to take the show down, I couldn’t display it at Quiltfest. If you would like to see it, it is on this video.
 So, by deduction, the dress isn’t my fantasy category. It was actually my evening wear. I’ve enjoyed making Victorian style clothes for years so it seemed like an obvious starting point. I also thought it was something I could add quilting to without ending up with a shapeless garment. I had issues with big shapeless coats and tops, well to be honest they have an issue with me. They make me look way bigger than I am and that is quite big enough to start with. I suppose the alternative would be to not put much quilting on the garment, but that really isn’t my way of doing things. If you ask me for quilted fashions, you had better believe they will be quilted.
The patterns for this outfit are all from Truly Victorian. The skirt and bodice are patterns I have used before but the train had just been in my wish list. Again the show gave me a good excuse to do something I’d been thinking about for years.
 As I’ve said if I am going to make a quilted garment it has to be quilted. This gave me a problem, how could I make a proper three layer quilt that would be soft and light enough to craft the train from. I came up with using organza. The train is three layers of organza. Silver top and bottom with black as the ‘wadding’. It is two widths of organza wide, about 80″ and approximately 120″ long. I had to guess the length as the pattern for the train went missing just as I was ready to load the organza on the train. I thought I had loaded up more than I could possible need but actually another 20″-30″ would have been good.
The quilting for the train was started at the hem and as with all my work is just freehand. The body of the train is quilted with feathers in various styles and colours. Starting with black at the hem and working up to lighter grey at the bustle. The bustled section is quilted with my curls, which really only add texture, you don’t see the design at all.
 The train is hemmed with heavy black lace. This I bought a roll of as I knew I would need several meters. I am flattered by those who ask if I made it, but I really can’t face that much lace making.
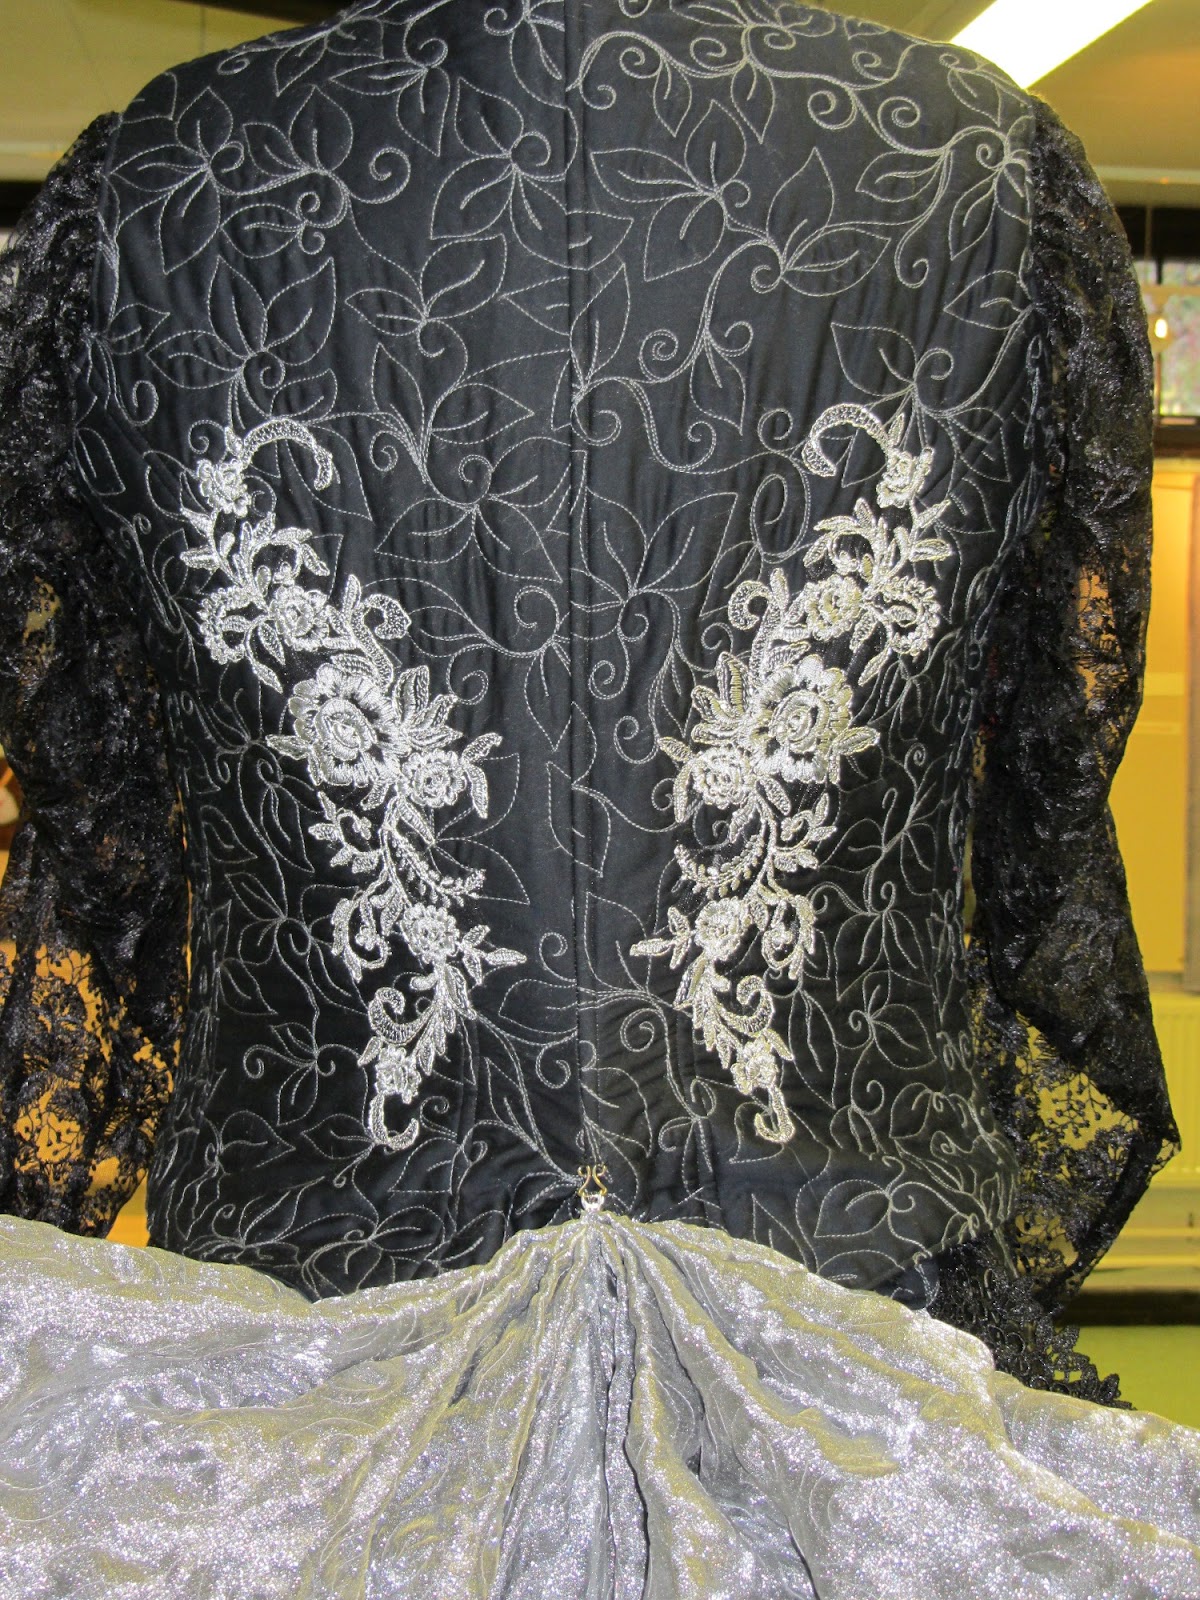
The back of the bodice is decorated with two lace panels. These were also purchased from Vena Cava Designs. This is a fantastic UK company that sells all sorts of corset supplies and fancy pieces like these laces. I had actually gone to the site to buy more spiral bones for the bodice but when I saw these motifs I had to have them.
 The next problem I came up with was how do I get into this outfit in a hurry. At the time I was planning it we were expecting a change time of about 5 minutes. That doesn’t give me long enough to get into a corset so the bodice had to do the job of the corset. However I wasn’t prepared to have laces on show. I settled on making the bodice very tight and using lare hooks and eyes to close it. It does mean I need a dresser (although that was going to be essential for the fast change anyway) to haul the bodice shut. It works surprisingly well and is pretty comfortable too.
The larger panels of the skirt were quilted on oversize sections of fabric that had been roughly cut to shape. The lining is black cotton and the outer is a cotton sateen. The wadding is a Dream Orient. It is a fantastic clothing wading. It is a blend of cotton, silk and bamboo, it drapes really nicely. I did use some marking on wash away stabiliser to make sure the panels on each side are mirror images of each other.
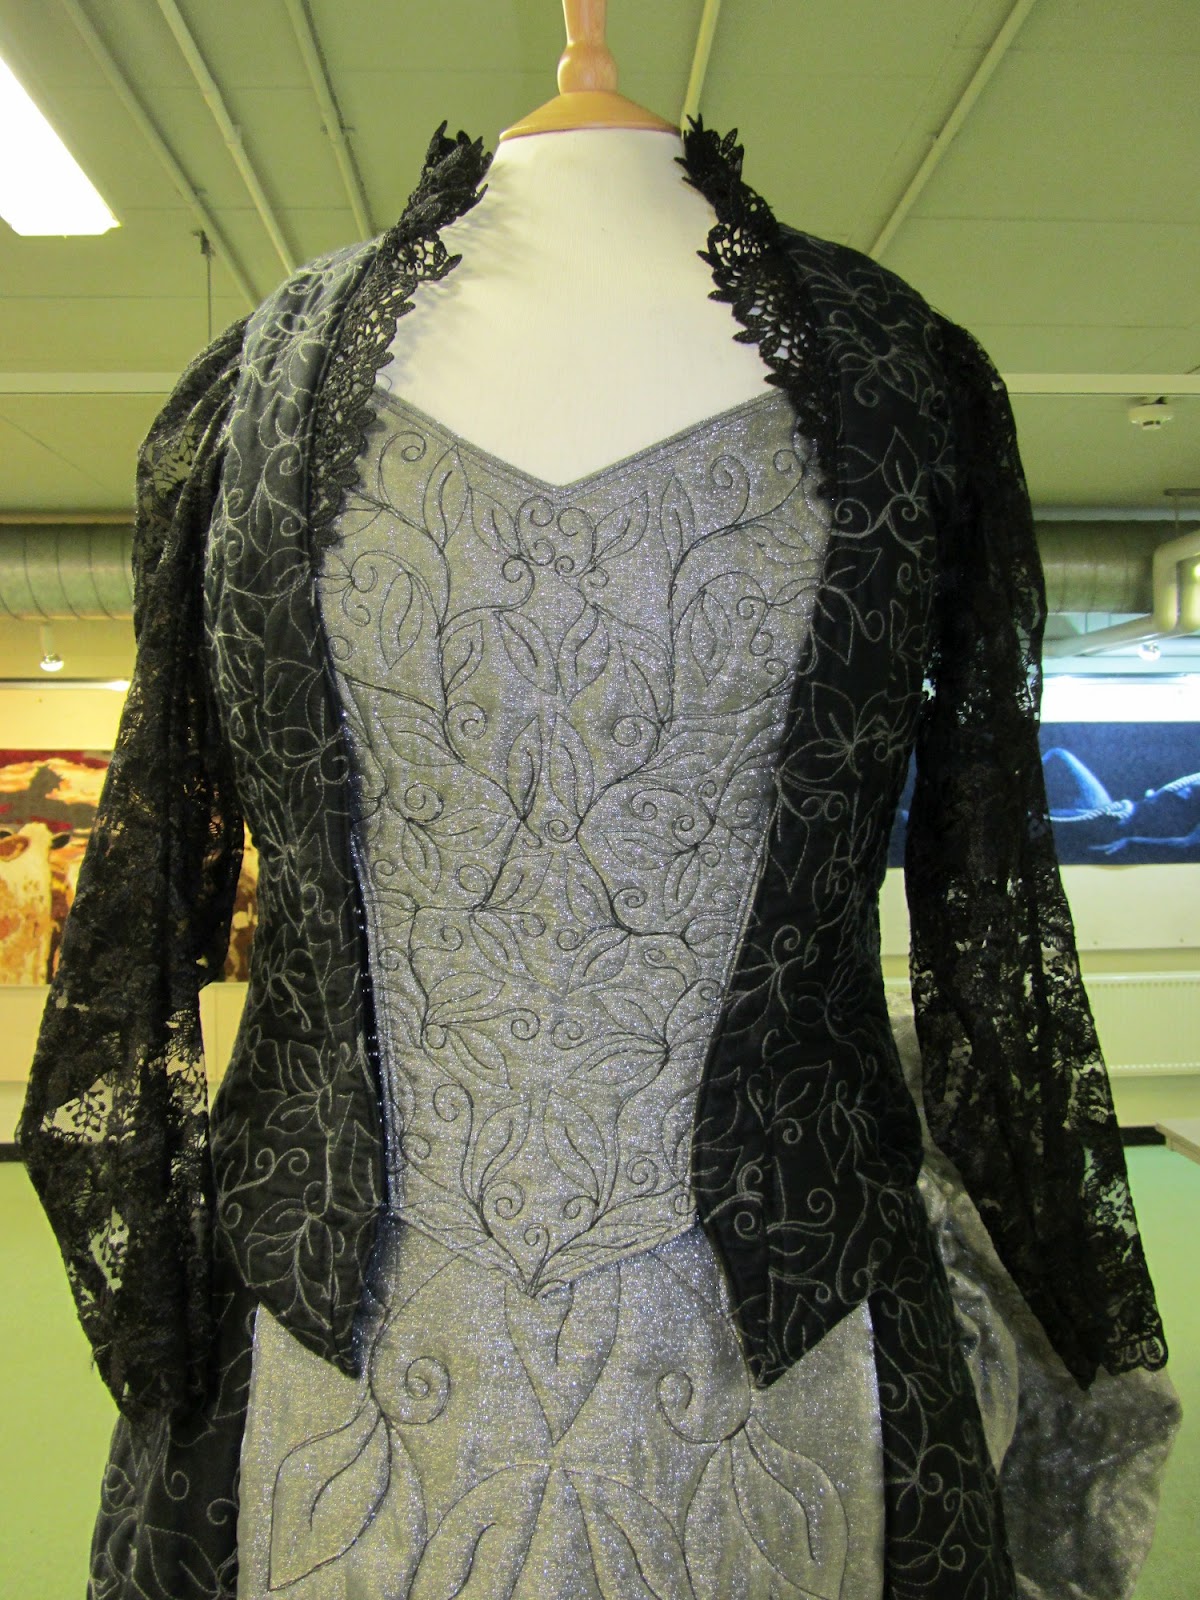
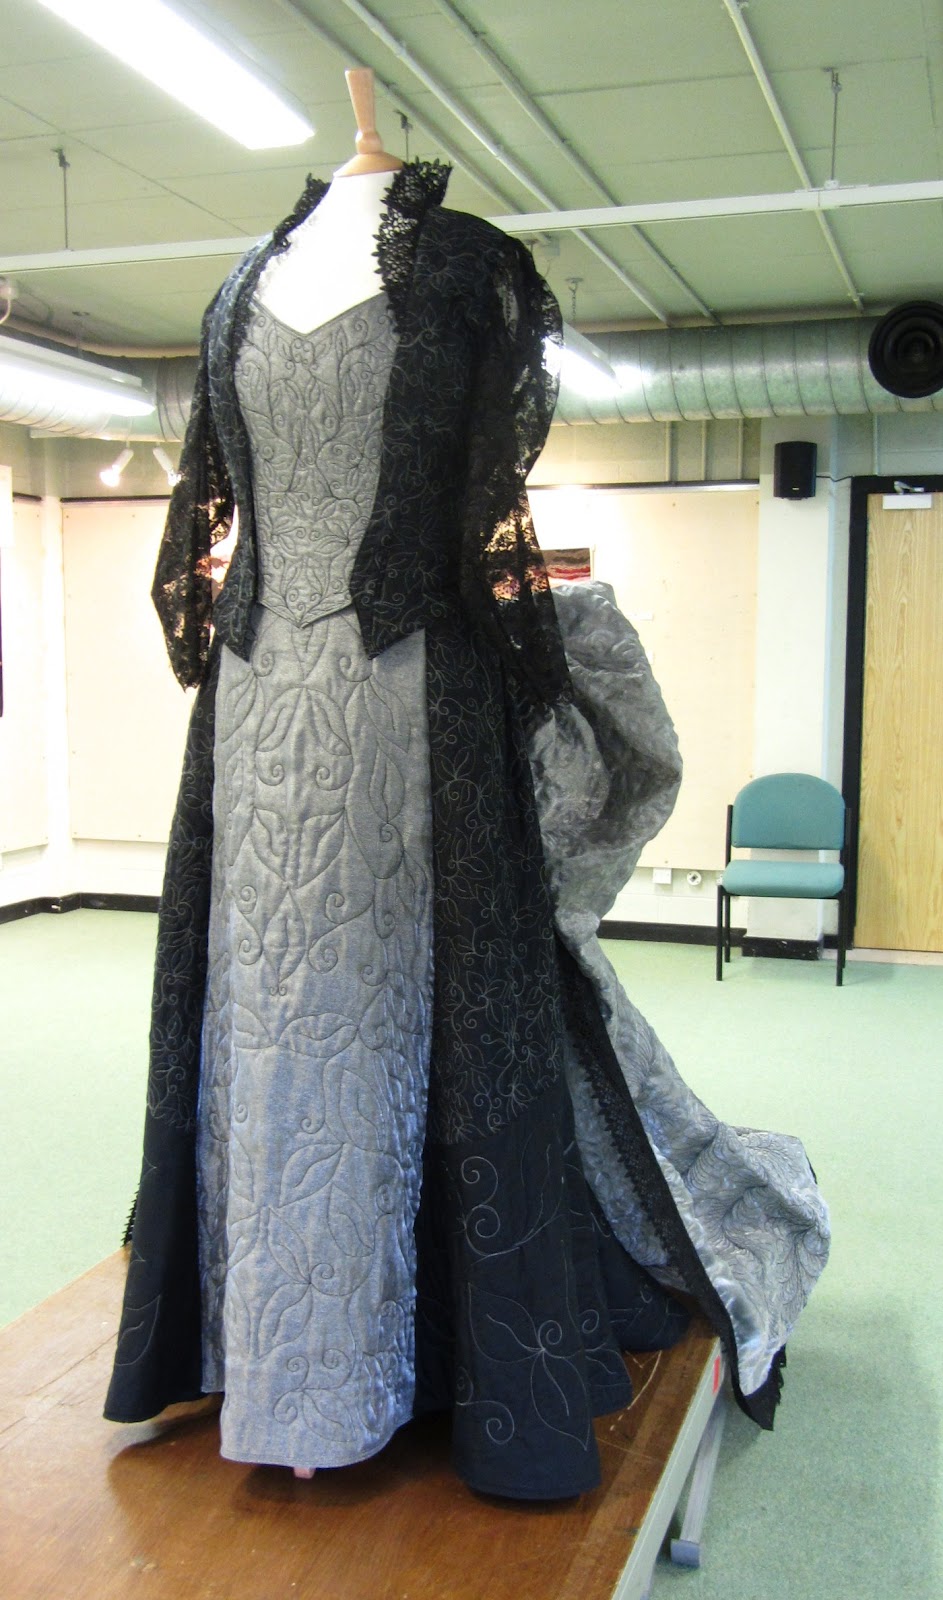 The top of the skirt and the black areas of the bodice were yardage I quilted before cutting the panels. They are quilted with and all over leaf and vine pattern. The front panel of both the bodice and the skirt and bodice are the same three layers as the rest of the garment but with an added layer of silver organza over the top.
The bodice is then trimmed with the same lace as the train and has lace sleeves. Although the quilting was all done on my longarm the assembly was done on an hand cranked sewing machine in my motorhome. It was the biggest space I had to work in and it was easy to keep completely cat free. Cats and organza don’t mix.
The outfit was named Victorian Steampunk by Susan Briscoe.

The last quilt for today is hanging right next to the dress. Being a double sided quilt it couldn’t be hung against the wall. It’s also very three dimensional so it doesn’t hang well that way. Fortunately Susan had these hooks and chains in her car. She claims she thought they would come in handy for hanging quilts! Well I suppose she was right and the metal bars on the gallery ceiling turned out to be well placed as well.
The quilt, well technically two joined quilts, does have a hanging gap at the top to insert a rod. The base of each side of the quilt is three layers stitched together. Both have a stiff interfacing as their backing. It can’t be seen and it gives a stable base, both for the textile components and the electronics embedded within it.
 The quilt reacts to sounds, so when you talk to it the lights flash. I made it to give quilts a way to interact with the audience when they cannot be touched. Being so tactile I do think quilts miss out when they aren’t handled, but having seen how much damage people do to quilts I have to support the no touching rule.
The resistors are not only the correct values, they are also the same way round as they are on the board. Yes, very sad and pedantic. The back of the quilt shows the tracks of the board and the solder spots. It is the hardest ‘soldering’ I have ever done. Hand stitching this silver fabric was a bear.
Quiltfest Gallery – Part 3
February 20, 2012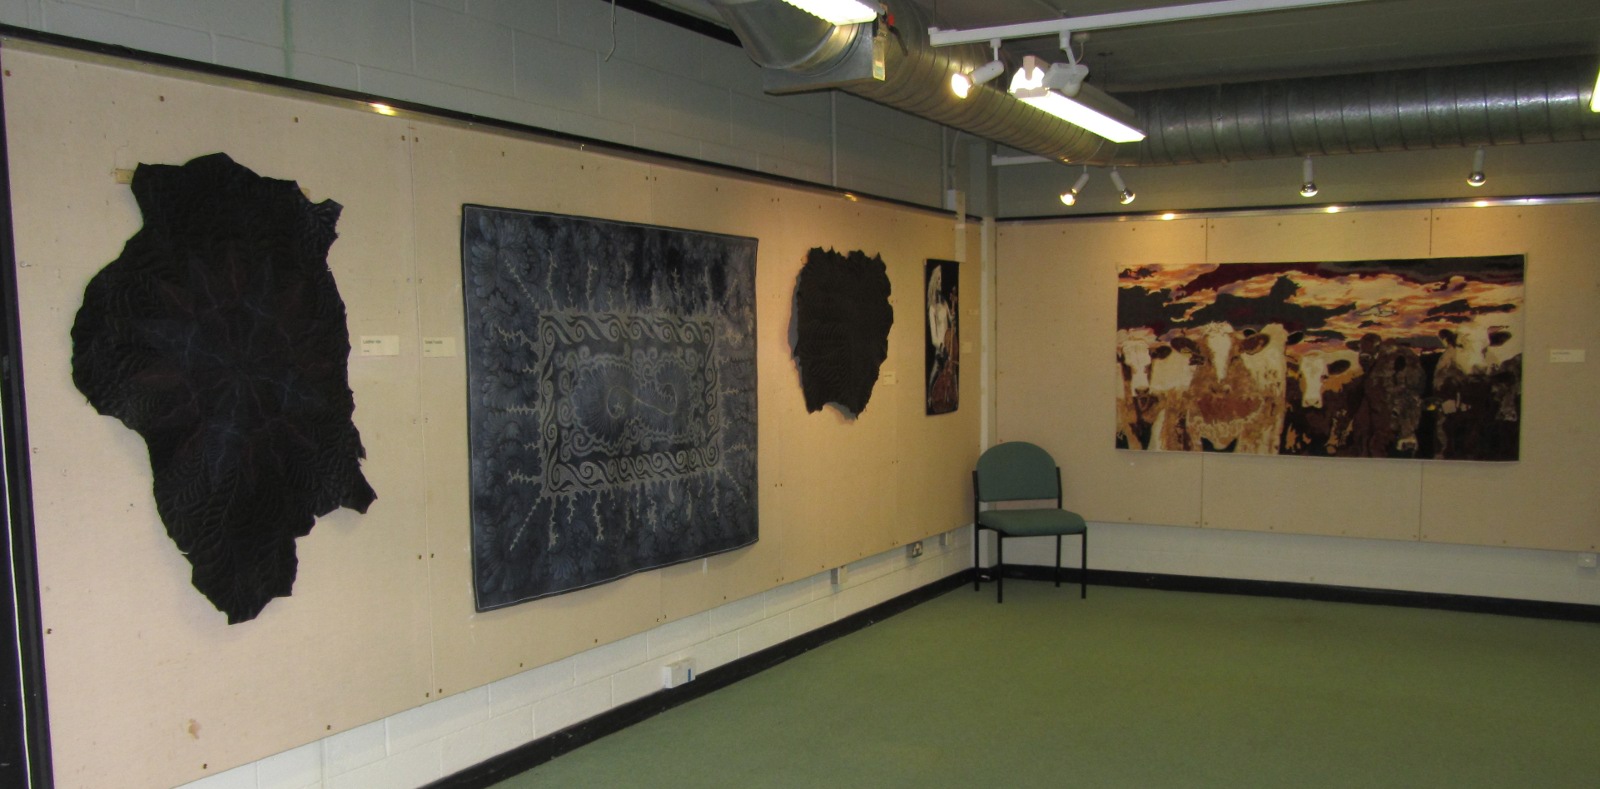
If you haven’t read parts 1 and 2 of the tour you might want to before starting on this section. They can be found by clicking on the links in the above sentence. We have just started working our way along the wall opposite the entrance.
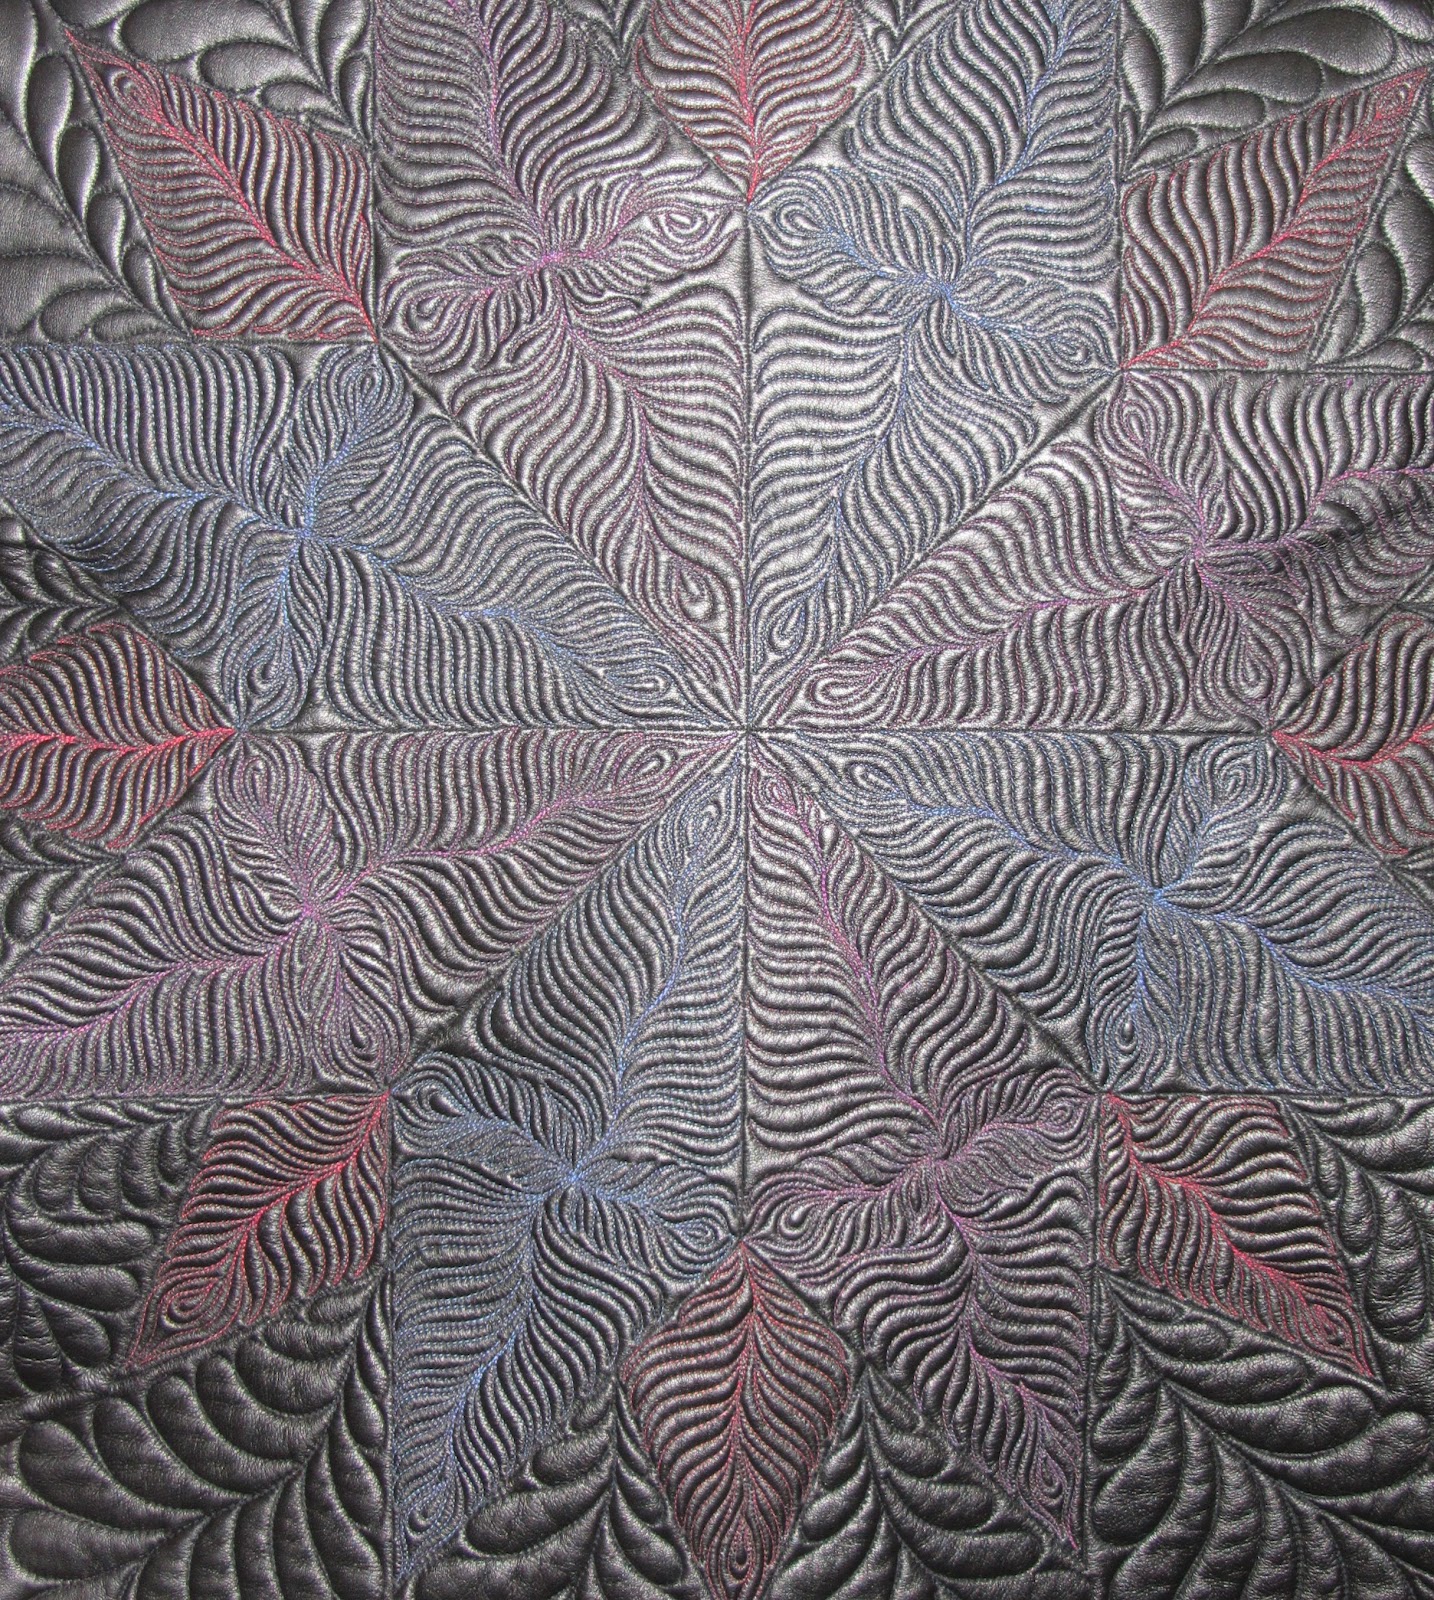
 The next quilt we come to is Leather Feathers. Yes it really is leather, and yes it really is a quilt. This quilt contains two layers of wadding. It was the first time I tried quilting leather and I was worried that one layer would be crushed flat by leather. Actually it isn’t a problem with the really soft leathers I use. That being said, two waddings always make the quilting pop so perhaps it wasn’t such a bad starting point. Quilting leather is on of the most nerve wracking things I’ve done. Knowing you can’t unpick is really scary. It’s a bit silly really given I don’t actually have to unpick that much normally but that’s just how it is for me.

 This quilt was one of the stars of the show. It will probably never stop surprising me the reaction this quilt gets. I guess it will always be stuck in my mind as a sample piece. I needed to try a few new ideas and this was where I did that. The quilt has a red batik backing, two layers of wool wadding and a cotton sateen top. The top fabric was a piece of Heide Stoll-Webber fabric that was waiting in my stash. I chose it because I wanted to explore the changing the shade of a fabric with thread. The mid grey seemed like a perfect starting point. Given how special the fabric is I made a design that would use every scrap of it. The fabric has no design on it. It is a hand dyed fabric with gentle variations of shade across it. A lot of people have thought the feathers were printed onto the fabric, but no, they are just the quilting.
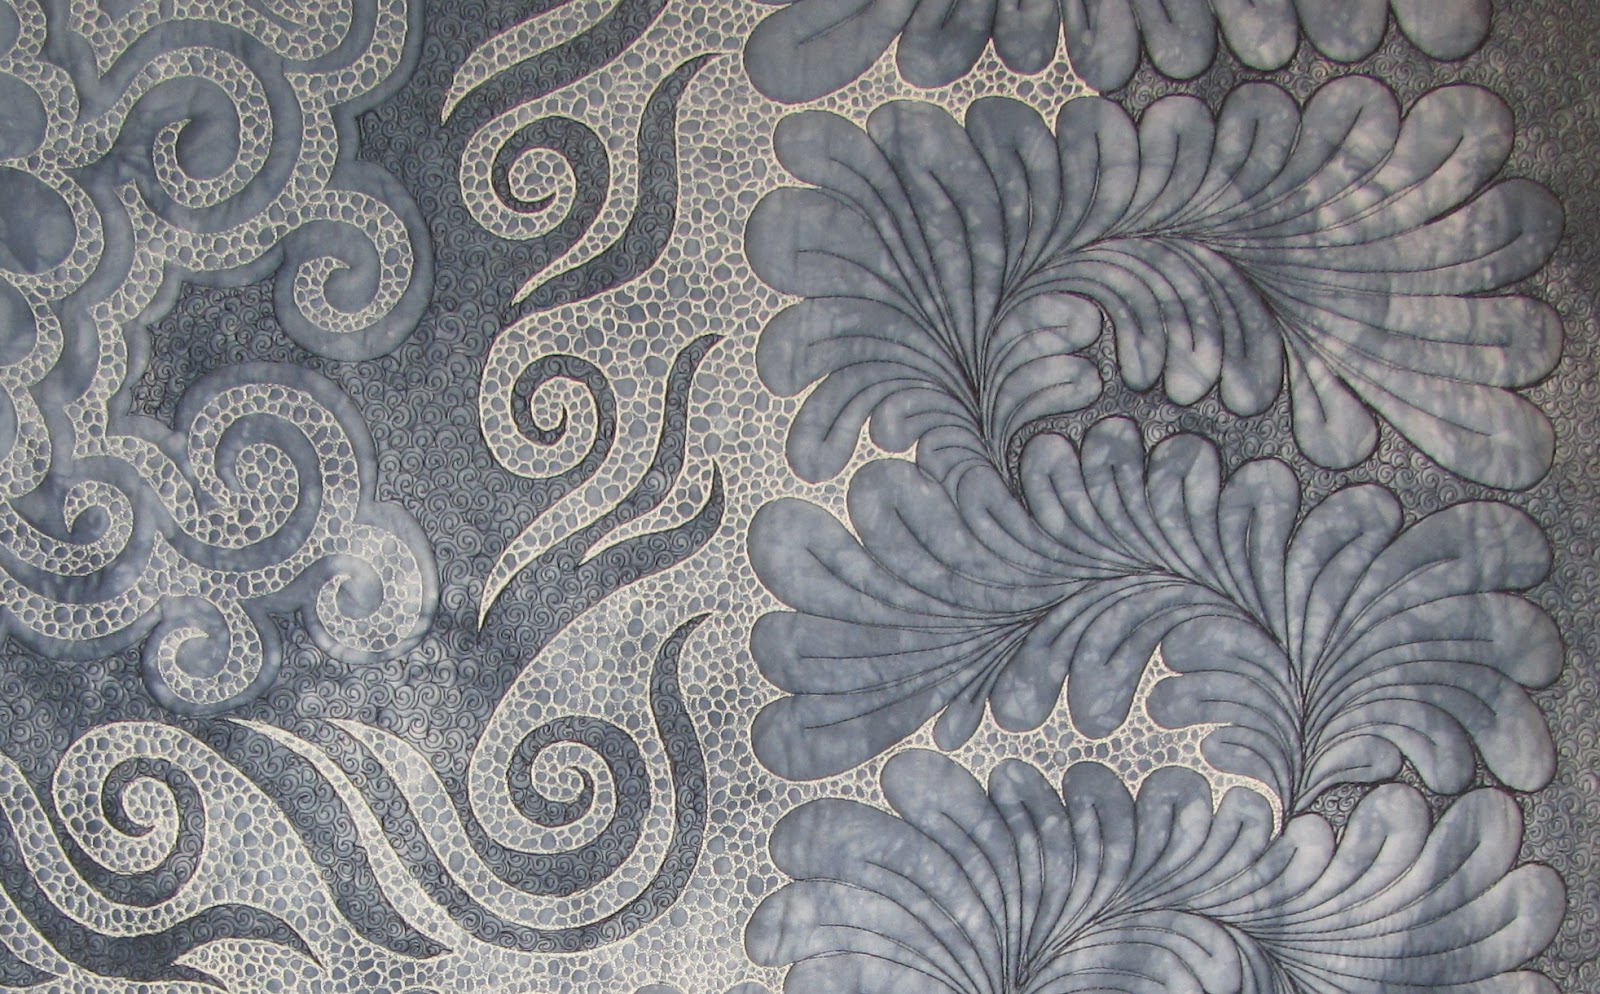
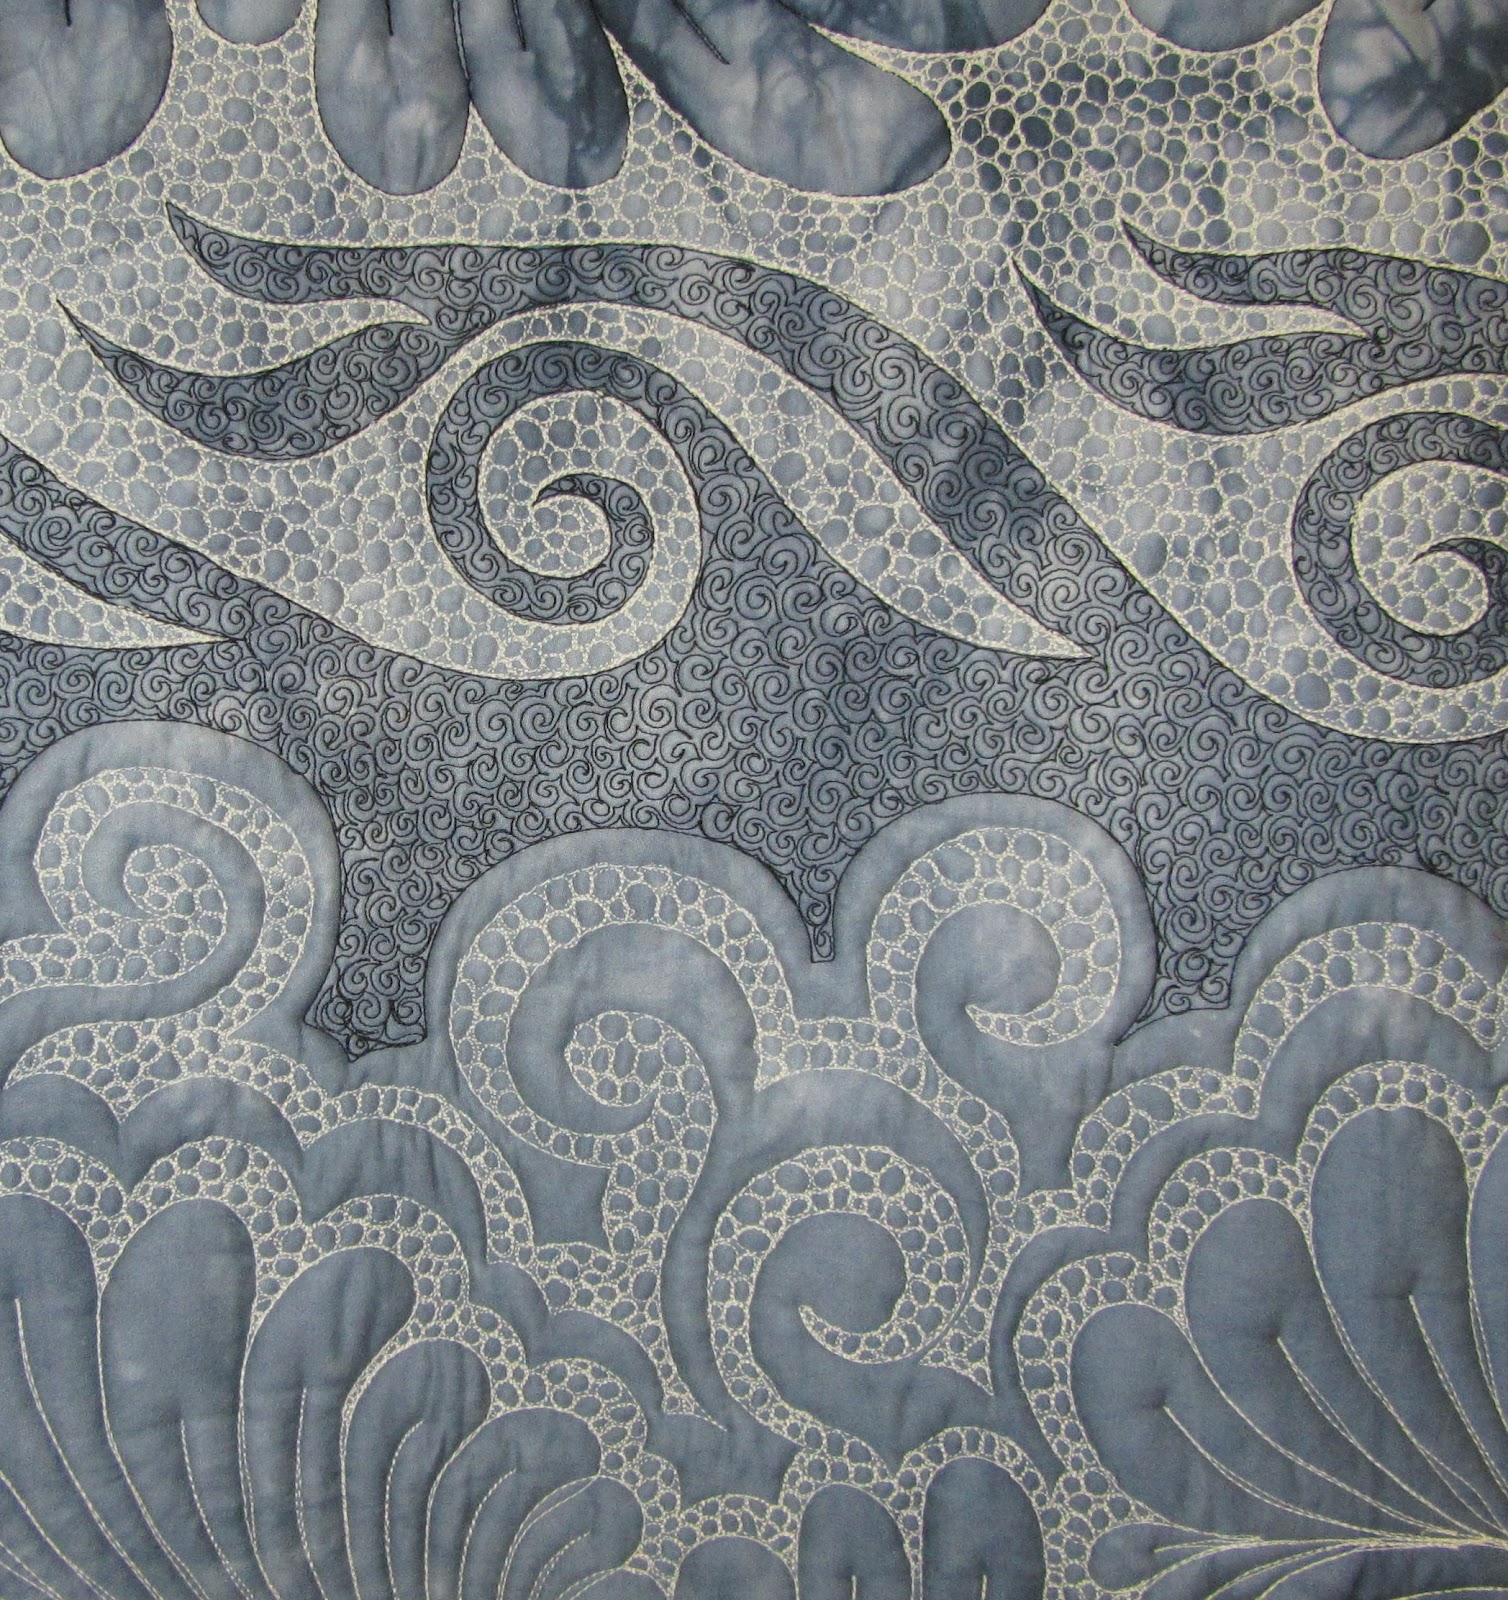
I started at the top of the quilt by marking the depth of the top border and the diagonal lines through the corner. With the machine I have I couldn’t sew the whole depth of the feather at once and rather than constantly roll the quilt back and forth each feather each was done in two parts.
 Once I had the top of a few feathers done I could start strengthening the lines around them. From there I could start on the background filler. The filler to the outside edge of the feathers was stitched in black thread. This darkens the fabric and helps the feathers to stand out. The pattern is the curls I use instead of a stipple but on this quilt they are tiny, the large curls are sometimes as bit as half an inch across.
The inner edge of the feathers was over sewn with cream thread instead of black. There are three or four lines of stitches all the way around the feathers. The cream thread was then used for the background stitching inside the feathers. The cream background stitching is micro pebbles. Yes it took a very long time. In the quilt there are four whole comes of thread, that will be around 12,000m of thread.
 The next design idea I wanted to test was changing a quilts colour at a quilting pattern. I was specifically interested in the idea of a border transitioning at a smaller curled border. I was pleased with this sample and this is used this technique in the full sized wholecloth that this was a sample for, Prometheus. Prometeus was too big to fit in this gallery but hopefully will be out and about on the show circuit this year. It will be at the National Quilt Championships at Sandown and I have entered it for Paduch this year. I won’t hear for another couple of weeks whether it has managed to get in.
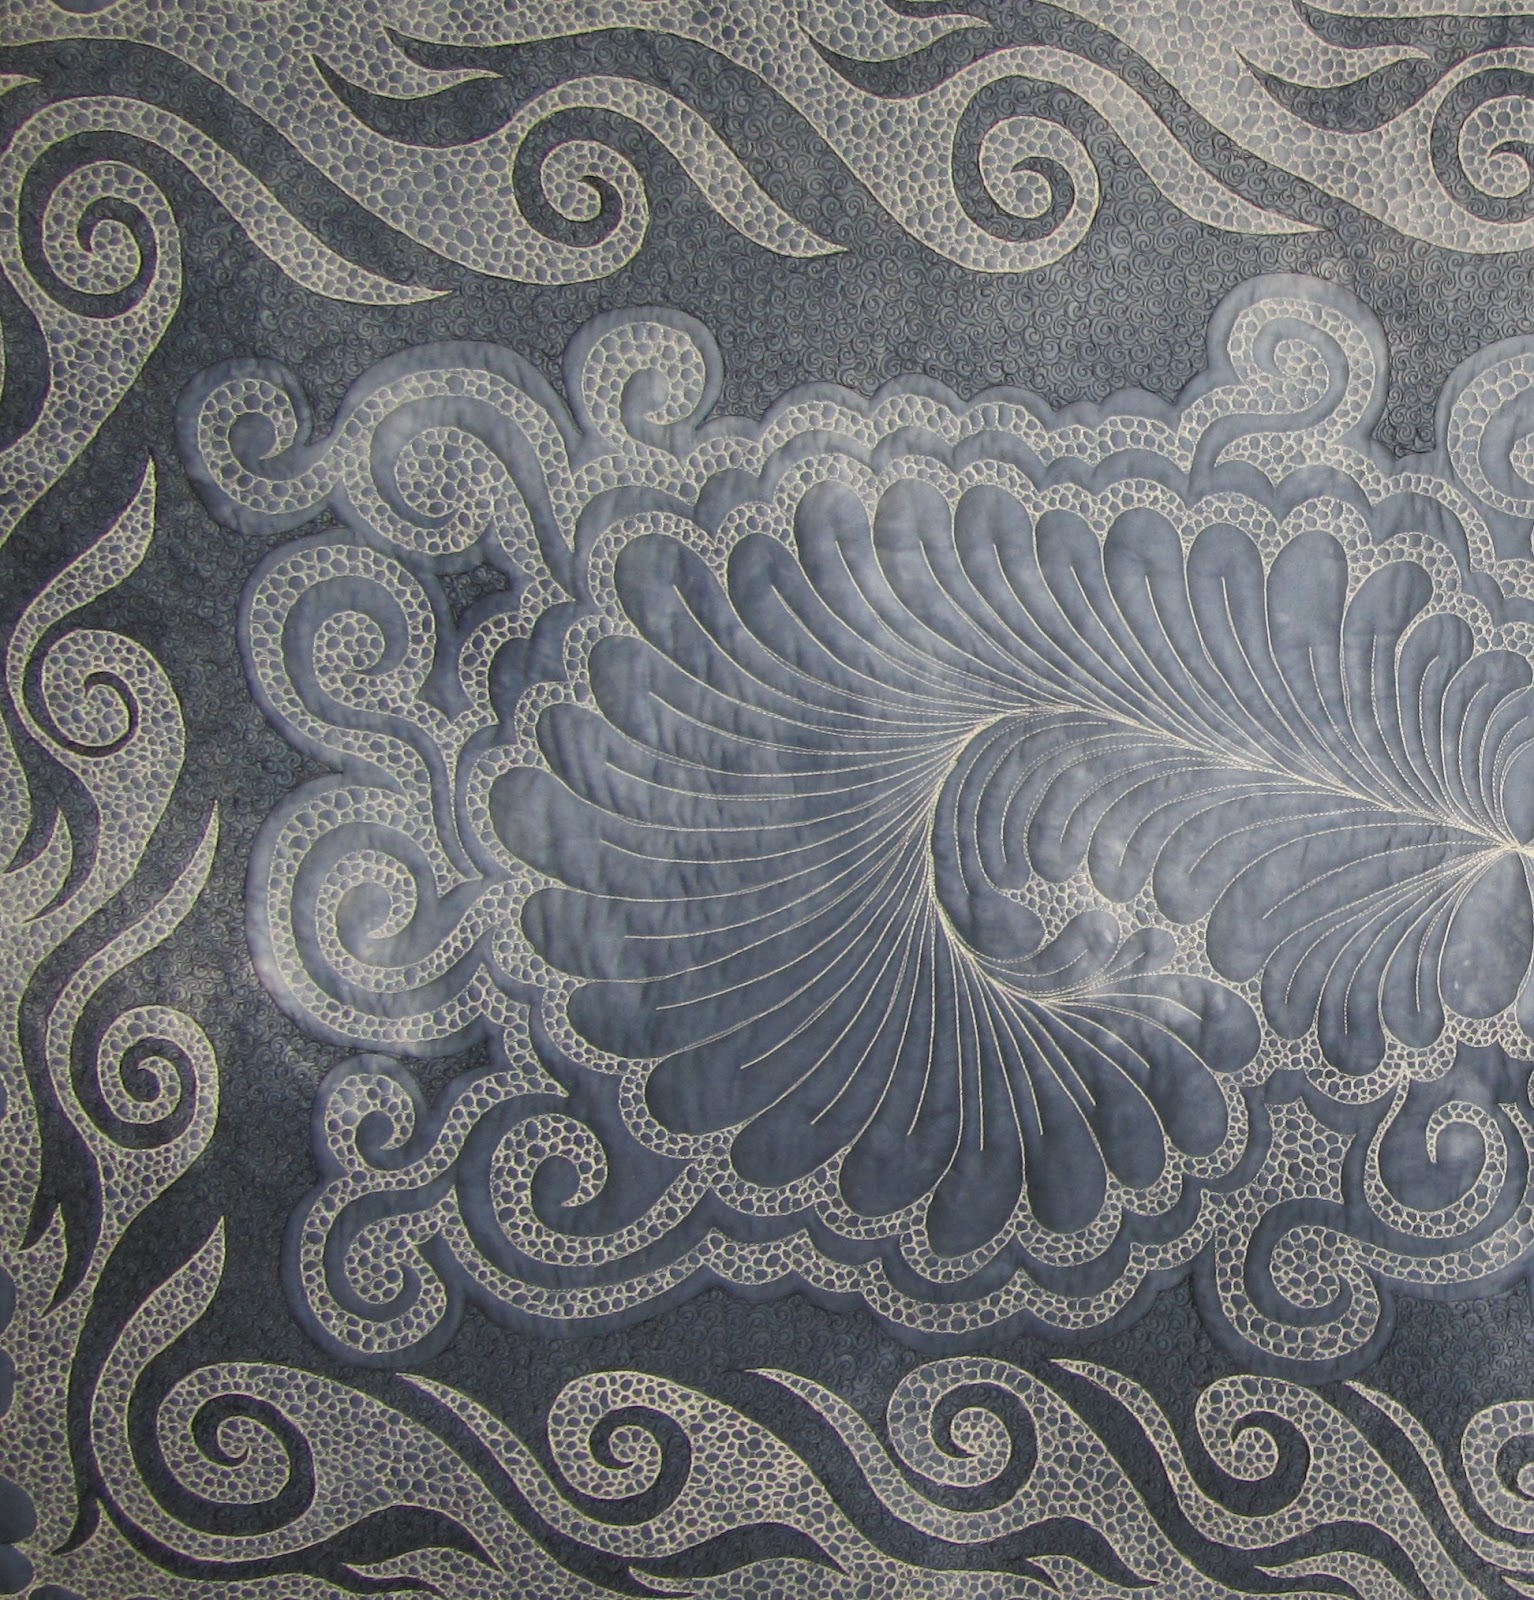
Greek Fossils has only just arrived home. It has been on tour with the World Quilt Show. This is one of my favourite competitions to enter. I love that it goes to several different venues, but the best part is how they handle shipping the quilts. It is one of the cheapest shows to enter as the quilts are gathered at a hub within your country then shipped at the shows expense to America. Unfortunately they have size restrictions that mean a lot of my quilts aren’t eligible to go. However any I have that fit the requirements will be entered.

I hope that the close up pictures here will let you get a feel for the quilting on this piece. As with all my pictures you can click on them to see them larger.
 While I was demonstrating the longarm in the gallery the most requested pattern was a design similar to the centre of this quilt. On an A4 piece that is quite tricky, but after a few failed attempts I managed something close enough to keep people happy. Obviously with the micro pebbling the took a lot longer than other samples, but that turned out to be a very good demonstration. People could not only see how long it takes but could also look over my shoulder and see how tricky it is to focus on a design this small. I didn’t believe it the first time I heard a long arm quilter say she had to look through her hopping foot to see where she needed to stitch. For this pattern, that is exactly what you have to do, and after a while your eyes really don’t like it.

The last piece in this section of the gallery is another leather wholecloth. This is the second piece I made, and is called Leather Star. After I finished Leather Feathers I was so excited about quilting on leather I had to immediately make another. The second was a little less scary and I decided I was prepared to try a pattern where it would be clear if I made a mistake. I also wanted to know if I could use colour on leather. The problem is I can’t stitch as densely on leather as I can on fabric. If the stitches get too close together the leather would fall apart. Not really what we are looking for.
However it turns out the colour of the thread shows up quite well even with less dense designs. To further reduce the stress on the leather this quilt only contains one layer of wadding. Combined with the more intricate design the quilting is still very well defined.
 If you own a copy of my book Ferreting Around you might want to take a good look at the cover. Not the cover picture as such, the background image. The blue area. Do you recognise it? It’s this quilt. We needed some sort of texture for that part of the cover and Tet wanted me to just quilt up a bit of something. I was already up to my eyeballs in quilts I needed to do for a show so I didn’t take this suggestion very well. At the time most of my wholecloths were too flat to give a good texture and I was starting to think I was going to have to make another quilt, when we had a moment of inspiration. This quilt filled the space perfectly.
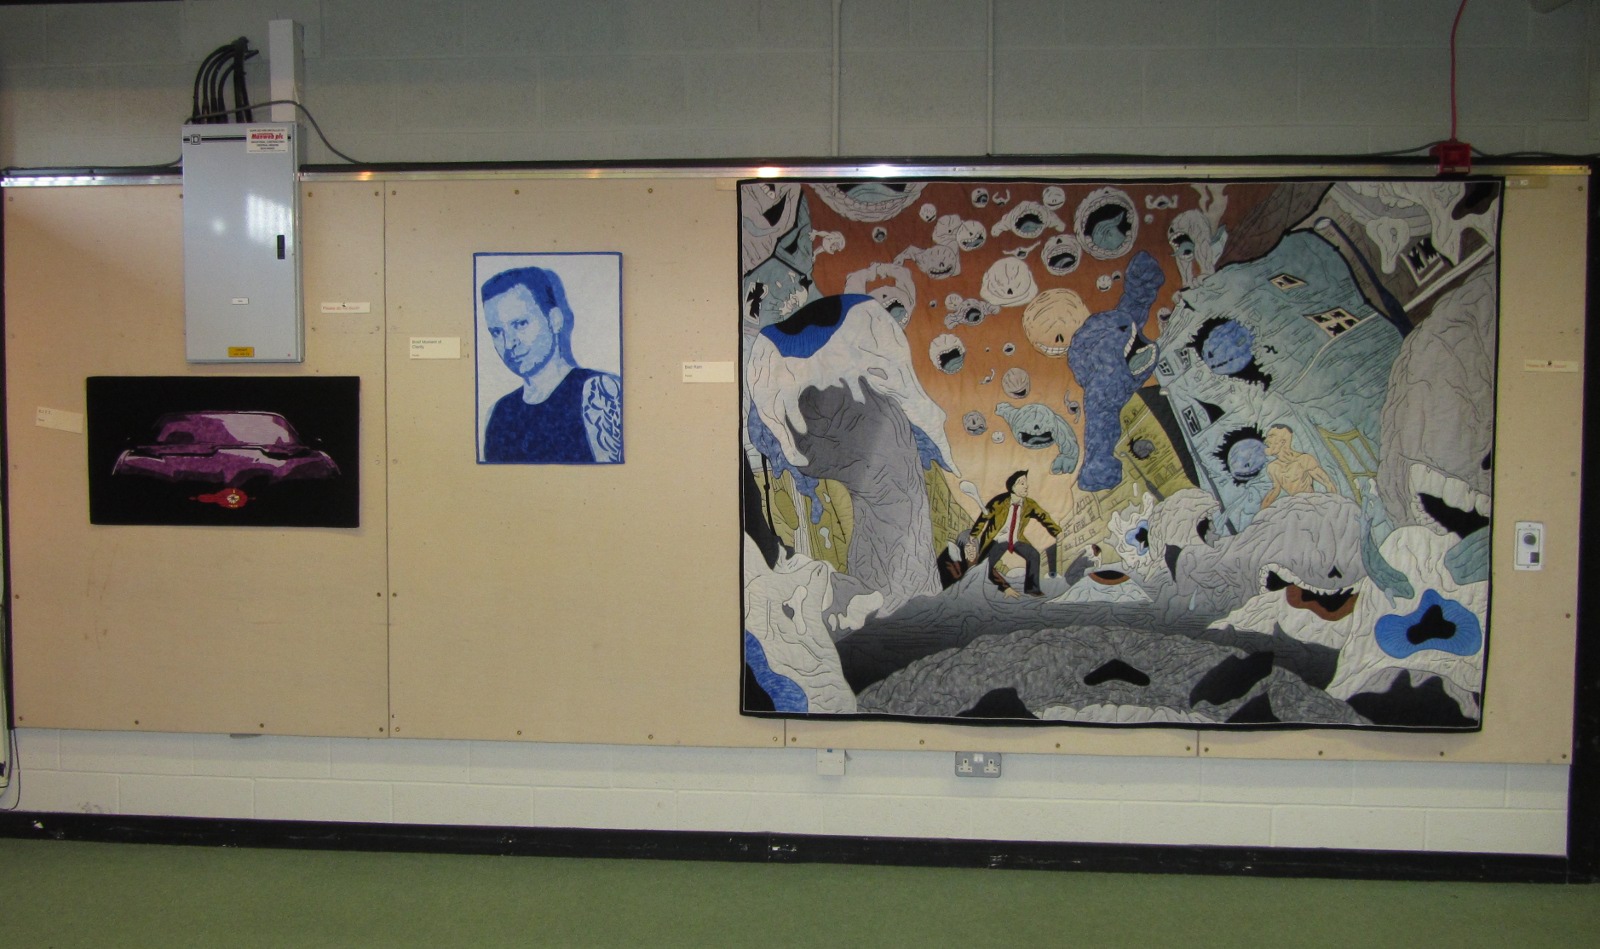
The next section of wall is quite a change of pace. These quilts got some of the most interesting reactions, and taught me a lot about setting up an exhibition.
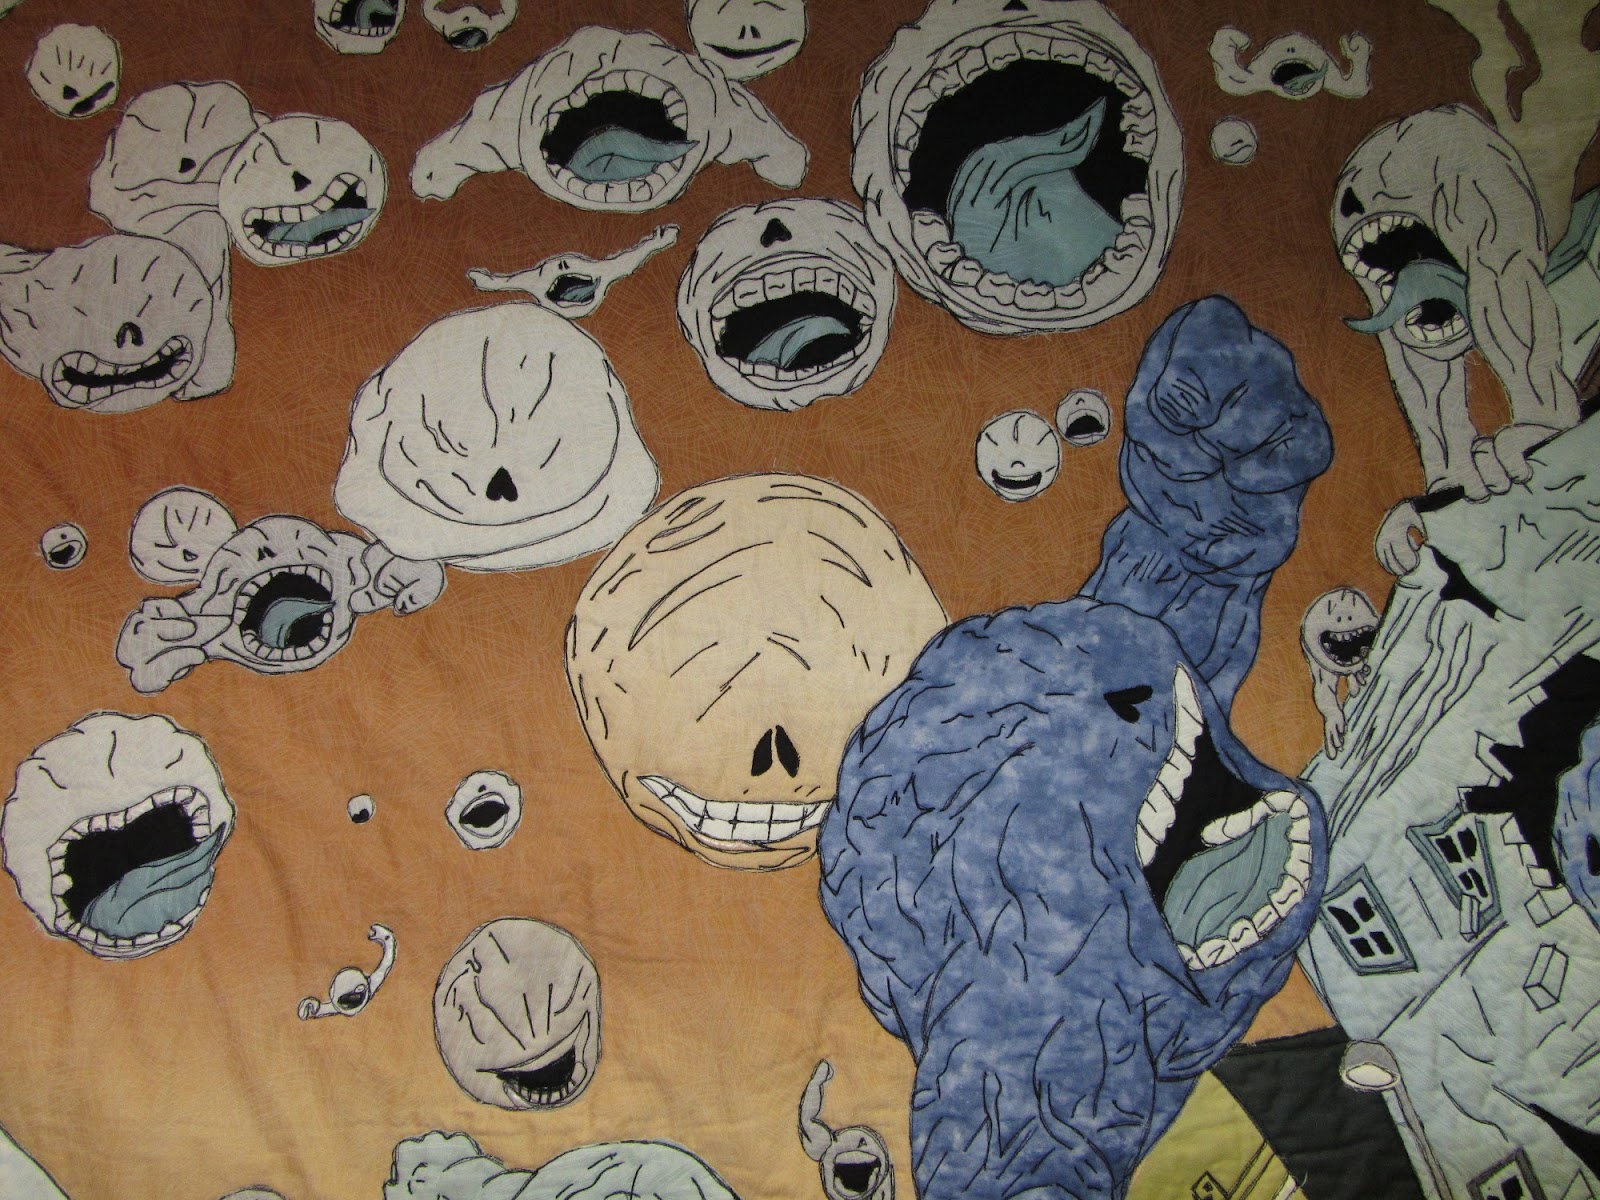
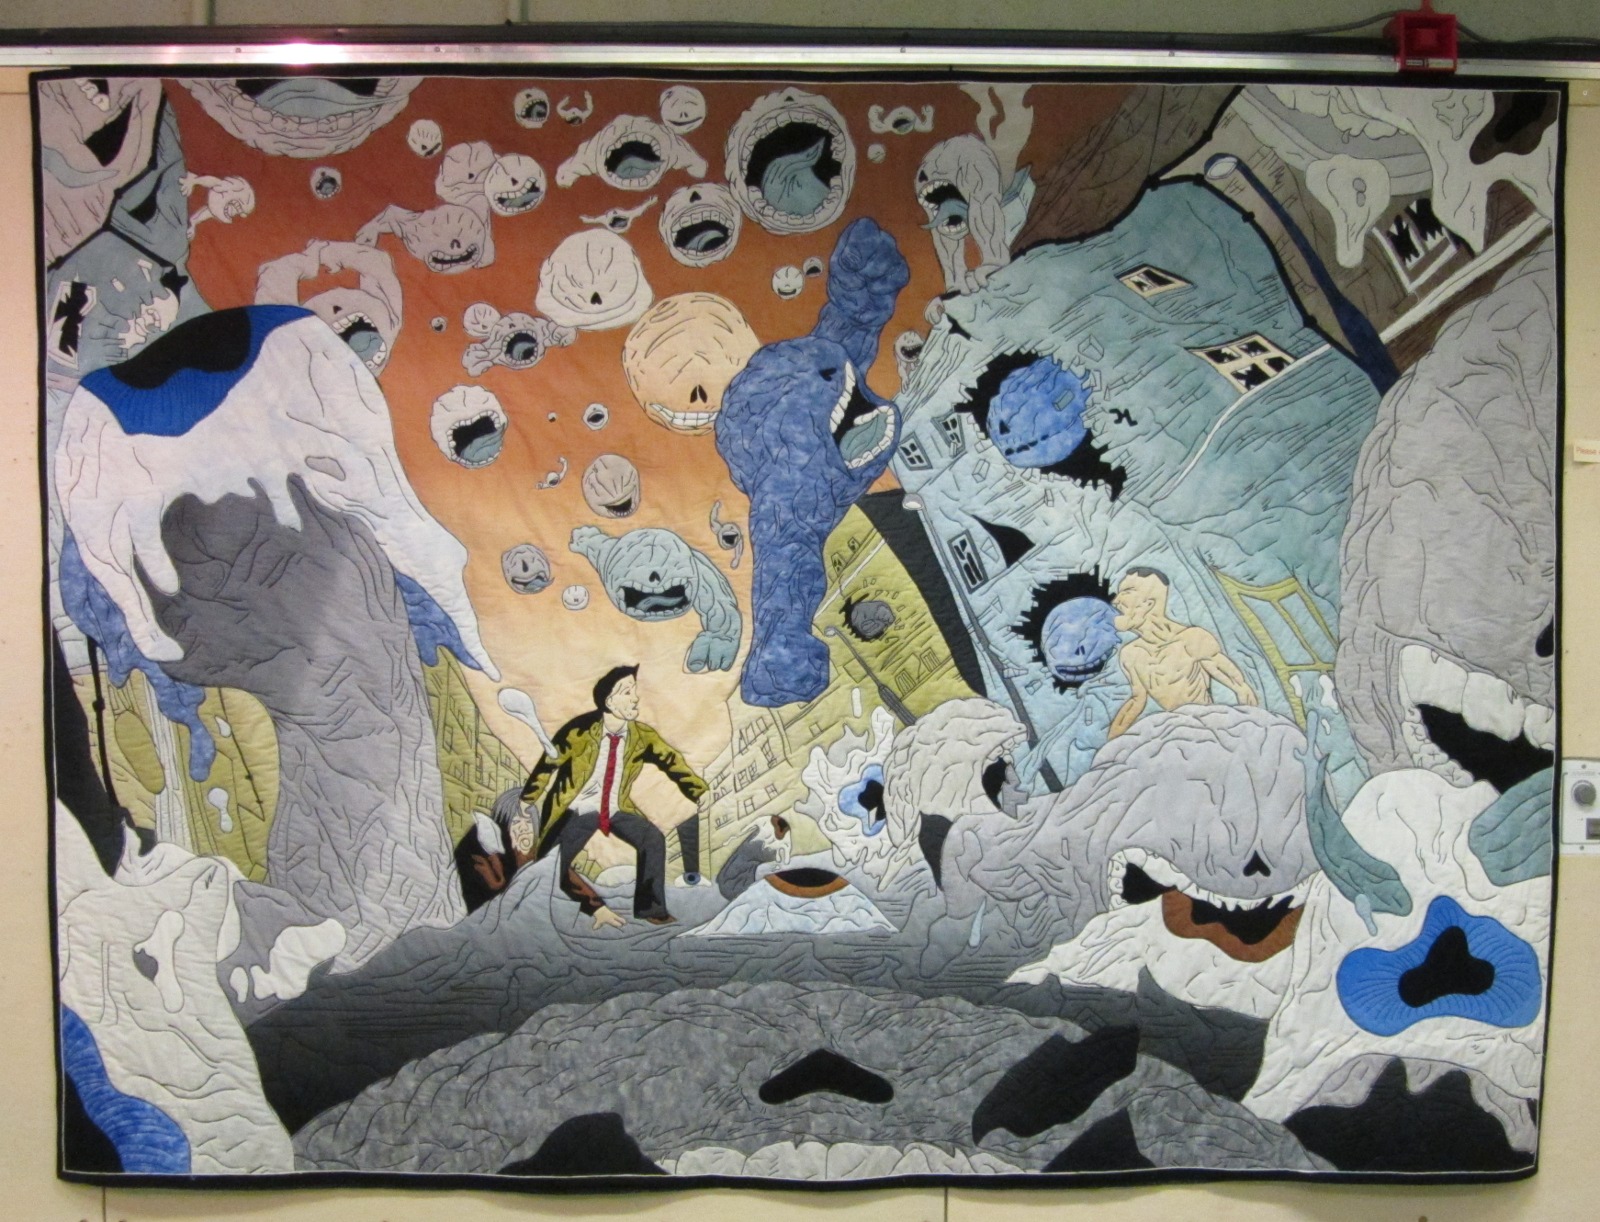 Bad Rain was very popular with children. They all seemed to like this style of art work. I find that quite unsurprising. However only a few thought it was scary, and if only from it’s strangeness and size I would have expected a reasonable amount of scary.
Adults on the other hand tended not to like it on first look, but nearly all changed their mind after I explained it to them. Generally I like not having long explanations displayed with my work. I am quite happy for people to come up with their own story of the piece but for this one I think I will have to produce it a sign.
 I suppose it’s quite fitting really. This images comes from a book called Cancertown. It was written by a friend Cy Dethan and the artwork was originally produced by Stephen Downey. You can see all of us with the quilt here. The image is designed to be encountered within a story. It helps to tell the story but also expects you to come to it knowing certain things about the the world it is showing you. If you want to know more about Cancertown, follow the link and Cy will tell you all about it.
Let me tell you something about trying to capture another artist work in a quilt. Given I don’t draw myself working from other peoples art seems the simplest option. To a degree it is, but it turns out that in quilting I do put my own spin on the art work. That’s fine until I really want to render exactly what the original artist had created.

I decided one of the things I needed to do was to only quilt the lines Stephen had drawn. If I added more quilting that would change it’s character. That at least was easy technically if a little frustrating at times. I was very lucky his lines are fairly well spaced throughout the piece. The harder part came when I saw the finished book, with the colour image. The colouring had been done by computer which gives almost glowing shading of the colours. How on earth was I going to get fabric to do that without adding a lot of extra stitching? Ombre fabrics. I bought a huge box of yardage from Equilter.com and set to work. It was tricky at times as my fabric only shaded at set rates which I couldn’t change but by picking and choosing I think the result is pretty close to the original.
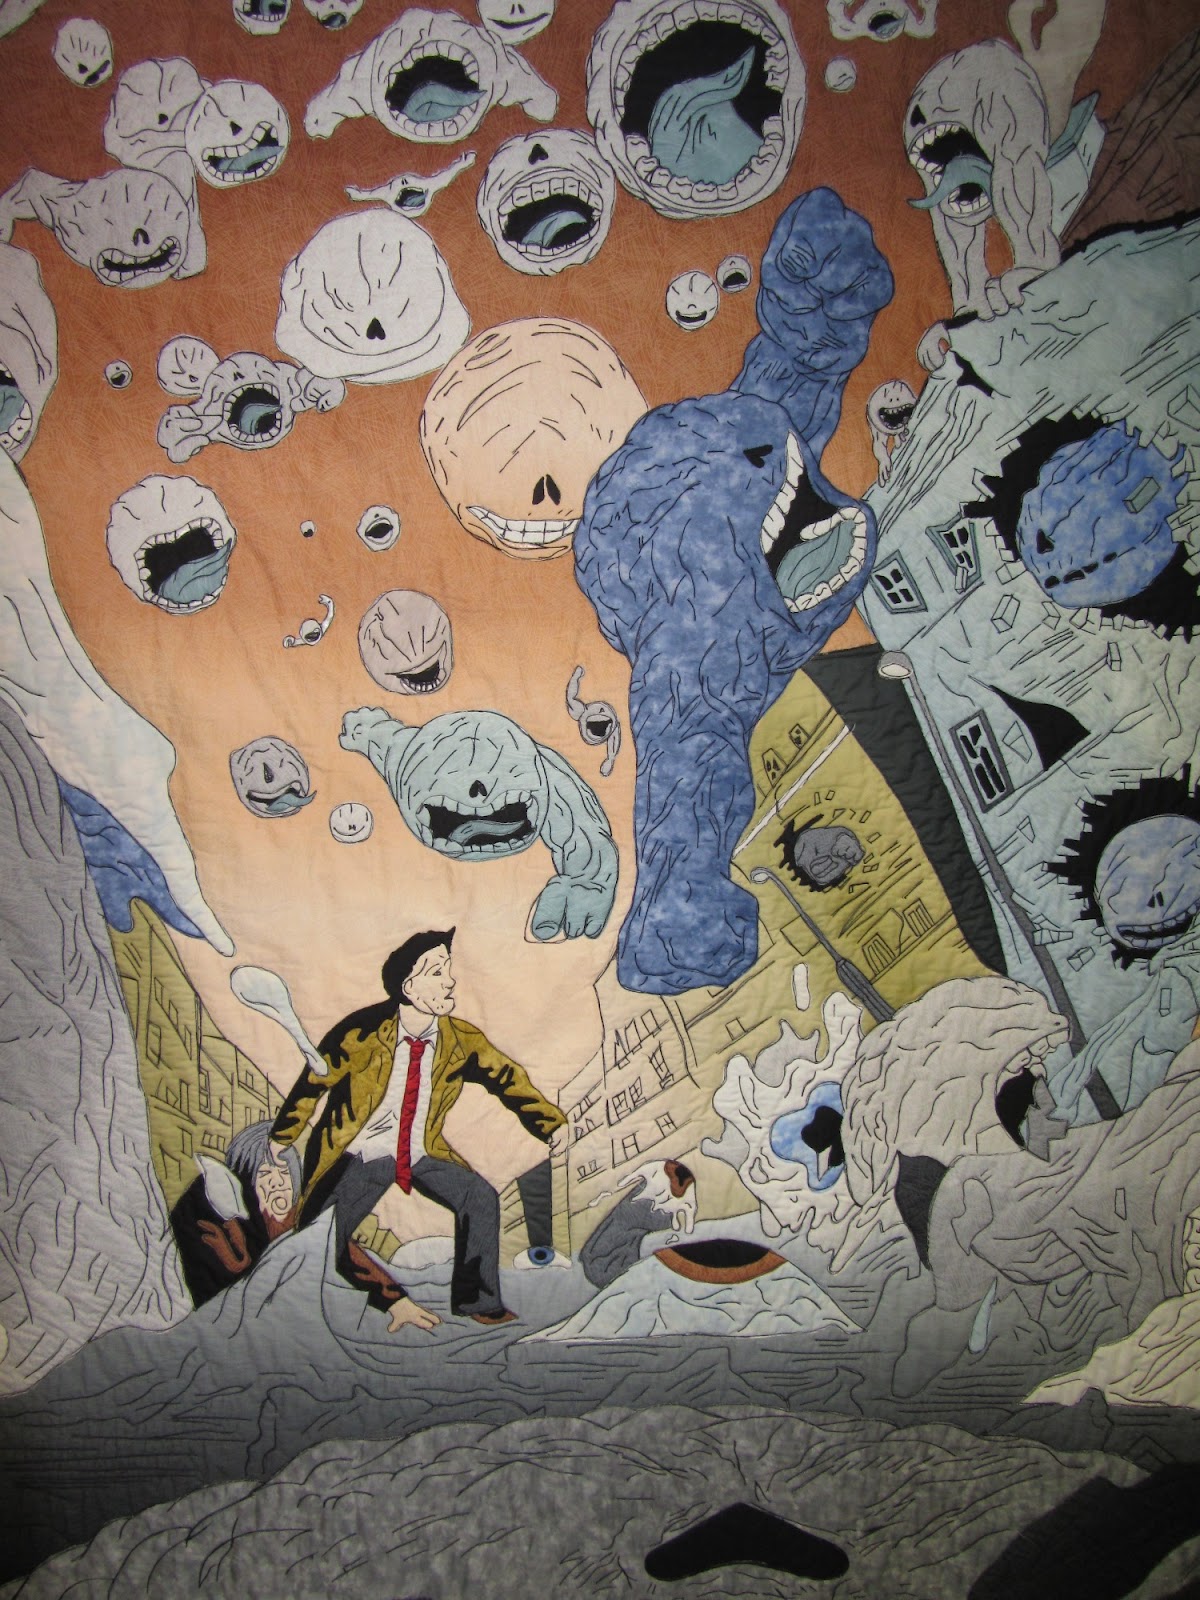
 Working so closely with someone else’s art really makes you look at it and I think there are a lot of details that people reading the book will never see, let alone appreciate. The Bad Mouths (the characters that are all mouth filling the sky) all have slightly different features and characters. I love the ones with their arms folded, especially the largest one diagonally up from the huge blue one.
The blue Bad Mouth was mostly hidden in the book because it falls directly in the spine of the book. It’s a real shame, it had great texture. I think it came out particularly well as a quilt. The lumpy muscle is perfect and becomes really 3D when quilted.
 Bad Rain is another quilt that hasn’t done many quilt shows. It’s too big to ship easily (it HAS to be rolled) so the US shows are out and even UK shows are difficult if I can’t hand deliver it. On the other hand it has made it out to a few comics events and it has been very well received. I wasn’t sure how people would react to it when we came up with the idea but it seemed daft not to try displaying it, if nothing else it is a huge advertising banner. I didn’t need to worry. As it turns out comics events might be a very good place to introduce younger people to quilting. I supposed it’s just another form of art and the people at these events are already interested in graphic novels so why not. Now I just need to fit another dozen hours in the day to follow that idea up…
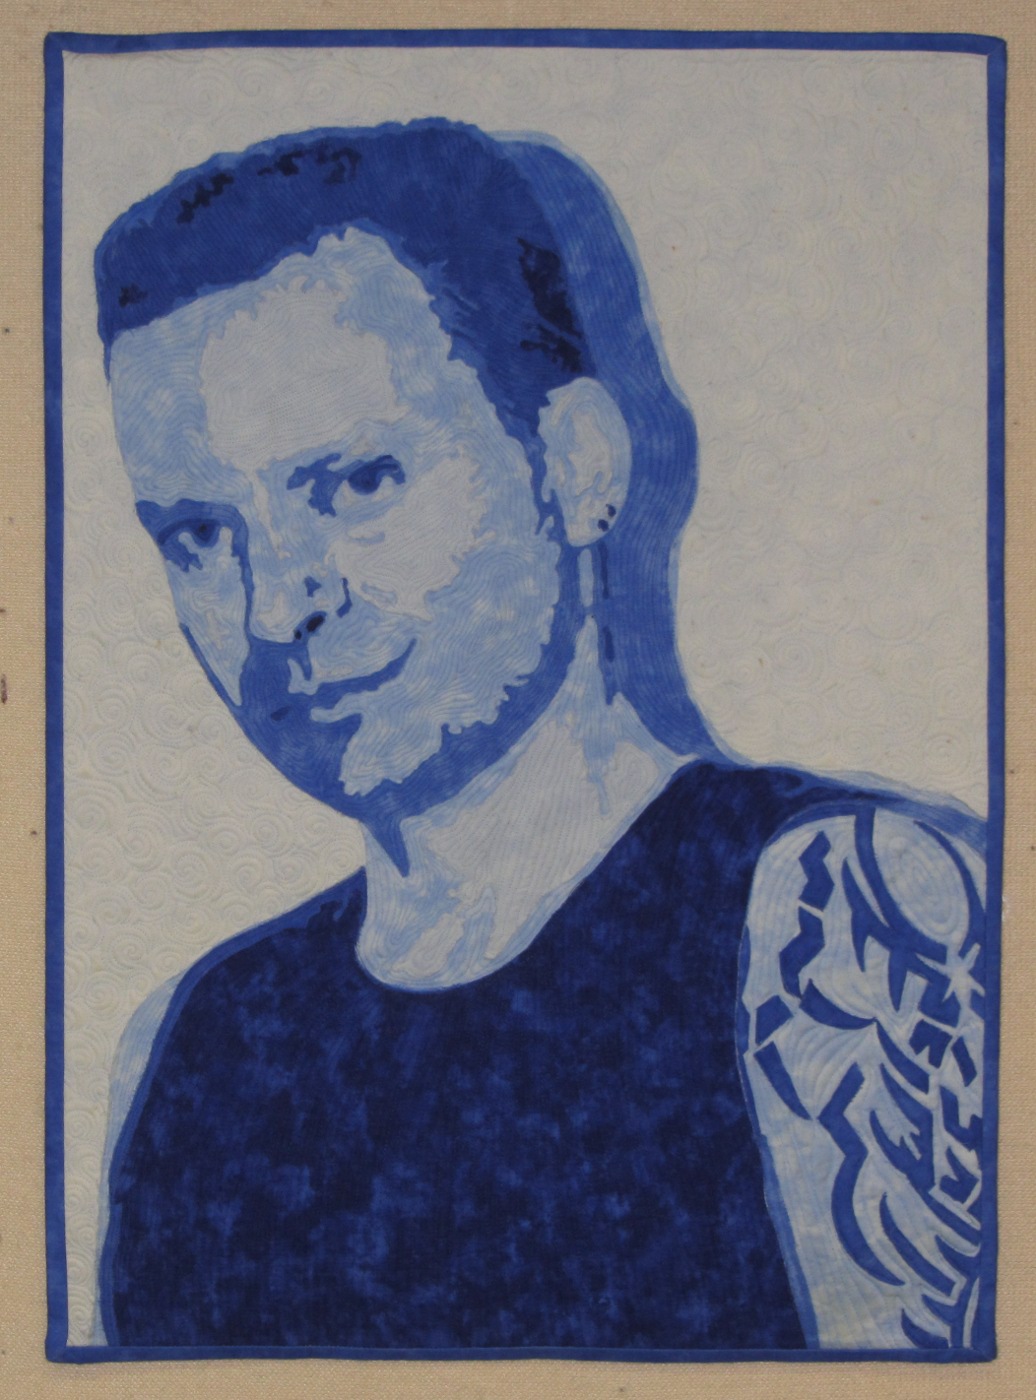
The last quilt for this instalment is ‘A Brief Moment of Clarity’. This is a portrait of Cy, the author of Cancertown. I hadn’t meant to make this quilt at all, I was planning something completely different. However at the end of the photoshoot I thought this was the perfect image. It was actually one we had taken for him to use for publicity but what the heck, he gave his permission for me to turn it into a quilt.
 I got most of the fabric in place and then realised I had a problem, his earrings. Never mind, they are only small I can leave them off right? Wrong. I’ve known him too long they had to be there. In the enlargement you can probably see that not only are they pieces of fabric, each one is made of two pieces. Yes that is really far too small to sew through but it can be done if you are mad enough. It did require a piece of washaway stabiliser to keep it steady and I may have even bonded it in place. I can’t remember for sure but it is one of the tricks I try on difficult pieces. I don’t use Bondaweb though, way too stiff. I generally use Misty Fuse if I have to bond anything.
I think I am calling that it for now. That’s a lot of images and I am ready for bed. I will try and do another section tomorrow.
Part four is here.